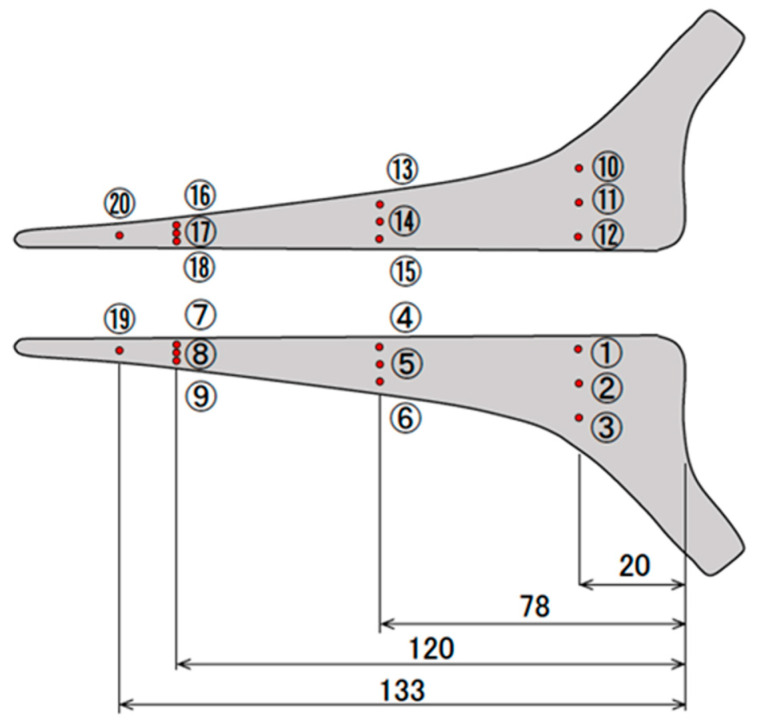
Figure 2.
Measurement of stem surface roughness. Prior to the loading experiment, the surface roughness of the stem was analyzed. Using a laser microscope (VK-8700, Keyence, Osaka, Japan), surface roughness was assessed at 18 sites on the front and back surfaces of the stem: three positions at 20 mm (proximal), 78 mm (middle), and 120 mm (distal) from the top of the stem.

