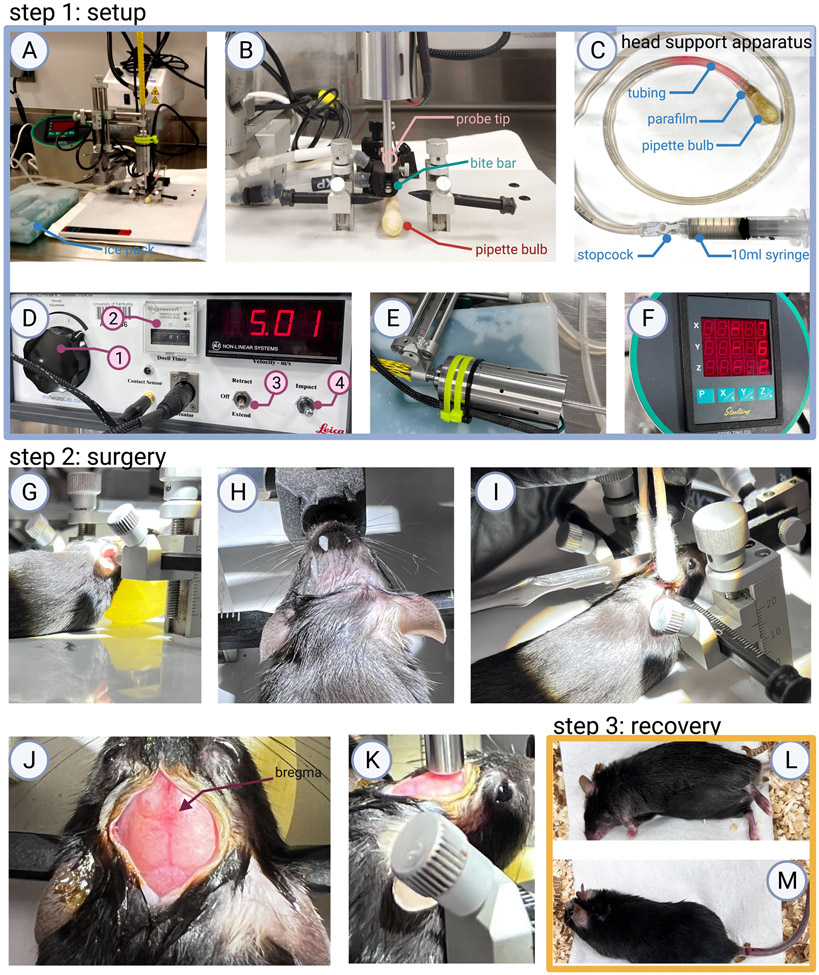
Figure 1: Step 1: Surgical area setup.
(A) An example of the surgical area and tools needed to perform CHI surgery (ice pack for the impactor, stereotaxic frame equipped with the impactor, impactor control box, and surgical tools) is shown. (B) A close-up view of the 5 mm steel probe tip, bite bar, and head support apparatus, which illustrates the positioning needed for the midline impact. (C) The head support apparatus is made from a 1 mL latex pipette bulb attached to the tubing by parafilm. A 10 mL syringe is filled with water to inflate the bulb, with a stopcock to keep the bulb inflated once in position. (D) Impactor control box: (1) a large knob to adjust the impact velocity, (2) a dwell counter, (3) an extend/retract toggle switch, (4) a toggle switch that, when pushed down, will deliver the impact. (E) When not in use, the impactor is kept on an ice pack to prevent overheating and possible malfunctioning. (F) A digital stereotaxic display is used for establishing the x (anterior-posterior), y (medial-lateral), and z (dorsal-ventral) coordinates. Step 2: Surgical procedure. (G,H) The anesthetized and shaved mouse is secured into the stereotaxic frame, (I) a midline incision is made to expose the (J) bregma, (K) which is used during surgery to line up the impactor. Step 3: Recovery. (L) The mouse is removed from the stereotaxic frame. After the scalp is closed by stapling or suturing the skin together, it is placed in a clean recovery cage on its side. (M) The mouse is monitored until the mouse rolls over and the righting reflex occurs.

