
Figure 2: Graphical summary detailing the preparation and immunostaining of lens fiber cells.
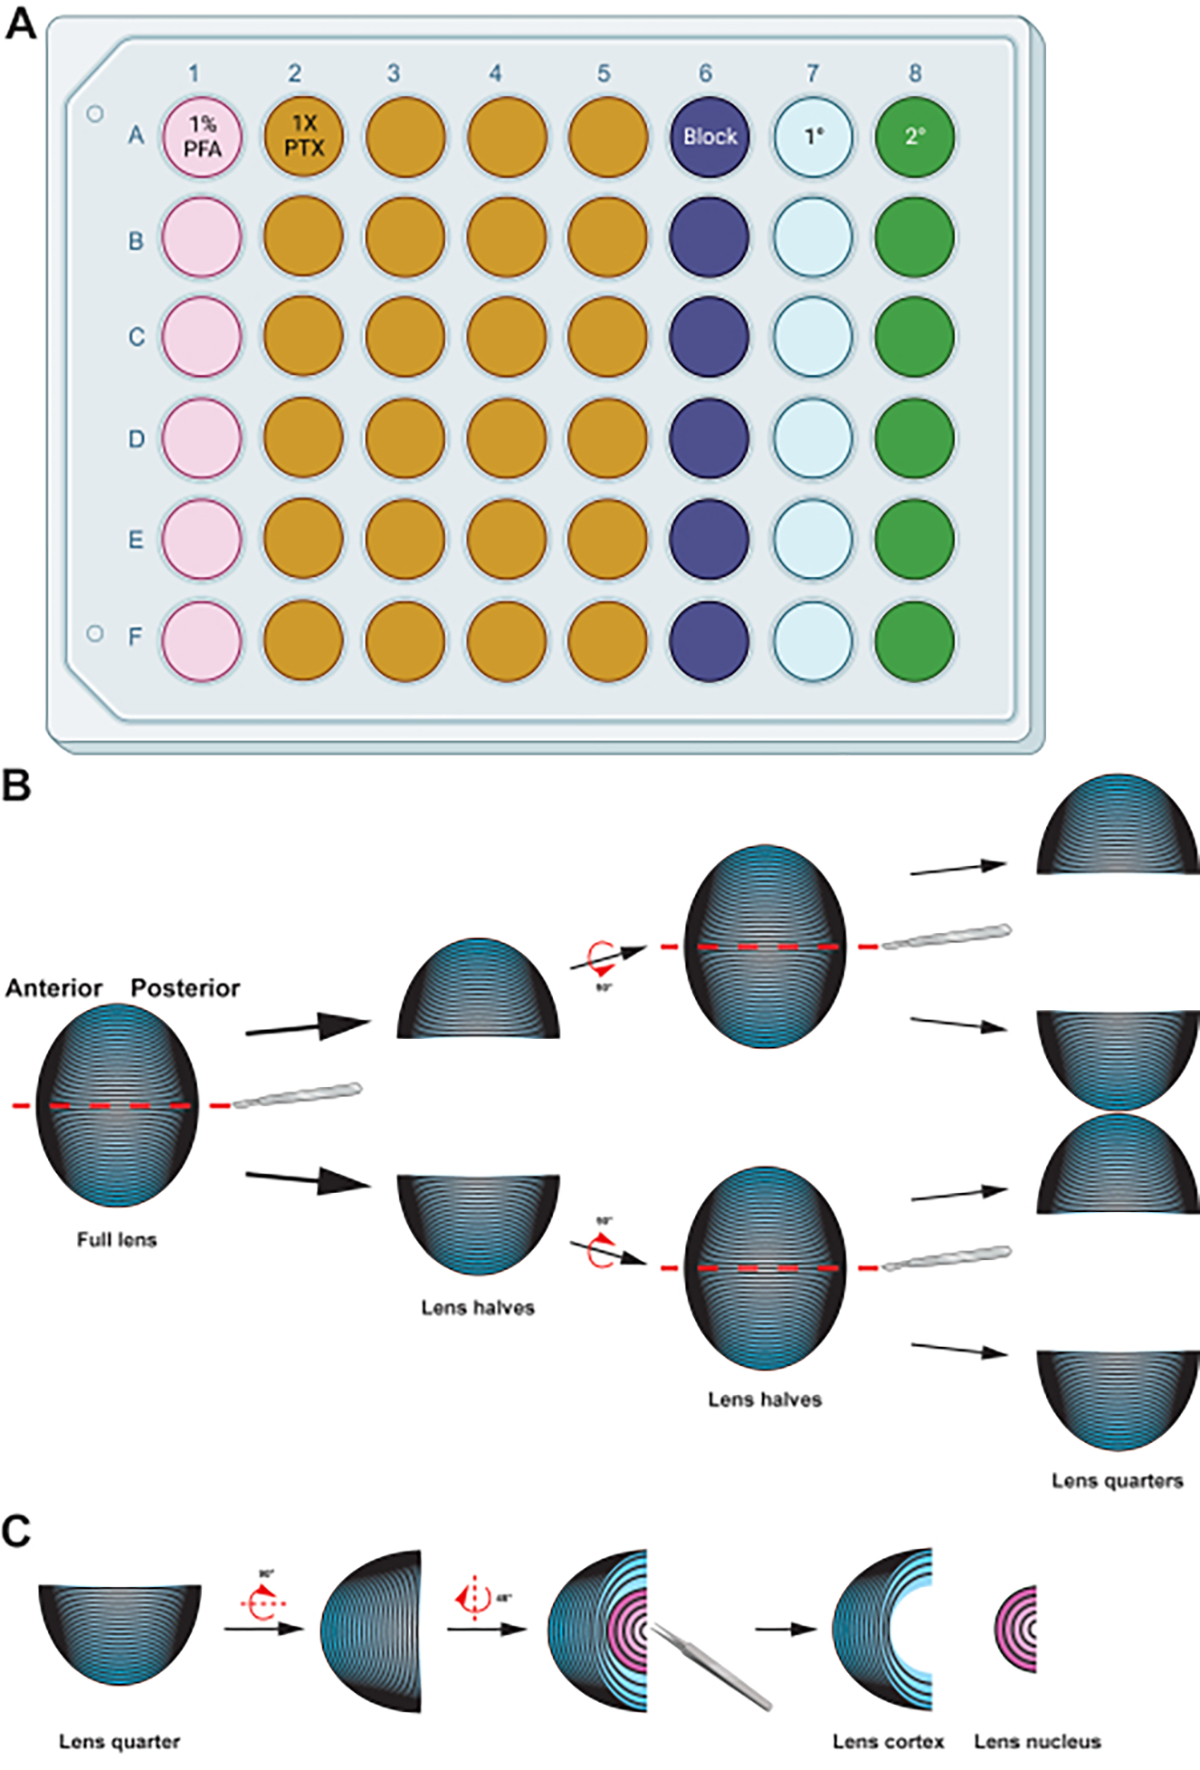
(A) This 48-well plate has been color-coded by column to demonstrate a sample plate setup for the described methods, allowing easy transfer of samples between the various immunostaining steps by gentle handling using forceps. While the representative data for this protocol is not incubated with a primary antibody, the diagram includes a column for primary antibody incubation, and the wells for washing can be reused after removing used wash buffers by aspiration. (B) After fixation of the lens fiber cell mass, the tissue is split along the anterior-posterior axis (red dashed lines) to preserve the original structure of the cells. Once the tissue mass has been halved, the samples are rotated and the halves split into quarters along the anterior-posterior axis (red dashed lines). (C) Removing the lens nucleus region (in pink) is easily done using tweezers to dig out the dense central tissue from the cortical fiber cells (in blue). Cartoon diagrams were partially created using BioRender.com and not drawn to scale.