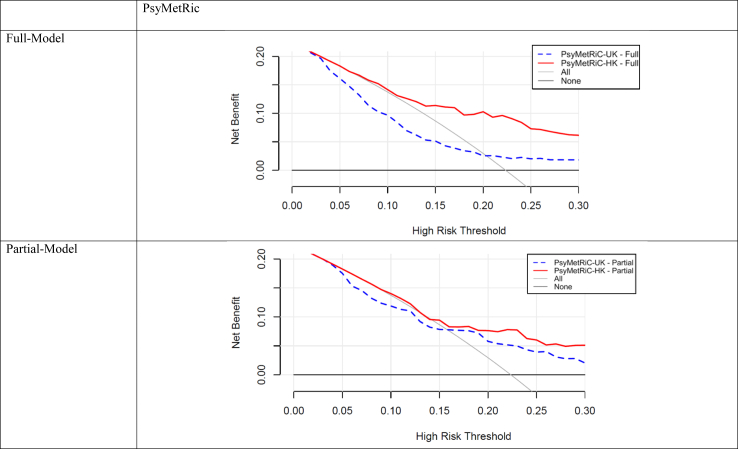
Fig. 3.
Clinical usefulness of PsyMetRiC before and after logistic calibration. The plot reports net benefit (y axis) of PsyMetRiC Full- and Partial-Models (blue line = original PsyMetRiC algorithm applied to the sample; red line = recalibrated site-specific version PsyMetRiC-HK) across a range of risk thresholds (x axis) compared with intervening in all (grey line) or intervening in none (black line). In Decision Curve Analysis, it is customary to consider only the range of risk-thresholds that may reasonably be considered in clinical practice. Our upper bound of 0.30 represents around a one-in-three chance of developing MetS should nothing change, and it is unlikely that risk thresholds greater would be tolerated. Net harm (i.e., more false positives than true positives exposed to an intervention at a selected risk threshold) is indicated when the decision curve line is plotted at y <0.

