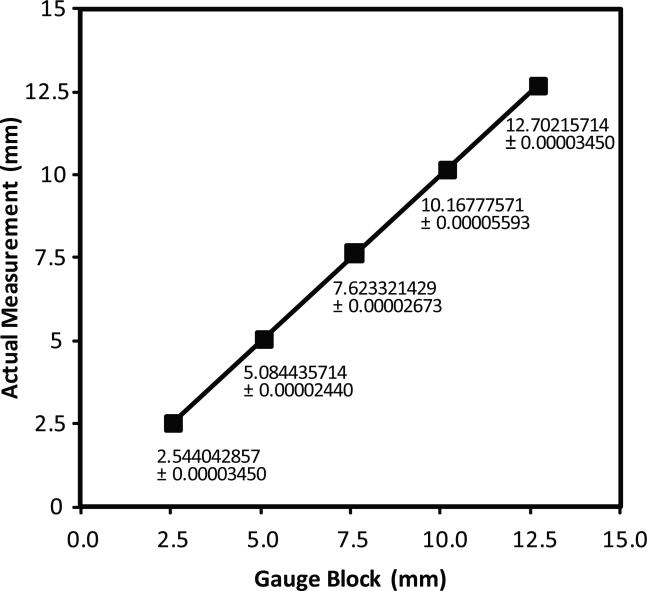
Figure 2.
Laser micrometer calibration assessment. The laser micrometer was calibrated against gauge blocks. Workshop grade gauge blocks with fixed widths of 0.254, 0.508, 0.762, 1.016, and 1.27 cm (0.1, 0.2, 0.3, 0.4, and 0.5 inch thickness in English units as stamped on the gauge blocks) were measured 7 times at 23 °C and the standard's value is shown as the independent variable on the X-axis. The average of the 7 measurements is shown as the dependent variable on the Y-axis. Numbers indicate actual measurements with their standard deviations; the error bars of the standard deviations cannot be seen on the graph because they are so small. A linear least squares fit line was applied. Slope, intercept, and coefficient of determination (R2) were calculated and graphed in Microsoft Excel 2003 and calculations verified in Plainstat. These data show a resolution of 0.7679 microns and a coefficient of determination of 0.999999726.

