
Figure 3.
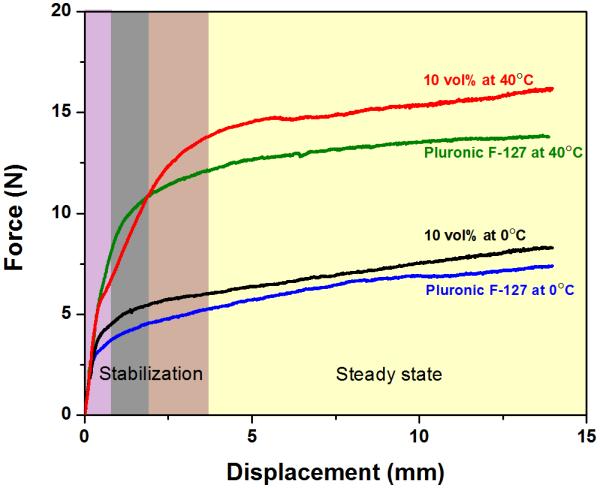
Load versus displacement curves for the inks printed through a 250 μm tip at 0°C and 40°C with a printing speed of 10 mm/s. Initially the system equilibrates and flow starts (shadowed zone) until a steady state is achieved.
Official websites use .gov
A
.gov website belongs to an official
government organization in the United States.
Secure .gov websites use HTTPS
A lock (
) or https:// means you've safely
connected to the .gov website. Share sensitive
information only on official, secure websites.
Load versus displacement curves for the inks printed through a 250 μm tip at 0°C and 40°C with a printing speed of 10 mm/s. Initially the system equilibrates and flow starts (shadowed zone) until a steady state is achieved.