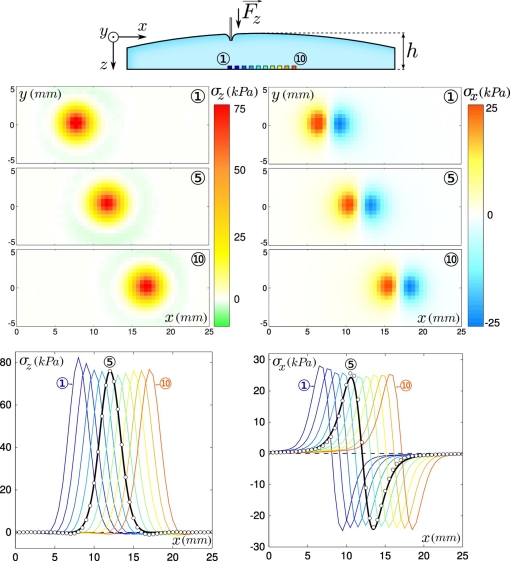
Figure 2.
Characterization of the intrinsic receptive fields. (Top) Sketch showing the local indentation procedure. A 500 μm in diameter cylinder is indented at the surface of the elastomer cap at varying positions (x, y). (Middle) Normal (left) and tangential (right) stress fields, respectively σz and σx, measured by the micro-force sensors ①, ⑤ and ⑩ as a function of the indentor’s position (x, y) under a unit normal force Fz =1 N. (Bottom) Normal (left) and tangential (right) stress measured by each of the 10 micro-force sensors (from blue to red) as a function of the indentor’s position x for y =0 under a unit normal force and for a layer thickness h =3.04 mm. The experimental stress measured by sensor ⑤ (white circles) is compared to the prediction of a Finite Element calculation (black solid curve).

