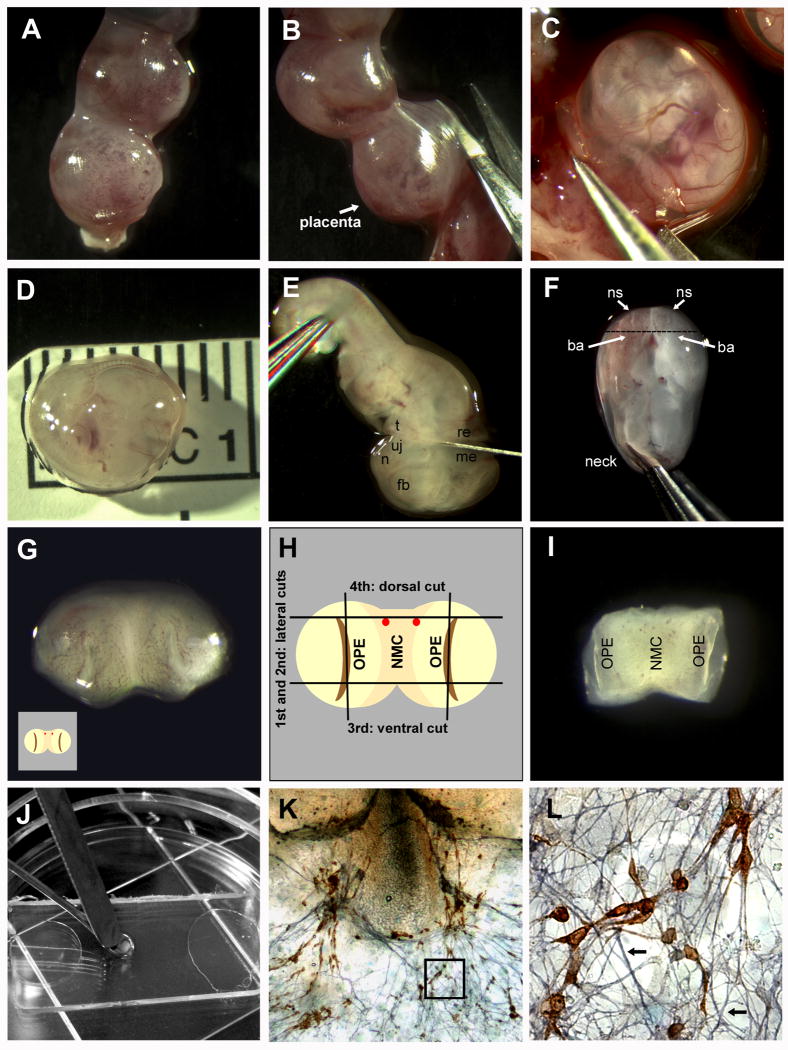
Figure 1.
Critical steps in nasal explant preparation. A One end of an isolated mouse uterus. B The uterus is cut through the muscular layer (opposite the placenta). C An embryo in its amniotic sac, still attached to the uterus, is removed with forceps. D The measured embryo is showing the ideal size of an E11.5 embryo (6.2 -7.2 mm from crown to tail). E A forceps is used to hold the embryo in place, while the head is removed with a scalpel. The cut is made between the tongue (t) and upper jaw (uj) at one side, and between the mesencephalon (me) and rhombencephalon (re) at the other side. The forebrain (fb), and nasal area (n) are also easily identifiable. F With the dorsal side of the head down, the two naris (ns) can be viewed from above. The branchial arch (ba) is also clearly visible. The head is grasped with forceps inserted into the mescencephalon where the base of the “neck” would be. G The nasal area, after the cut shown in F, with the outer surface viewed from above. Each olfactory pit (OPE in H) is visible as slight indentations on the right and left sides. H Schematic of G with the four cuts shown. The two lateral cuts going through the olfactory pit (OPE) on either side of the nasal mesenchyme (NMC) are illustrated. The two red dots shown are the blood vessels prominent in most embryos making a useful marker for the 3rd dorsal cut. I Explant, after the cuts are made in H, with the outside (exterior) face down (opposite view of H and I). This is the orientation the explant is plated. J Explant being transferred to permanox slip covered in plasma using two spatulas. K A 7 div explant stained for GnRH (SW 1:1000 stained in DAB; Fueshko and Wray, 1994) and peripherin (1:1000 stained in SG, blue; Fueshko and Wray, 1994) L Close-up of K (boxed area), with GnRH neurons migrating on peripherin positive fibers (arrows).

