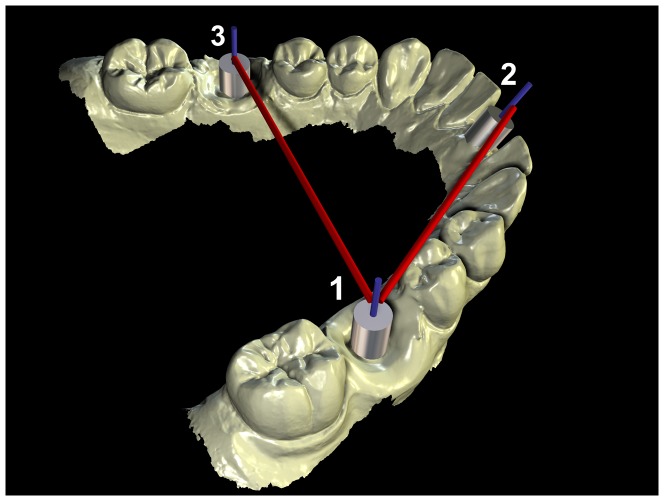
Figure 5. The measurements were made between the centers of the high-precision cylinders.
Three 3D CAD models of the cylinders in the model were imported and registered with each of the scanned equivalents. The distance between the centre-lines was measured in the software using a linear measurement tool. The angular deflection of the cylinders was measured with an angular measurement tool, using the cylinder at the location of the lower right molar as the baseline.

