
Figure 2.
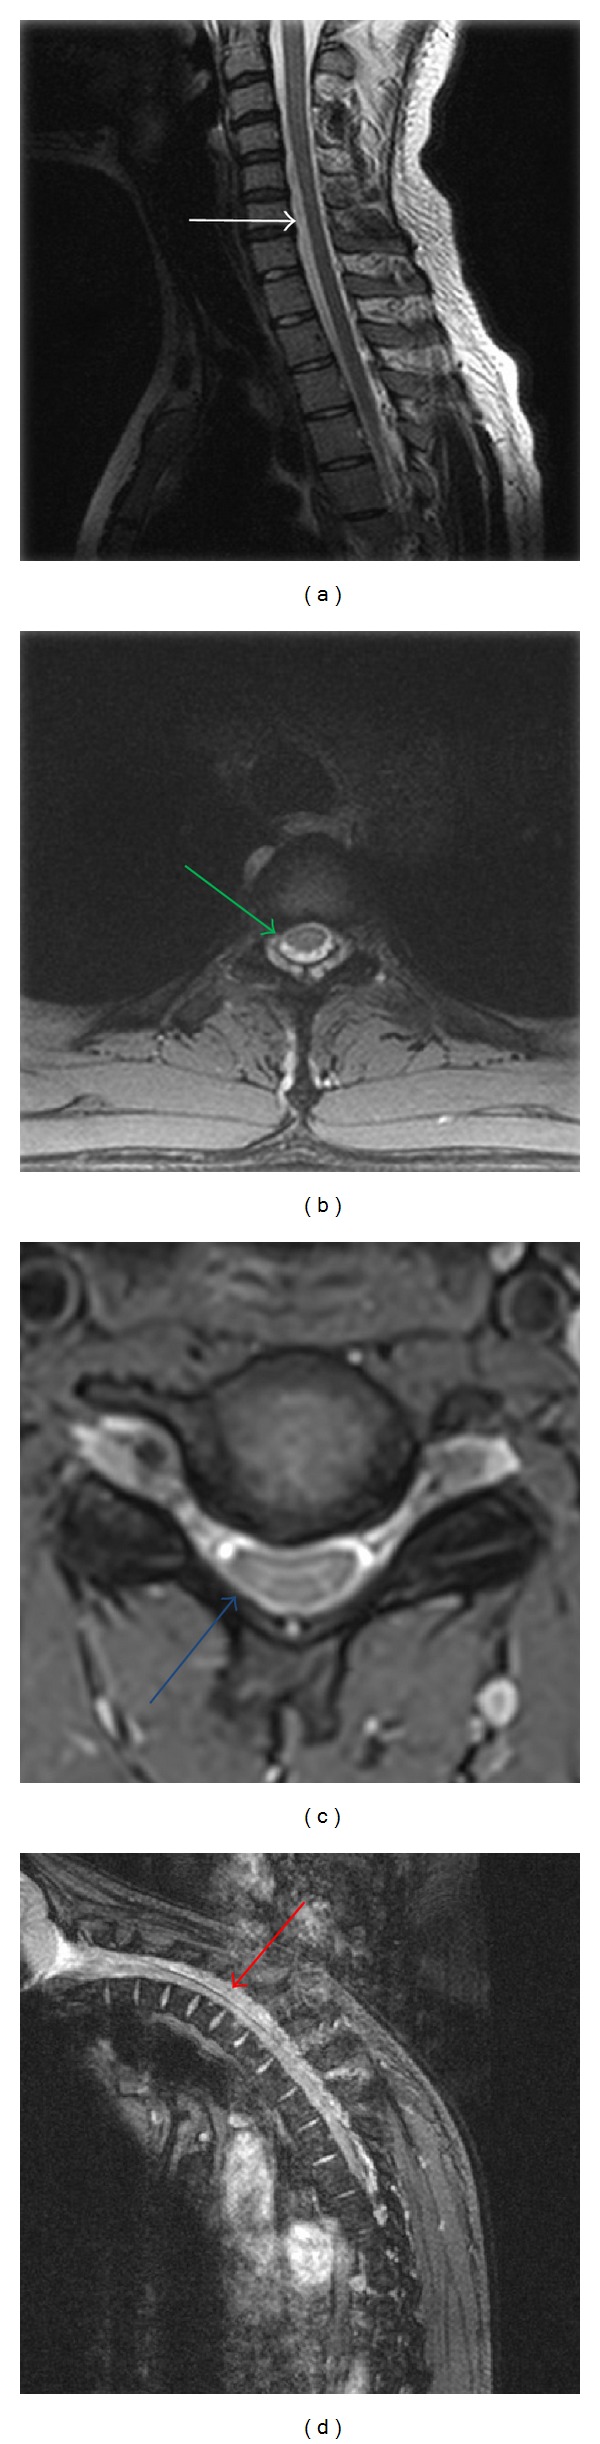
Localised cord atrophy (white arrow) on neutral sagittal T2WI (a), pear shaped asymmetric cord flattening on neutral transverse T2WI (green arrow) (b), asymmetric cord flattening with loss of attachment of dura from subjacent lamina (blue arrow) on neutral position axial T2WI MRI (c), and anterior displacement of posterior dura from C3–D8 on postcontrast imaging showing intense enhancement of posterior epidural space from C6–D3 (red arrow) (d).