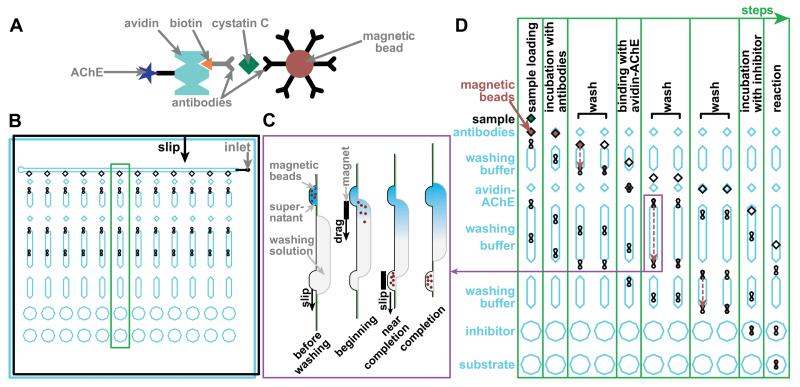
Figure 5.
Illustrations of the immunoassay and SlipChip design. A) A drawing of the complex used in the magnetic bead-based immunoassay for cystatin C. B) A drawing of the overall SlipChip design. The chip has a top plate (black lines) and bottom plate (blue lines) that face each other. Each of the 12 columns is designed to perform an assay at a different threshold concentration, for a total of up to 12 threshold concentrations (or fewer, if duplicate assays are desired). Reagents are pre-loaded into the chip in rows into the layer shown in blue before the sample is introduced into the inlet. To perform each step of the assay, the top plate is slipped according to the “slip” arrow (solid black arrow), performing the assay on all 12 columns in parallel. The green box indicates the column shown in D. C) Schematic of the washing mechanism, based on dragging magnetic beads through a channel containing washing solution (side view). When the top plate is slipped relative to the bottom plate, beads are moved to the beginning of the channel containing washing solution. A magnet is used to move the beads to the other end of the channel, and then, to another well on the top plate. The plate is then slipped once more to separate the beads and the channel. D) A time series illustrating the assay. Only one of the 12 columns is shown (11 times), illustrating the 8 steps of the assay. The movement of the plates of the SlipChip (7 slips total) is shown. The blue (bottom) plate is stationary, and the top (black) plate moves along the direction of the arrow shown in B. The movement of magnetic beads (3 transfers) is shown with red dashed arrows.

