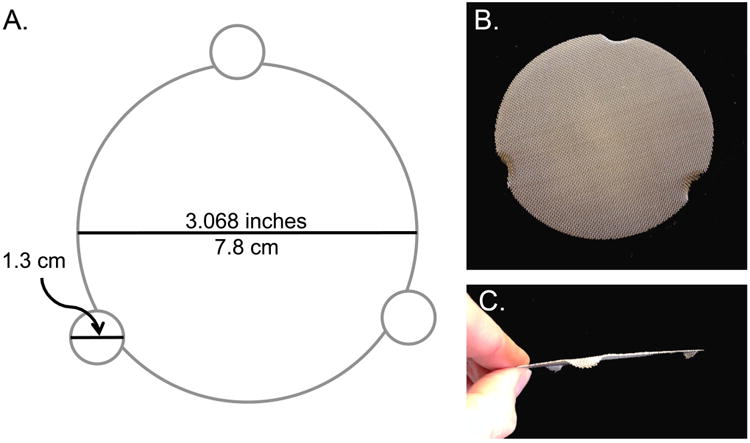
Figure 3.

A. Template for creating an efficient grid-bending device. Copy the template above making certain the diameter is exactly the same as that of the wire grid. Cut out the template including the three notches. Follow the kit directions for preparing the clay in the plastic ring, making sure the surface is completely flat and level. Press a wire grid into the center of the clay to just make an imprint. Lay the template over the clay exactly covering the grid imprint, and gently drive the top of a 12 × 75 mm test tube straight into the clay at each of the three notches until the tube reaches the bottom surface, gently remove the clay from the hole. Carefully press the clay out of the circle form and be certain the notches are still aligned with the each other and the template and that the surface is completely level. Use the base of the test tube to be sure the holes are still properly formed. The clay can be remolded in the ring if needed. Bake the clay disk according to the kit directions. When cool, place an unbent grid onto the grid imprint of the hardened clay form and insert the base of the 12 × 75 mm test tube into each the three holes to bend the legs of the grid. Repeat to bend the needed number of grids. B, C. Top- and side-views (respectively) of a flat grid that is properly bent to have even legs.
