
Figure 3.
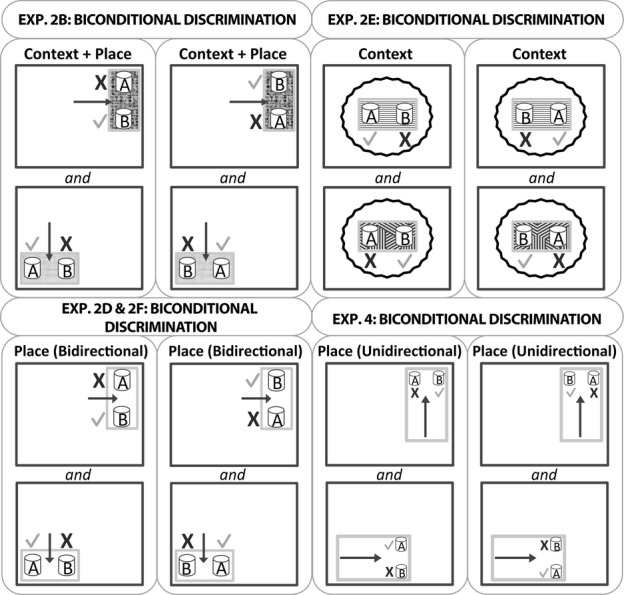
A schematic diagram of the biconditional discriminations in experiments 2 and 4. The dark grey outlines represent the testing room, and the smaller grey rectangles represent the plastic test boxes in which the digging cups were placed. Two different local contexts (test boxes) and locations were used for the context + place biconditional (experiments 2B and 2C). The place biconditional tasks (experiments 2D, 2F and 4) used the same test box for the two locations. In experiments 2D and 2F, the rat was placed between the two digging cups and, therefore, the rat could approach the digging cups going in one of two directions (bidirectional). In contrast, the two digging cups were placed side by side in experiment 4, and the rat always approached the two choice digging cups from a single direction (unidirectional). In the context biconditional task (experiment 2E) the wavy black lines represent the curtain that prevented the rats from seeing the walls while two different local contexts were used (different test boxes). The ticks indicate the correct digging cup while the cross indicates incorrect responses. The black arrow shows where the rat was placed in the test box (experiment 2B) or the direction the animals ran towards the digging cup(s) (experiments 2D, 2F and 4). The diagram is not drawn to scale, nor do the depicted locations represent all test room conditions (see text for the locations of the test boxes in each room). Note that the test box used for experiment 4 was larger than that used for the other experiments (apart from experiment 3B).