
Figure 4.
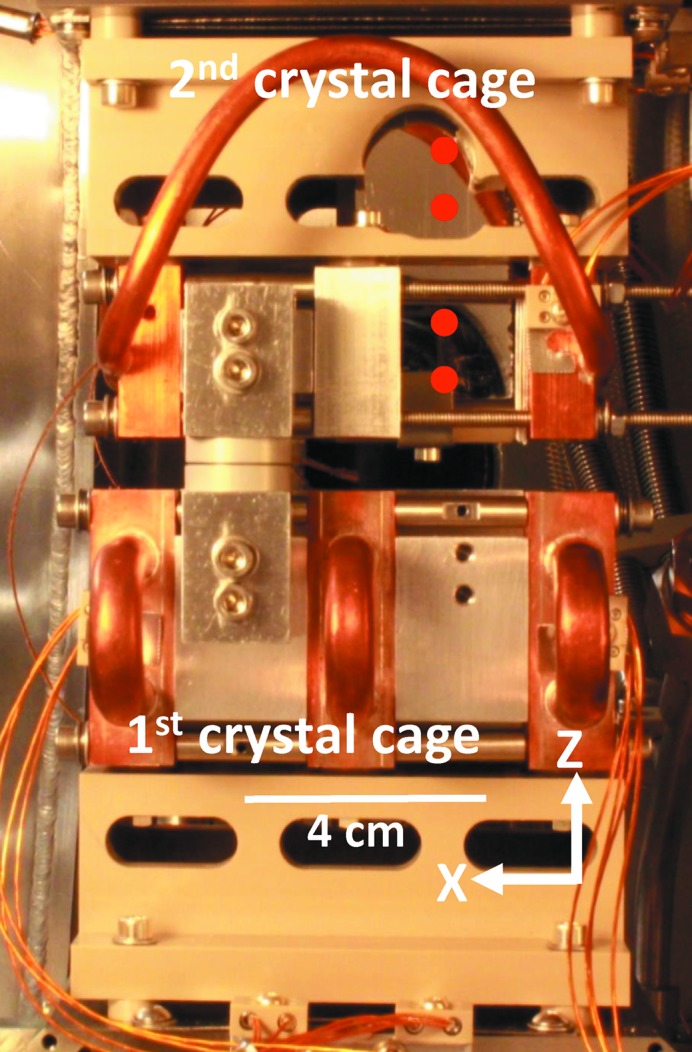
The mount of the mirror within the second-crystal cage. The four red dots illustrate interferometer beams. Note that the depicted PEEK block (Tavlet & Van der Burgt, 1994 ▸) supporting the second-crystal cage has been modified to accommodate the mirror.