
Fig. 2.
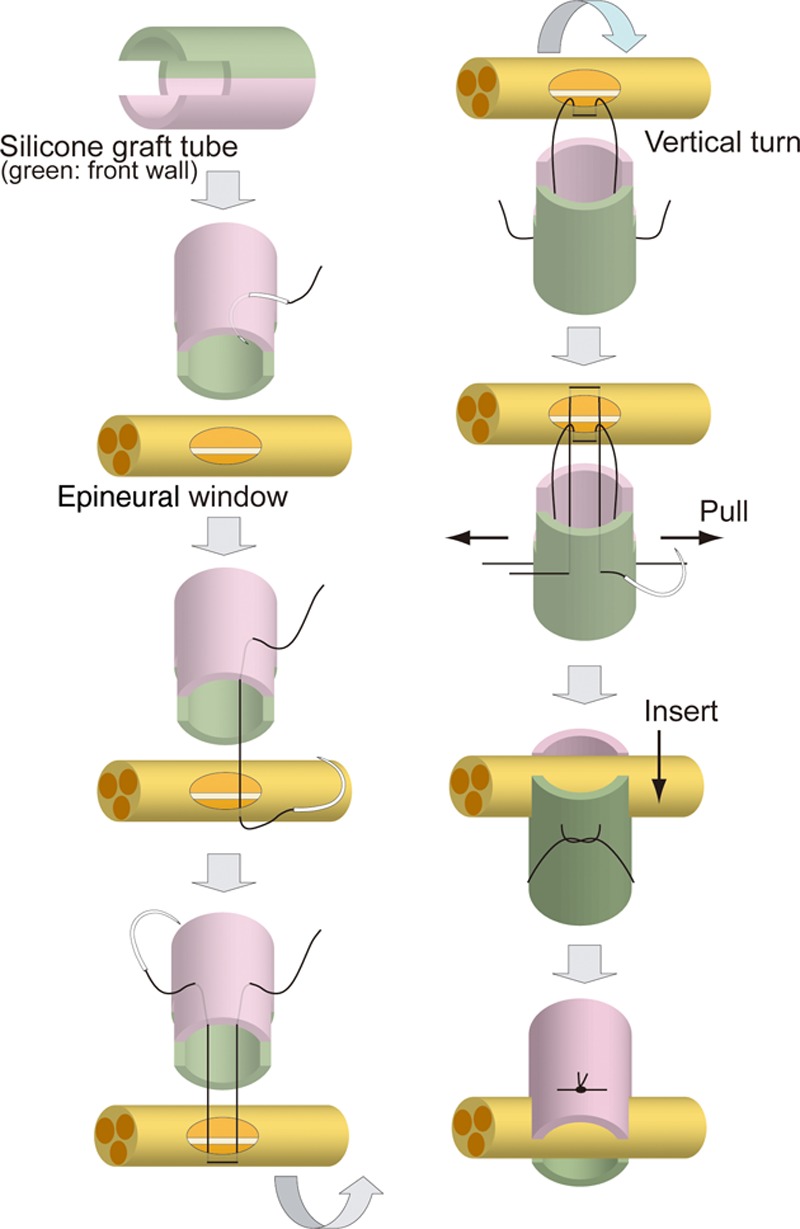
Schematic illustration of end-to-side neurorrhaphy with the silicone tube. End-to-side neurorrhaphy using the silicone tube is described in a step-by-step manner from the top to bottom illustrations in the left and right columns. (1) Gaps (1.5 mm long and 1 mm wide) were created at both ends of the tube (length, 10 mm; internal diameter, 1 mm; external diameter, 2 mm) (left column, first). (2) After epineural windows in the facial nerve trunk and hypoglossal nerve were created, neurorrhaphy was performed as follows. First, a 9-0 nylon suture (Nescosuture, Alfresa, Osaka, Japan) was passed from the external margin of the posterior wall of silicone tube (pink side) into the lumen (left column, second). (3) Then, the suture was passed from the epineural window through the epineurium toward the outside (left column, third). (4) The suture was then passed again from outside the epineural window through the epineurium into the lumen, from the lumen of the silicone tube toward the outside, and left in place without a ligature (left column, fourth). (5) Then, the silicone tube was rotated 180° vertically, and the anterior wall of the silicone tube (green side) was sutured by the same procedure for the posterior wall (right column, first). (6) The anterior and posterior wall sutures were carefully stretched (right column, second). (7) The facial nerve trunk was allowed to insert into the gaps initially created in the silicone tube (right column, third). (8) The facial nerve trunk was confirmed to be firmly inserted into the gaps on the left and right and ligatured with 2 sutures (right column, fourth).