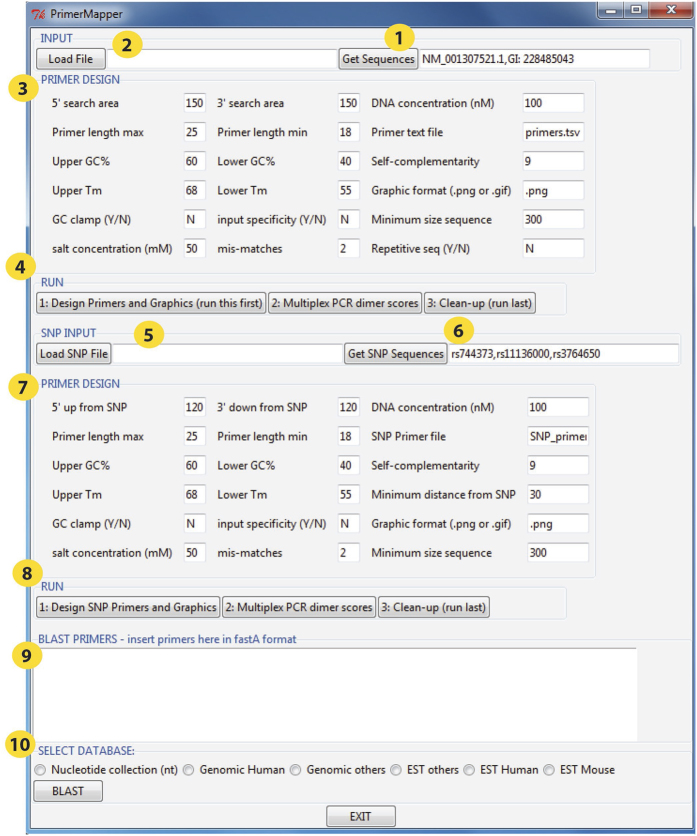
Figure 2. PrimerMapper user interface.
The PrimerMapper user interface is divided into three sections that can be executed independently. The first section is for general primer design from DNA sequences in fastA format that can be uploaded by clicking the “Get Sequences” button which will collect fastA formatted sequences from NCBI’s GenBank (yellow circle, number 1), or locally by clicking the “Load File” button (yellow circle, number 2). The Primer design criteria are populated in the textboxes within the “PRIMER DESIGN” frame (yellow circle, number 3). Primer design then begins by clicking the buttons within the “RUN” frame (yellow circle, number 4). The user must start with “1: Design Primers”, followed by “2: Multiplex PCR dimer scores” or “3: Clean-up”. The second section of the interface is for “SNP INPUT”. Similar to the first section, the data can be uploaded locally (yellow circle, number 5) or remotely from dbSNP by entering appropriate accession number(s) (yellow circle, number 6). Next the primer design criteria are populated within the “PRIMER DESIGN” frame (yellow circle, number 7), followed by program execution by clicking the buttons 1 to 3 in the “RUN” frame (yellow circle, number 8). The third section is the BLAST window at the bottom of the interface (yellow circle, number 9); here the user can input any number of fastA formatted primer sequences and BLAST against a specific database at NCBI (yellow circle, number 10). The results from the BLAST report are printed to a text file in the current working directory.

