
Fig. 6.
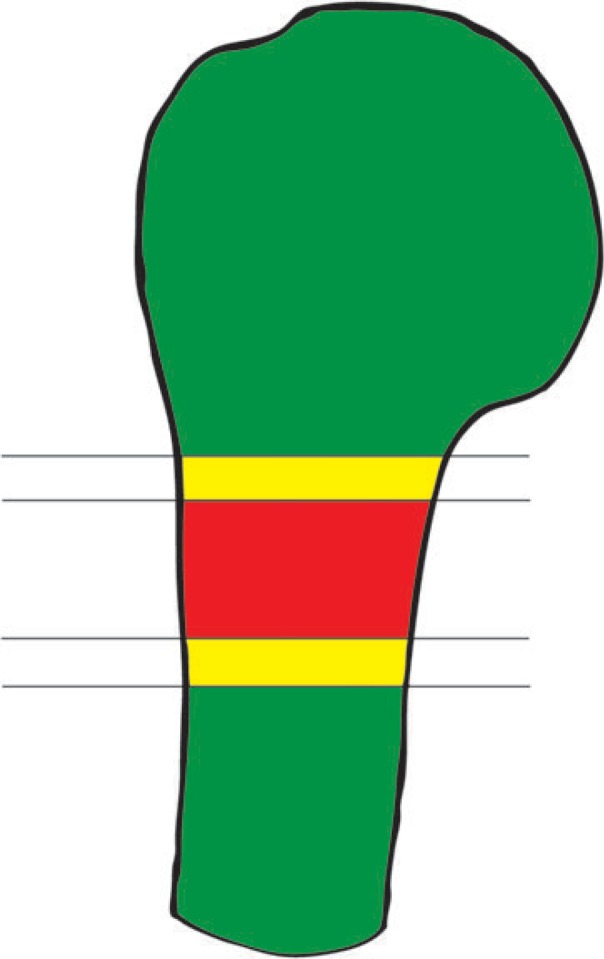
Diagram of ‘safe’ and ‘danger’ zones from the tip of the humerus marking the danger posed to the axillary nerve at these positions. Red ‘danger’ area between 5.6 and 6.5 cm from the superior point of the humerus.
Official websites use .gov
A
.gov website belongs to an official
government organization in the United States.
Secure .gov websites use HTTPS
A lock (
) or https:// means you've safely
connected to the .gov website. Share sensitive
information only on official, secure websites.
Diagram of ‘safe’ and ‘danger’ zones from the tip of the humerus marking the danger posed to the axillary nerve at these positions. Red ‘danger’ area between 5.6 and 6.5 cm from the superior point of the humerus.