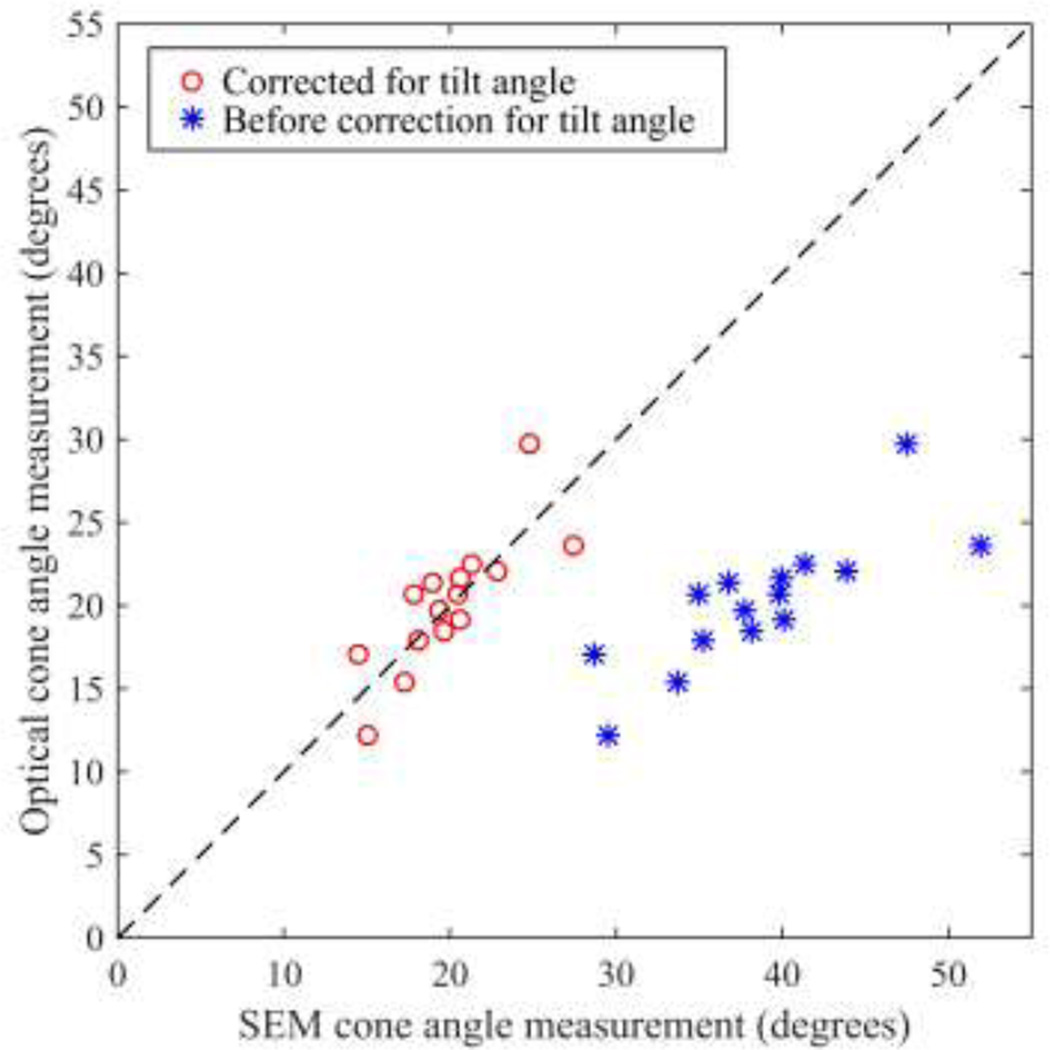
Fig. 9.
Comparison of cone angle measurements obtained using SEM and using our optical method. The dashed line indicates 1-1 agreement. Correcting for the tilt in the SEM image (using Eq. 3) improved agreement. Optical cone angle measurements differed from corrected SEM measurements by −0.23 ± 2.32°.

