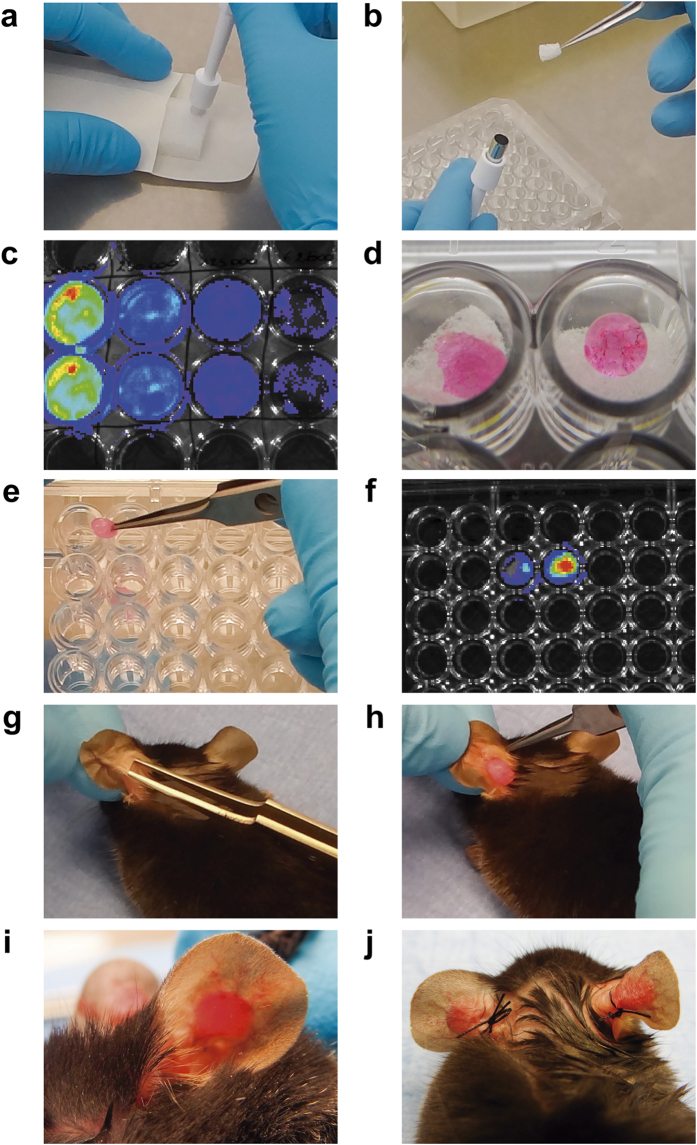
Figure 1. Description of the main steps of the ear sponge assay.
The two major steps of the ear sponge assay are the sponge preparation (a–f) and the sponge implantation in mouse ears (g–j). (a) Sterile compressed gelatin sponges were cut with a sterile biopsy punch into small cylindrical pieces. (b) Sponges were next placed in a 96-well plate (one per well) with a forceps. (c) For each experiment, the positivity for the Luciferase gene expression in B16F10Luc+ transfected cells was checked by bioluminescence. Serial dilutions of cells, starting at 5 × 10⁵ B16F10Luc+ cells (wells at left), were associated with proportional Xenogen signals. (d) A drop of the appropriate cell suspension (20 μl) was seeded on top of the sponge, allowing the progressive diffusion of the solution into the sponge during an incubation for 30 minutes at 37 °C. (e) Sponges were soaked with a collagen mix, placed immediately in a new well and incubated at 37 °C for 30 minutes to allow collagen gel polymerization. (f) Such collagen coating did not affect the bioluminescence emitted by cells when luciferin was added inside the sponge. In the picture, sponges soaked with 20 μl of 1 × 10⁵ and 2 × 10⁵ at left and right, respectively. (g) A horizontal incision was performed in the basal, external and central part of the mouse ear and the external mouse ear skin layer was smoothly detached from the cartilage with a thin forceps. (h) Sponges were placed in the incision. (i) The gelatin sponge was introduced inside the hole, between the external mouse skin layer and the cartilage. A suture point was made to close the skin incision. (j) The same procedure was repeated in the other mouse ear, using always sponges with the same experimental condition in the same mouse.

