
Fig. 1.
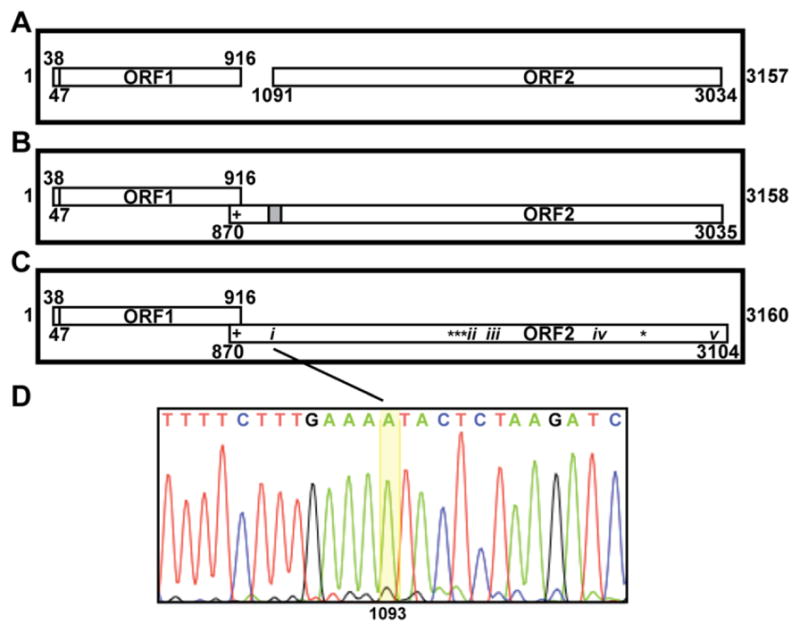
Genome diagrams and sequencing results. (A–C) The genome of ZbV-Z/412 is depicted by the thicker-lined box in each panel, with the spans of ORF1 and ORF2 indicated by the thinner-lined boxes inside. Whether ORF1 and ORF2 are in frame 1, 2, or 3 is indicated by vertical position top to bottom in each panel (e.g., in panel A, both ORF1 and ORF2 are in frame 2). The limits of each ORF as defined by flanking stop codons are numbered by nucleotide position. The first nucleotide in the putative start codon of ORF1 is also numbered. Scales in all three panels are approximate. (A) Diagram of the ZbV-Z/412 genome from GenBank AF224490. (B) Our prediction for how a single 1-nt insertion (within the gray-shaded area) would allow ORF2 to overlap ORF1 in the +1 frame (frame 3). $, Position of a proposed slippery sequence for +1 PRF, allowing translation of an ORF1/ORF2 fusion product. (C) Diagram of the ZbV-Z/412 genome from new sequencing results (GenBank KU200450). i–v, Positions of the respective indels; *, Positions of four single-nucleotide substitutions; $, same as described for panel B. (D) Sequencing electropherogram across the region of indel i in the ZbV-Z plus strand, showing the 1-nt (A) insertion at position 1093.