
Fig. 1.
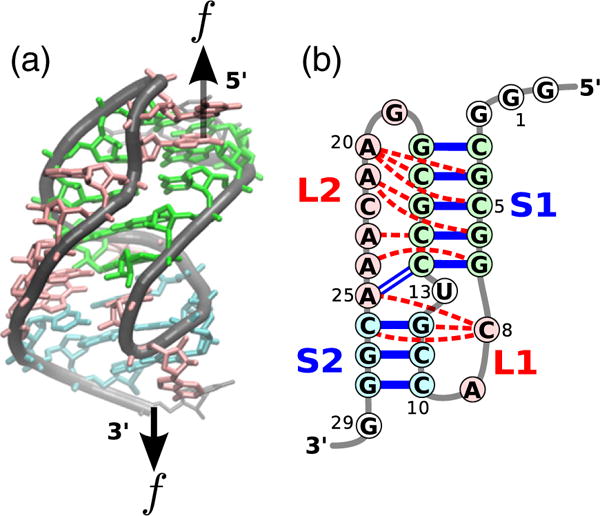
Structure of the BWYV pseudoknot. (a) Sketch of the crystal structure [32] color-coded according to secondary structures. The black arrows indicate positions at which the external mechanical force is applied. (b) Schematic representation of the secondary structure. Unlike the typical H-type pseudoknot, the two helix stems (S1 and S2) are not coaxially stacked in the BWYV pseudoknot [25]. Tertiary interactions are indicated by red dashed lines.