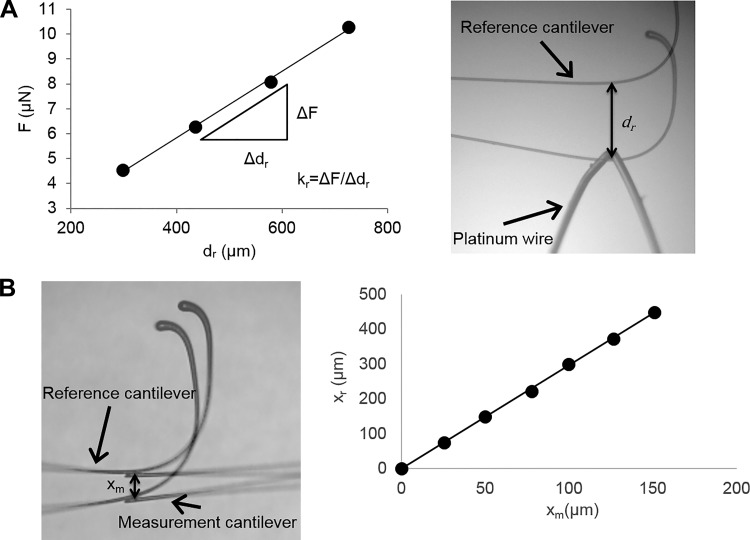
Fig. 1.
Cantilever calibration procedure. A: spring constant of reference cantilevers (kr) was determined by hanging lengths of platinum wire from the end of the reference cantilever (F = force applied to the cantilever) and measuring cantilever deflection (dr). Image is shown with an overlay of the original cantilever position. B: spring constant of the measurement cantilever was determined by displacing the reference cantilever relative to the measurement cantilever and measuring the displacement of the reference and measurement cantilevers (xr and xm, respectively). Measurement cantilever stiffness is calculated from the slope of the relative deflection plot and the known reference cantilever stiffness.

