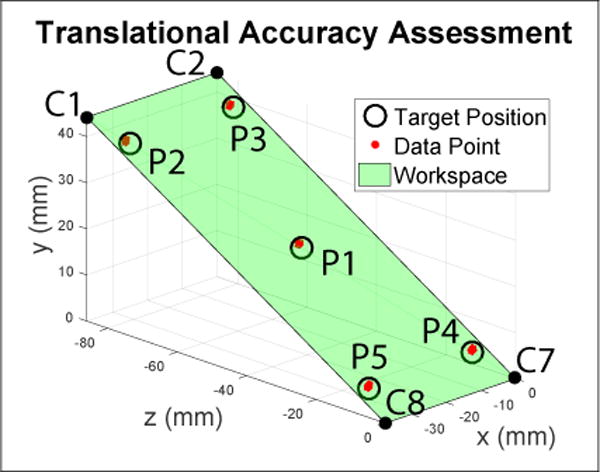
Fig. 10.

Assessment of the positional accuracy of the inserted probe tip. The green plane diagonally bisects the workspace and five target positions(P1, P2, P3, P4, and P5) are selected on that plane based on the ISO9283 standard. These positions are visited 30 times each.
