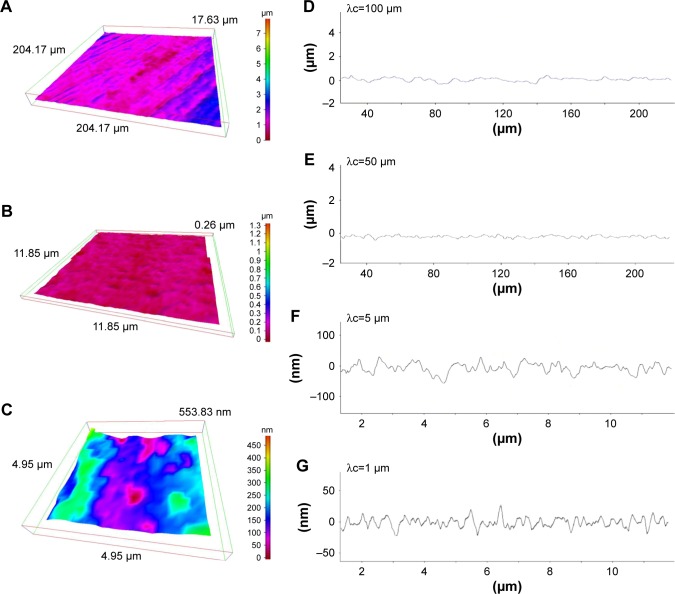
Figure 3.
Three-dimensional profiles of the machined zirconia surface.
Notes: (A–C) Three-dimensional images of the machined zirconia surface taken with an optical profile microscope at three different magnifications. (D–G) Profile curves of the machined zirconia surface by line scanning. Long (D, E) and short (F, G) line scanning were performed. Different filter values (cutoff value λc) were applied to draw each of the profile curves.

