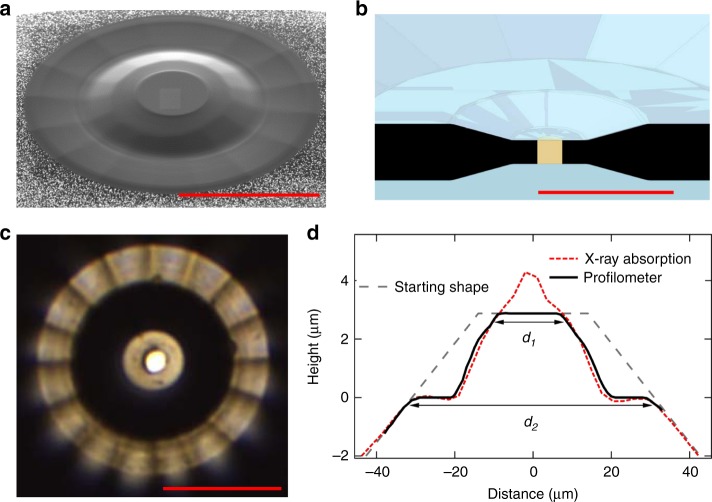
Fig. 1.
Geometry of the optimized toroidal shape used in runs 1–4. a Scanning electron micrograph picture. b Sketch of the sample chamber in toroidal-DAC. The sample and gasket are represented in yellow and black, respectively. c Picture of the aluminum sample in run 4. The sample chamber in the center has been drilled with focused ion beam. The central flat, diameter d1 = 16 μm, is shiny. The groove has a total extension d2 = 60 μm and appears black for the inner part and shiny for the outer (almost horizontal) part. d Profile of the diamond tip measured with a profilometer. The raw X-ray absorption profile measured with λ = 0.3738 Å (see Methods section) is also plotted. d1 and d2 are the toroidal pit inner and outer diameters. The red scale bars all indicate 30 μm

