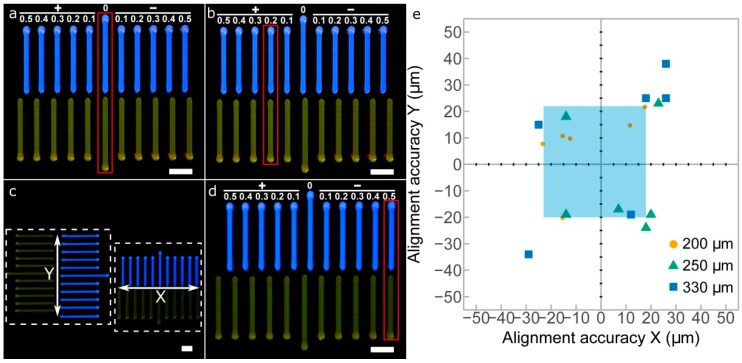
Figure 7.
Images of the printed xy-offset pattern calibration model between P1 and P2. (a) perfect alignment between P1 and P2; (b) +200 μm x-offset of P2 respect P1; (c) overall picture of x and y calibration models printed at the same time; (d) −500 μm x-offset of P2 respect P1; (e) alignment accuracy in x and y axes measured for three different nozzle sizes (200 μm, 250 μm, and 330 μm); scale bars: 2 mm.

