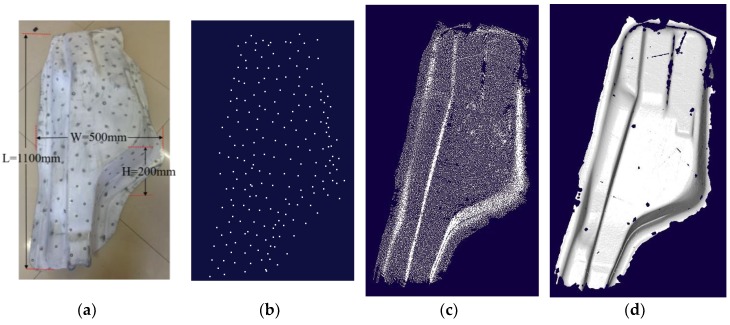
Figure 19.
The contour of large-sized workpiece measured by the handheld scanning system in this study. (a) the workpiece with typical structures for testing the system performance; (b) the measured marked points by TRITOP system; (c) the laser points reduced to a third by the system studied; (d) the shaped of (c) generated in “Imageware.”

