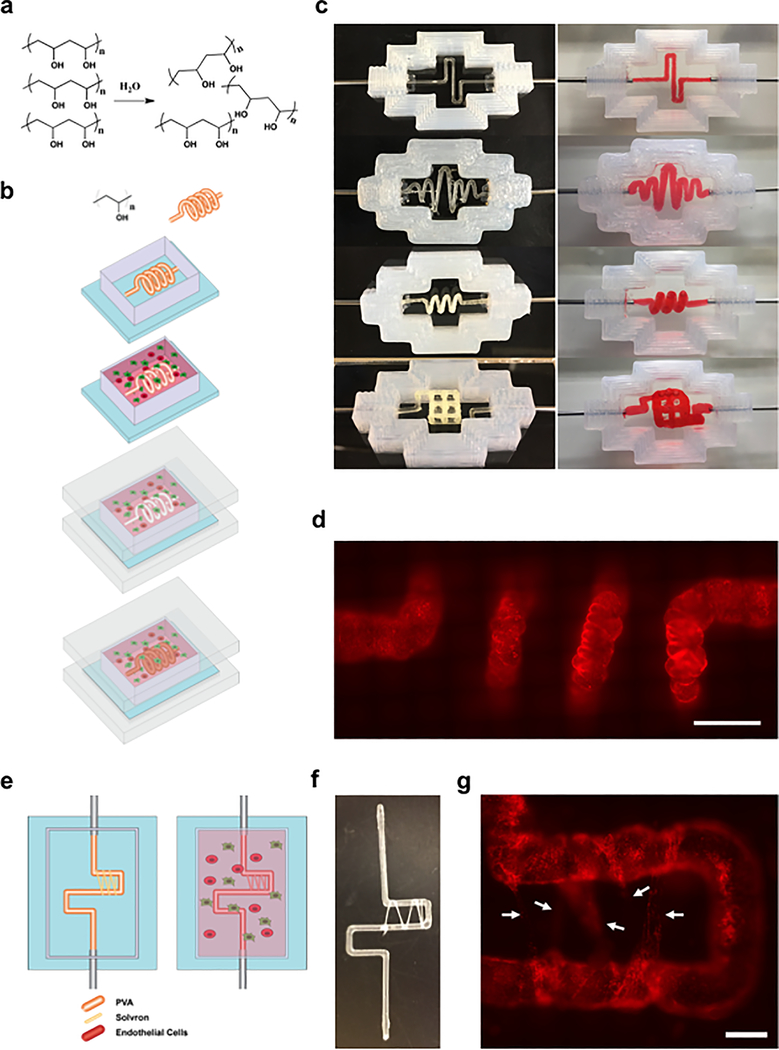
Figure 1.
Printing 3D vascularized constructs using PVA scaffolds: a) Chemical structure of PVA and solvation in water. b) Schematic representation of the vascularized construct manufacturing procedure. A PVA scaffold of desired geometry is printed and inserted into a silicone holder. The PVA scaffold is then encapsulated within a matrix formulation of desired composition. The matrix formulation is allowed to gelate and simultaneously, the PVA scaffold slowly dissolves. The structure is then sealed using an acrylic base and lid, and the scaffold is evacuated using warm media. Following evacuation, the resulting lumen can be seeded with endothelial or epithelial cells. c) Examples of 2D and 3D geometries that can be printed and evacuated using PVA. Images on the left show the PVA structures prior to evacuation, and images on the right show the perfused channels following evacuation. Scaffolds in this figure were encapsulated within a matrix of 7.5 wt% gelatin and 10 mg mL−1 fibrin. d) Fluorescent image of a 3D spirals-haped channel seeded with mCherry-labeled HUVECs. Scale bars: 2 mm. e) Schematic representation of dense vascular bed induction procedure. A PVA scaffold of desired geometry is printed and wrapped with PVA (Solvron) threads, before being encapsulated and dissolved. Over time, Solvron threads also dissolve, resulting in narrow channels into which endothelial cells may migrate. f) A PVA scaffold partially wrapped with Solvron thread. g) Fluorescent images of mCherry-labeled HUVECs migrating into narrow channels left by evacuated Solvron. Scale bars: 1 mm.

