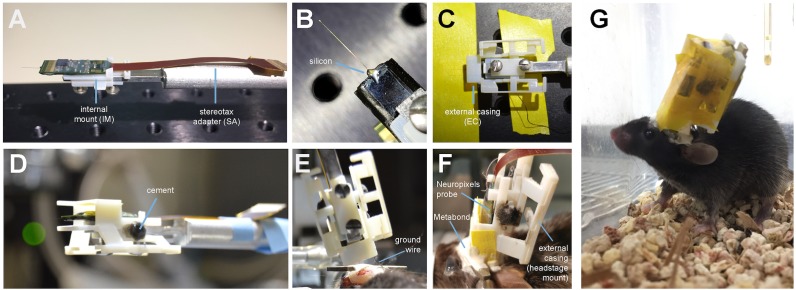
Figure 2. Mounting and implanting the Neuropixels probe.
(A) The internal mount (IM) is attached to the stereotax adapter (SA) with two screws, and probe is attached to the internal mount using an epoxy. (B) Medical-grade silicon is added to the base of the shank to add extra support. (C) The external case (EC) is attached to a breadboard, and the IM+probe assembly is carefully guided into the internal compartment of the EC (top view). (D) After cementing the IM to the EC, the entire assembly is ready to be implanted. (E) During surgery, the the shank is lowered into the brain (here at a ~ 16° angle). The ground wire extends down the side of the implant and is attached to the ground screw. (F) The entire encasing is attached to the headbar and skull using Metabond. Tape is added where necessary to add protection between the encasing and the skull. The stereotax adapter (not shown) is removed after this support structure is dry and secure. (G) Image of a mouse with the implant ~48 hr after surgery. The entire assembly is wrapped in Kapton tape to protect the onboard electronics.

