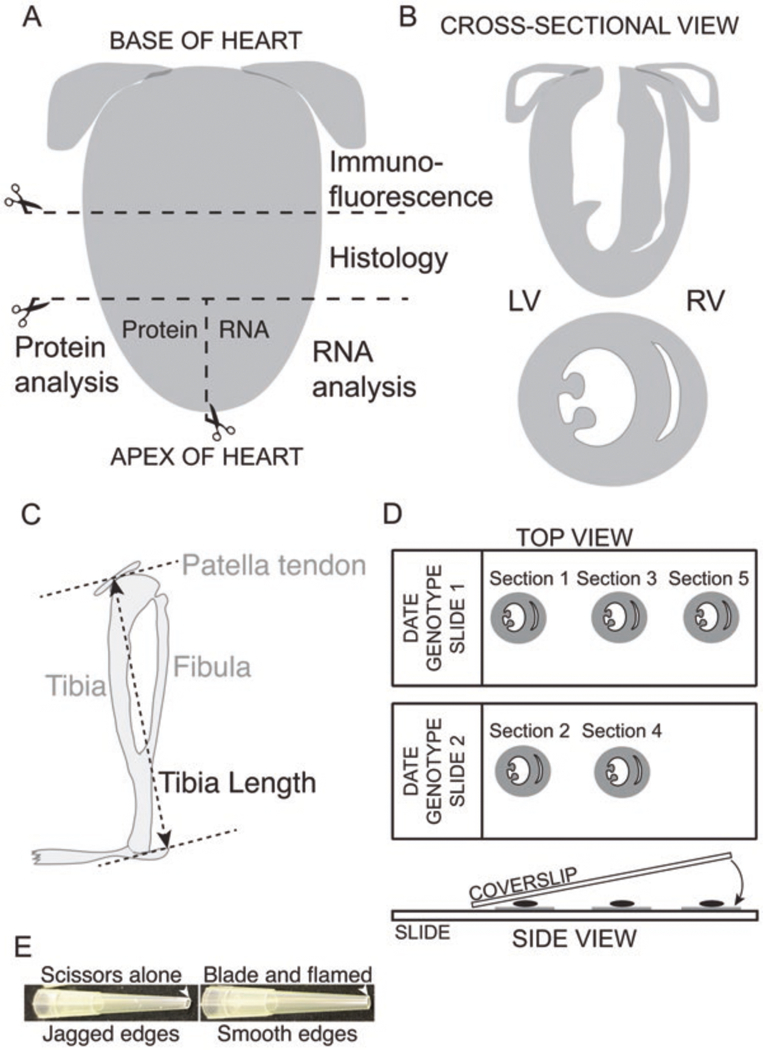
Fig. 5.

Processing of heart for analysis. (A) Post-extraction, the heart is cut into three pieces: The base is used for immunofluorescence and the midsection for histology; the apex is divided into two parts, for RNA and protein extraction. (B) Cross-sectional view of the heart showing all four chambers (top) and two chambers (bottom). (C) Schematic of a mouse tibia with measurement points indicated between the bottom of the tibia and the patella tendon. (D) Top view: After sectioning the heart for immunofluorescence analysis, sequential sections are placed on consecutive slides to allow direct comparison of different antibodies at similar spatial locations. Side view: Post-antibody staining and wash steps, a small amount of mounting medium is placed directly on the section, and the coverslip is slowly lowered using forceps to avoid generating air bubbles. Depending on the mounting medium, coverslips are either left to dry overnight or sealed with clear nail polish. (E) Preparation of P200 tips to pipette isolated myofibers. Note the importance of using a razor blade and gentle Bunsen burner flame to generate smooth edges on the pipette tip to minimize sample loss
