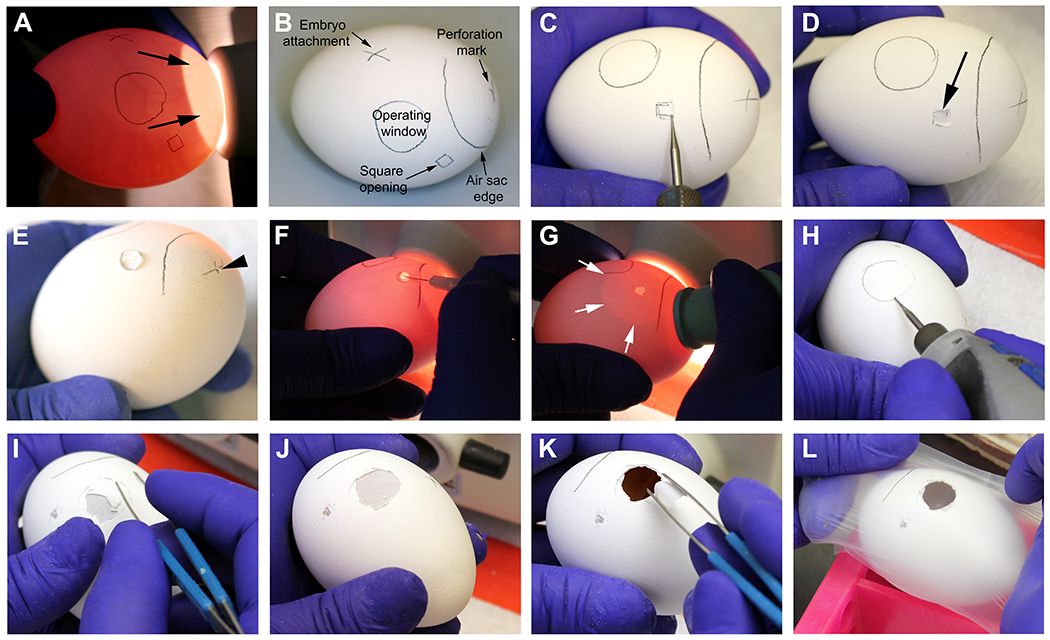
Figure 3: Preparation of the eggs on day 8.

A-B. Identification of egg vasculature and markings prior to the procedure. Arrows on A point to the naturally-occurring air sac. C-D. Drilling and opening of the egg shell on the square opening mark. Arrow on D points to the intact outer egg shell membrane after removing the shell with the help of blunt forceps. E. The marked cross on the air sac is perforated with the drill to allow flow of air into the egg (arrow head). 30 μL of HBSS medium is placed onto the outer egg shell membrane on the square opening. F. With a fine syringe needle, the outer egg shell membrane is perforated where the water was previously placed. G. Pressure is applied to a rubber eyedropper bulb while attaching it to the perforation drilled on the air sac. When finger pressure is released, water is vacuumed, generating an artificial air sac (white arrows) that should extend to the operating window. H. The edges of the operating window are drilled in an almost parallel position to the egg shell, to avoid accidental perforation. I-J. Removal of the egg shell with blunt forceps. K. Remove the outer egg shell membrane with blunt forceps, being careful not to introduce particles on the CAM (observed at ~1 cm below the surface). L. Eggs are covered temporarily with a paraffin wax membrane and put back in the incubator.
