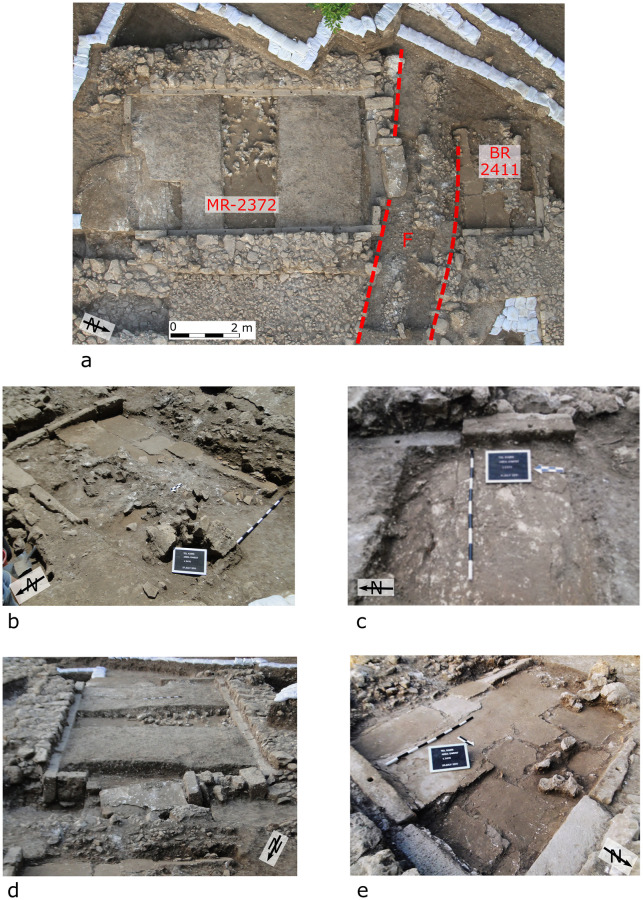
Fig 3. The Orthostat Building.
Each black or white segment on the scale-sticks represents 10 cm. (a) Aerial view showing the Main Room (MR), Back Room (BR), and Trench (T), which is denoted by dashed red lines. Notice that the southern side of the trench is partially obscured by a large stone block, whose flat upper side would have once served as a threshold leading into the back room, but which has now collapsed into the trench. Photo: Griffin Aerial Imaging. (b) The backroom (2411) covered in collapsed mudbrick and plaster. (c) Step or displacement in the floor of the Orthostat Building, just inside the entrance. One of the offset orthostats is visible at the top of the image. (d) The Main Room looking south and showing unbroken warped cross-walls; i.e., with a rise visible in the height of the walls. At the bottom of the image, wall 2404 and the threshold leading into the back room are visibly collapsed and tilting into the trench. (e) The backroom cleared of all rubble shown in Fig 3b, showing the broken and sloping plaster floor.

