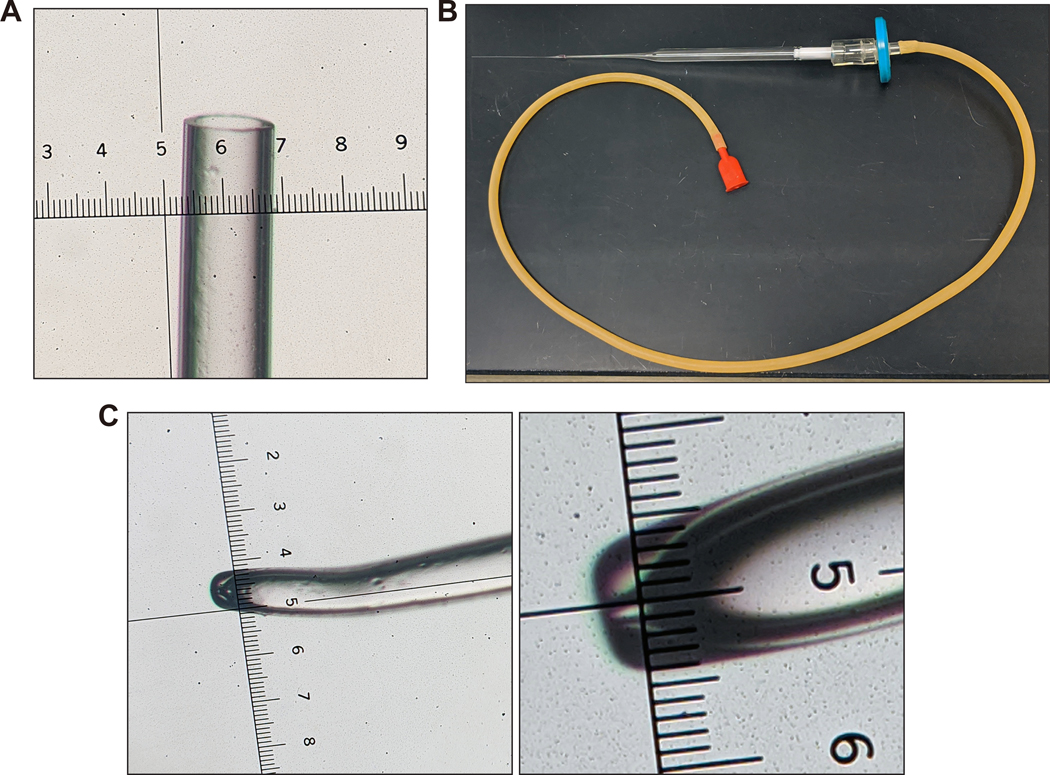
Figure 7. Transfer pipette setup for blastocyst collection and uterine transfer surgery of injected blastocysts and microinjection holding needle.

(A) The transfer pipettes are made by hand-pulling a cotton-plugged, 9-inch glass Pasteur pipette on a Bunsen burner (See Supplementary Video 3). The pipette is held in the flame of a Bunsen burner for about 5–7 s. The pipette is then removed from the heat and immediately pulled to about shoulder width apart. The end is then cut blunt so that the diameter is about 0.1–0.2 mm, equal to that of a blastocyst, as shown (smallest ticks on ruler in image are 10 μm apart; distance between each large tick is 0.1 mm). It is important that the end is blunt as jagged edges could damage the blastocyst. (B) Overview of the assembled transfer pipette setup. (C) The holding needle is prepared by pulling the borosilicate glass on the Bunsen burner and hand-cutting it to the desired size, then polishing and bending on the Microforge. The distance between the smallest ticks on ruler in left and right images is 10 μm. Note that microinjection holding needles can also be purchased commercially (for example, cat. no. MPH-MED-20, Origio Inc.). Images in (A) and (C) were taken with a Nikon SMZ U 1:10 stereo microscope with SMZ-U UW10xA/24 eyepiece containing a microruler.
