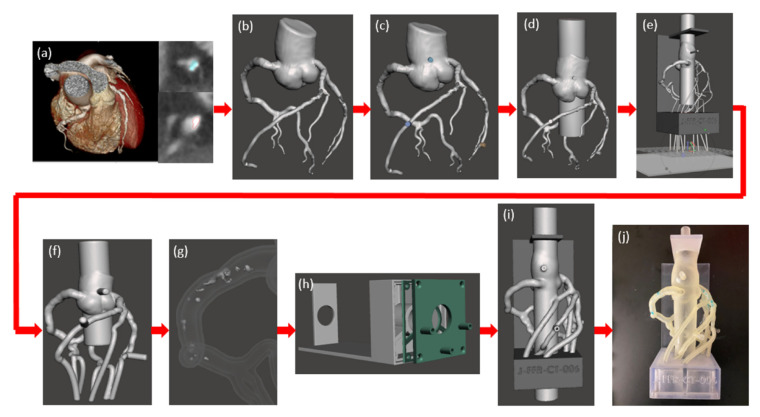
Figure 10.
Model development process of 3D printed coronary artery model and experimental setup. (a) Coronary CT angiography scans of the heart tissue and the three main coronary arteries were imported for analysis. The coronary arteries were segmented separately from the calcification using thresholding and contouring methods. (b) A stereolithographic file was exported from volume data and imported into Autodesk Meshmixer and segmentation errors were removed. (c) Cylindrical meshes were appended to the aortic root and the diseased coronary artery for future pressure sensor connections. (d) The aortic root was extended at both the inlet and the outlet. (e) Vessel branches were extended through each of the three chambers and a plane cut was administered at the vessel outlets for parallel ends. (f) A 2mm wall was generated and the lumen was hollowed out. (g) The calcification was solidified and subtracted from the vasculature. (h) A three-chamber support structure was imported into Autodesk Meshmixer. (i) Then model and support structure are aligned and ready to be printed. (j) The model is 3D printed, cleaned, and ready to be attached to a flow loop. Reprinted with permission under open access from Sommer et al. [64].

