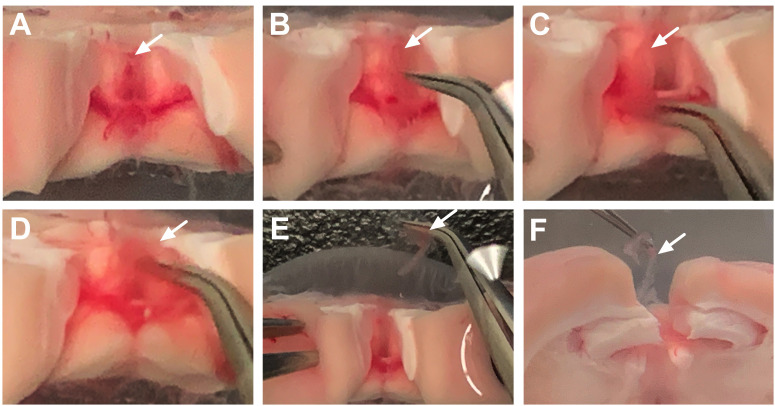
Figure 4. Step-by-step dissection of the third ventricle choroid plexus.
A. After separating the cortical tissue from each side, the third ventricle choroid plexus can be visualized directly on the midline. The white arrow denotes the location at the top of this choroid plexus tissue, which appears light pink in color. B. The forceps can be gently slid underneath the tissue to dissociate the choroid plexus (arrow) from the surrounding area. C. The choroid plexus tissue should now be movable within the third ventricle area. The white arrow identifies the floating tissue. D. Forceps are used to gently pull the choroid plexus from the ventricular cavity. The white arrow identifies the tissue being gently separated at the top of the brain chunk. E. After removal, the choroid plexus (arrow) should not be attached to any connective tissue. F. Side-view shows the removal of the third ventricle choroid plexus (arrow) from the midline.

