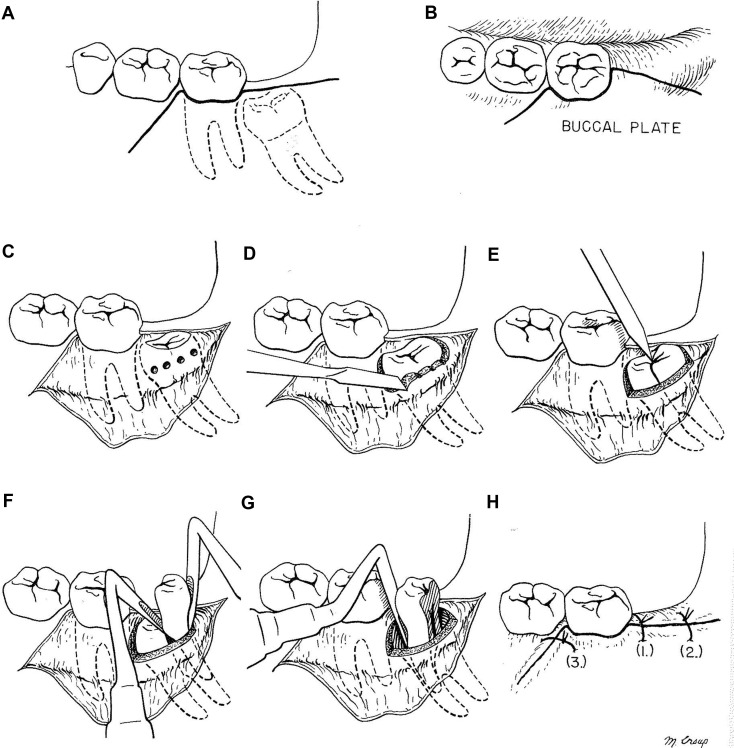
Figure 1.
Removal of class I, position C, mesioangular-impacted mandibular third molar. A, Standard flap design for extraction of mandibular third molars. B, Occlusal view of the flap design. The incision is kept on the buccal aspect to avoid the lingual nerve. C, After the flap is reflected, 4 pilot holes are drilled in the buccal cortical bone with a fissure bur. D, A sharp monobevel chisel is then used to remove buccal and distal bone around the crown of the impacted tooth. E, The crown and roots are then split with a sharp bibevel chisel. F, The distal aspect of the tooth is then removed using a No. 4 Apexo elevator placed into the split and a No. 5 Apexo elevator distally, using the buccal plate as a fulcrum to elevate the root anteriorly and superiorly. G, The mesial aspect of the tooth is then luxated with an elevator and removed. Only a small amount of bone had to be removed to deliver the impacted molar. H, Closure of the incision.
Reprinted from Oral and Maxillofacial Surgery, W. Harry Archer, Chapter 5 Impacted Teeth, page 274, (1975). This figure demonstrates the most recent illustrations of extracting impacted mandibular third molars with a chisel.4.

