
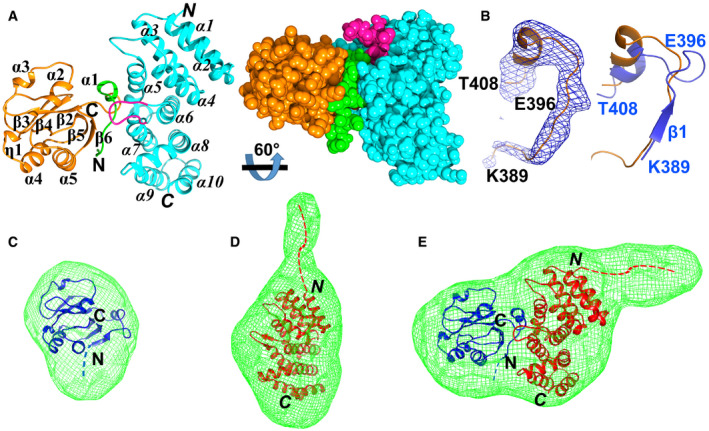
Figure 2. The overall structure of Mac2 in complex with Paip1M.
-
ALeft image: crystal structure of the complex between Mac2 (orange) and Paip1M (light blue). Mac2 possesses a three‐layer α/β/α fold. α1, 2, and 3, as well as η1 and α4, 5 form the two outside layers, whereas the β sheet (β3–β4‐β2–β5–β6) forms the central layer. The first 16 residues of Mac2 are shown in green. Paip1M comprises 10 helices within two layers. α1, 3, 5, 7, and 9 form one layer while α2, 4, 6, 8, and 10 form the other. The long loop region (Ile204–Thr212) is displayed in purple. The N and C termini of Mac2 and Paip1M (in italics) are marked. Right image: space‐filling representation showing the tight interaction between Mac2 and Paip1M.
- B
-
C–EThe crystal structures of Mac2 (C; blue), Paip1M (D; red; PDB entry: 3RK6, Lei et al, 2011), and Mac2:Paip1M (E) fit the shape of envelopes derived from the small‐angle X‐ray scattering (SAXS) data. The blue and red dashed lines indicate the four (GSHM) and seventeen (GSHMASMTGGQQMGRGS) artificial residues remaining from the expression vectors in Mac2 and Paip1M, resp.
Data information: Images A and C–E were prepared by using Chimera (Pettersen et al, 2004). Image B was prepared with PyMOL (Schrödinger; http://www.pymol.org).