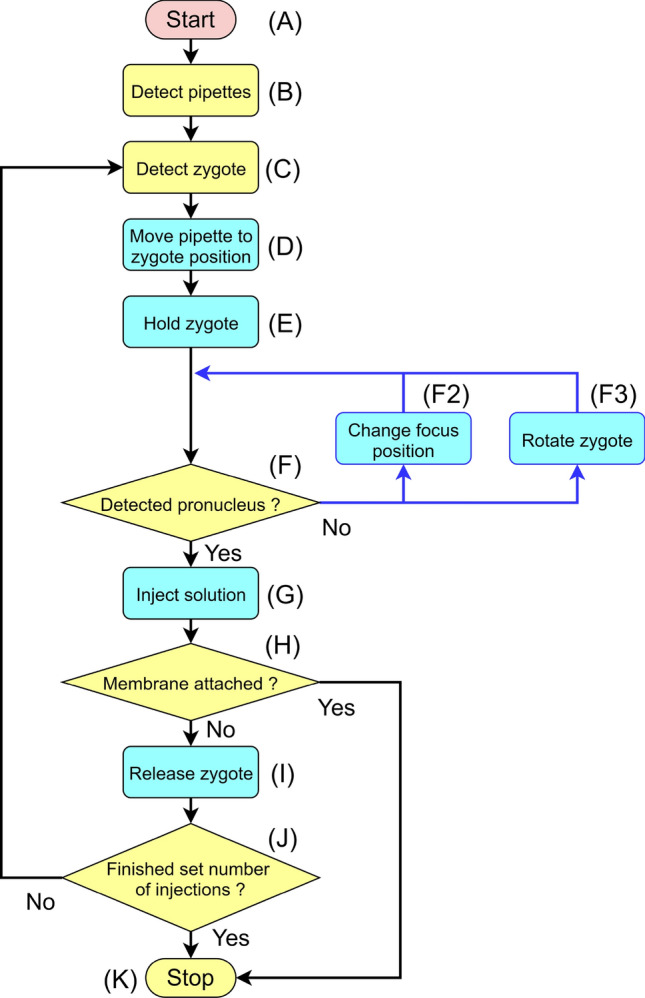
Figure 1.

Sequence required for fully automated solution injection. The sequence involves detection of the injection target and judgment of the work at each step (yellow), and then execution of the work (blue). (A) Command the controller (Computer) to start the fully automated operation. (B) Detect the coordinates of the current positions of the pipettes. (C) Detect the zygote position. (D) Move the pipette to the zygote position. (E) Hold the zygote in the holding pipette and release the zygote once to adjust the holding pressure. (F) Detect the current position of the pronucleus. If the pronucleus cannot be detected, change the height of the holding pipette while holding the zygote (F2), and then re-detect the pronucleus (F). If the pronucleus is not detected after performing sequence F2 multiple times, use an injection pipette to rotate the zygote vertically (F3) and then re-detect the pronucleus (F). (G) Insert the injection pipette into the pronucleus. (H) If, after injection of the solution, the nuclear membrane adheres to the injection pipette and does not come off, then stop the procedure(K). Remove the nuclear membrane from the injection pipette and restart (A). (I) Move the zygote to the release area and release the zygote (Fig. S3). (J) Check whether the injection has been performed on all zygotes. If an injection zygote remains that has not been injected, return to sequence C and continue injecting. (K) After injecting the solution into all available zygotes, stop the fully automated injection process.
