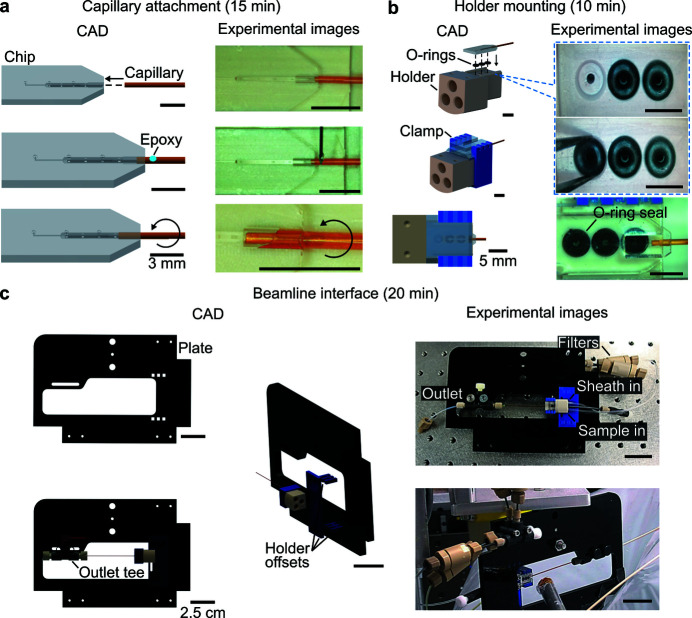
Figure 10.
CAD-renderings and images of the mixer and assembly process with approximate time estimates for each major step. (a) Assembly commenced with the attachment of a polyamide capillary (500 µm inner diameter, 554 µm outer diameter) to the chip with a ∼0.5 µl drop of 5 minute epoxy. (b) After the epoxy dried, the chip-capillary subassembly was mounted on the holder including inlet O-rings seals. The chip and O-rings were secured in the holder with a custom acrylic clamp. (c) Next, the holder was secured to the black acrylic holder plate. Shown here are three CAD renderings of the holder plate and associated holder offset and outlet tee components. The top right of (c) shows an image of the assembled device. The bottom right corner of (c) shows the mixer assembly at the X-ray beamline.

