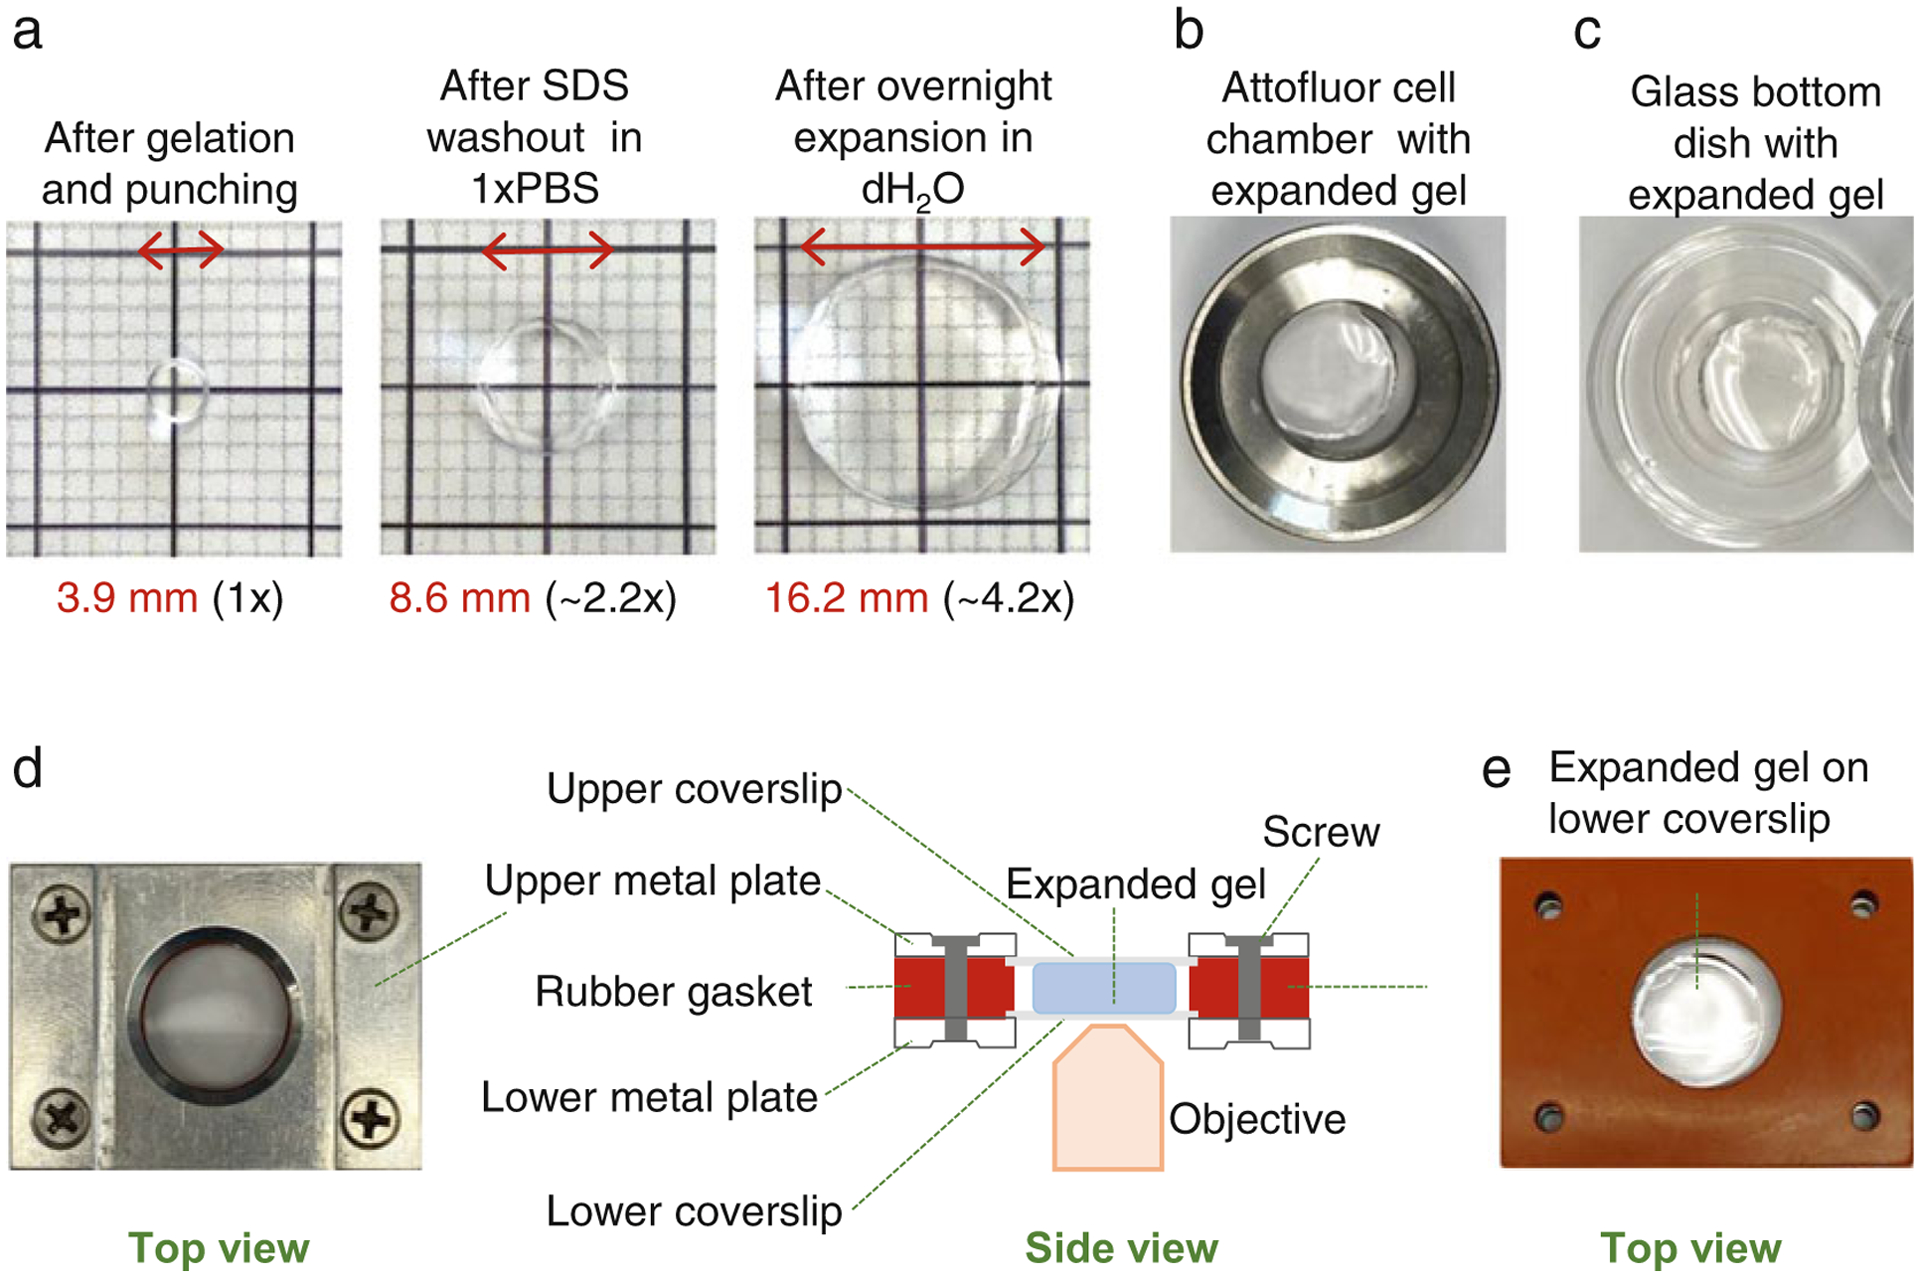
Fig. 5.

Expansion of immunolabelled samples and mounting of the samples for imaging. (a) Examples of gel punches at three different stages of the protocol. Left: After punching. Middle: after SDS wash-out. Right: after expansion in dH2O. (b) Attofluor chamber with an expanded punch. (c) A glass bottom dish with an expanded punch. (d) Left: A Rose chamber with an expanded punch and filled with dH2O assembled for imaging. Right: A scheme illustrates an assembled Rose chamber as viewed from the side (for more details see Subheading 3.9). Rose chambers are ideal for imaging of expanded gels because both surfaces of the gel can be accessible for imaging by flipping the chamber. This is particularly useful if there is ambiguity as to which surface contains a layer of cells. In addition, the gel is secured between two coverslips, which prevents moving of the gel during imaging. (e) Example of an expanded punch placed in the Rose chamber before addition of dH2O and closing of the chamber with the upper coverslip and the upper metal plate. Please note that the volume of polymerization solution (Subheading 3.3) needs to be adjusted to yield the gel thickness optimal for immunostaining and imaging. Alternatively, excess gel can be cut off using a scalpel
