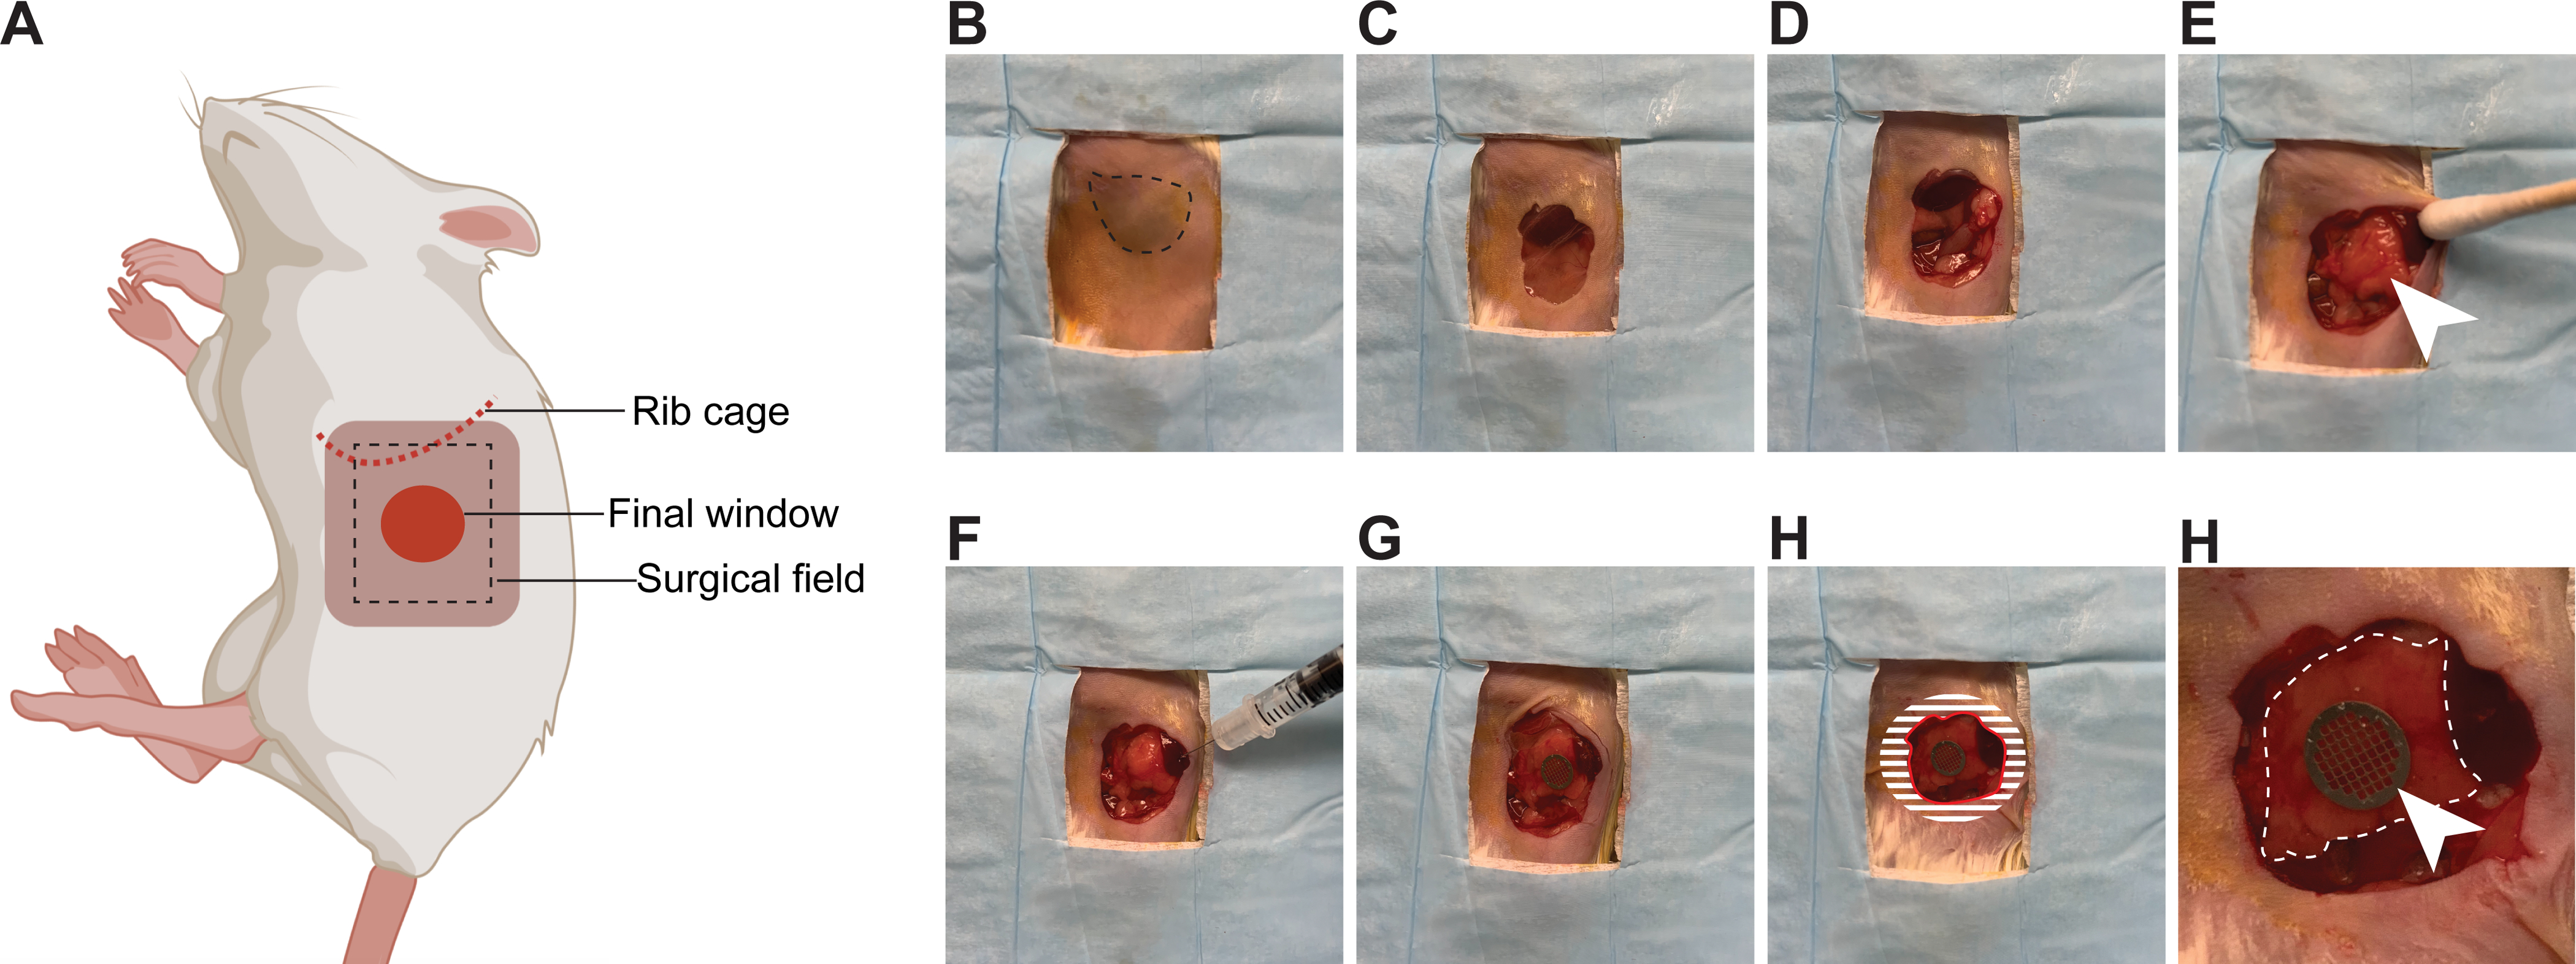
Figure 3: Surgical insertion of a window over the pancreas.

(A) The cartoon shows the anatomical location of structures relevant to the surgery. The black dashed box outlines the surgical field viewed in the pictures. (B) The mouse is placed in the right lateral decubitus position. The spleen is visible through the shaved skin (dashed line) (C) An incision is made starting 3 mm below the rib cage, and an approximately 1 cm2 section of skin is removed. (D) A slightly smaller section of the peritoneum is dissected. (E) The pancreas (white arrow head) is gently positioned with a moistened cotton swab in the location of the window. (F) Using a syringe, a small quantity of surgical adhesive is applied to the spleen, as well as the pancreas (away from the region to be imaged). (G) The window is positioned and held firmly against the pancreas until the adhesive has dried (2 min). The edges of the window are folded under the peritoneum and skin. (H) To secure the window to the peritoneum, adhesive is applied on the surface of the window corresponding to the shaded area, before pushing the peritoneum down on it and gluing it in place. The skin is similarly glued onto the peritoneum. A rim of glue is also deposited along the red line to prevent growth of the epithelium over the window. (I) At high magnification, the pancreas (outlined by a white dashed line) is visible through the window. The imaging area is marked by the grid embedded in the window (white arrow head).
