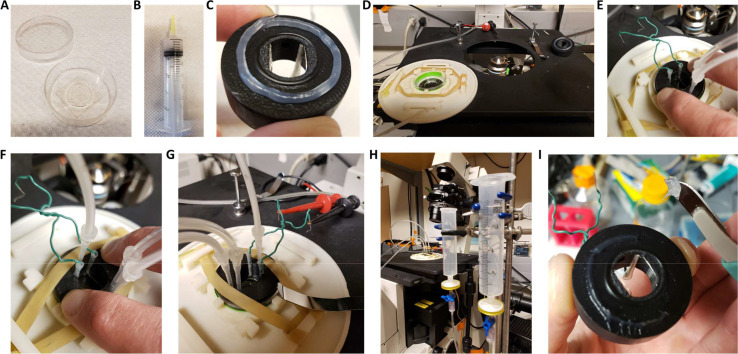
Appendix 1—figure 5. Setting up of the insert.
(A) 35 mm glass bottom dish with 14 mm coverslip, note the plastic area surrounding the coverslip that needs to be completely dry for the vacuum grease to create a good seal. (B) Vacuum grease loaded into a 30 ml syringe completed with a cut pipet tip. (C) Grease applied to the bottom of the insert. (D) Dish setup in the holder with the insert ready to be installed. (E) Insert with perfusion lines installed, keep pressure on the insert to maintain a good seal. (F) Vacuum line installed and rubber band securing the insert, after this step it is no longer necessary to keep pressure on the insert. (G) Dish older with insert installed on the optics and electrodes connected to the alligator test clips. (H) View of the whole system in place. (I) After removing the insert use a scalped to remove the excess grease for the bottom of the insert, finish cleaning with a kimwipe.

