Abstract
Dental photography is now an excellent tool that plays a crucial role in dentistry as it helps in documenting and analyzing the oral conditions of patients. Photography provides a visual representation of the teeth, gums, and other oral structures, which aids in diagnosis, treatment planning, and monitoring the progress of treatment. Therefore, it is essential for dental professionals to understand the importance of dental photography and incorporate photography it into regular practice. The purpose of this paper is to provide emphasis and elucidate the path of dental photography easier for dental student and practitioner.
Keywords: Dental, esthetic, extraoral, intraoral, photography
INTRODUCTION
The dexterity of capturing light with a camera, usually through a film or digital sensor, to create an image is referred to as photography. Without a doubt, photography ranks among the most ground-breaking discoveries in human history. Today, photography is ubiquitary in every sphere of human life from scientific inquiry to leisure pursuits, from historical record-keeping to the conception of breath-taking works of visual art; photography has become an integral part of modern life.
WHAT PHOTOGRAPHY LITERALLY MEANS?
The term Photography was coined from the Greek word phos, (genitive: Phōtós) meaning “light,” and graphê meaning “drawing or writing.” Photography is a beautiful culmination of art and technology. The artistic side of photography involves thinking creatively and pursuing a personal vision and the technical aspect includes one’s technique and tools.[1]
BRIEF HISTORY
Photography assimilates various technological advances about perceiving and capturing images. The discovery of the camera obscura, a large box with a tiny hole (“dark chamber” in Latin), created an image on one side and an inverted image on the other. While technology has changed, the purpose has not. The first dentistry school with a photography gallery was founded by dentist-turned-photographer Alexander Wolcott (1804–1844).
Later (1850–1870), roll film, flash, through-the-lens (TTL) metering, and instant image creation were added. After 1970, digital cameras and smartphones were introduced. Mirrorless cameras appeared in 2010. Charged couple device (CCD) is now replaced with photographic film.[2]
ROLE OF PHOTOGRAPHY IN DENTISTRY
Technical literature and reports in everyday practice show its importance in modern dentistry for documenting dental treatment, communicating between the dentist, patient, and dental technician. It is also used for self-checking (controlling) results, illustrating lectures and publications, conceptualizing efficient marketing, and achieving electronic teledental connections. It simplifies, speeds up, and improves dental treatment documentation, patient education, and clinical studies.
About 3.6 billion people use their phones to access the internet. Due to the high number of mobile phone users on social media, dentists can utilize dental photos to attract and encourage dental treatment through digital marketing.[3,4]
ARMAMENTARIUM
Extraoral accessories
Compact and digital single lens reflex (DSLR) cameras are photographic cameras. Compact cameras work well for extraoral images but poorly intraorally. Obtaining intraoral details, especially in the posterior, is limited without extra devices. DSLR cameras are best suited for medical and dental photography.[5,6,7]
The component parts of a DSLR camera dedicated to dental photography are Figure 1:
Figure 1.
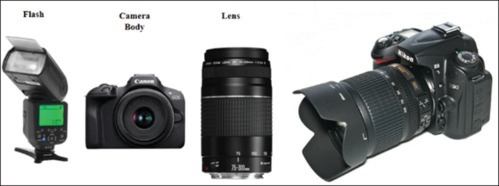
Parts of DSLR camera
The camera body
Made of high-grade plastic or metal, this holds all the other parts together as well as provides protection to the delicate internal parts of the camera.[8]
The lens
Lens is the eye of single-lens reflex camera. The vast majority of the photos taken in the dental office are macro photos, so they naturally require macro lenses.
The 100 mm and 105 mm macro lenses are best suited for dental photography.[6]
The flash
Flashes are an integral part of a camera [Figure 2]. It is a light sourcing part/device that produces flash of very bright light and capture pictures even in dark areas. There are mainly three type of flashes commonly used in dentistry [Table 1]. For surgery, a ring flash is the top choice but it has limitations for documenting prosthetic procedures as it acts as a single source of light which produces reflected image of anterior teeth so for intraoral dual flash system is best suited.[9]
Figure 2.
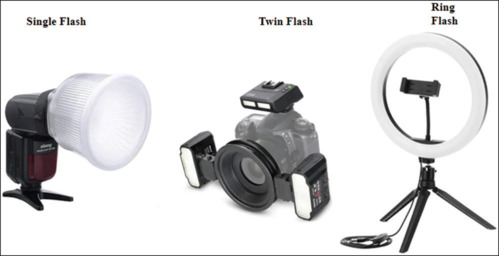
Different types of flashes
Table 1.
Types of flashes and their applications in dental photography
| Flash type | Use | Advantages and disadvantages | ||
|---|---|---|---|---|
| Single point | To capture anterior teeth (a small segment) | It casts a shadow, so the contour of anterior teeth can be readily appreciated in the photographs Not recommended for complete arch[10] |
||
| Ring flash | To capture complete arch | Not for anterior teeth photography Emits too much light, causes a flat and bland (due to the absence of shadow) captured image |
||
| Twin flash | For complete arch capture Can be used at different angulations. (45°; one on each side is recommended) |
The second flash is used to cover the shadow whichis created by using a single-point flash |
This light can be modified by reflectors, blocking, and diffusers.
Blocking light
Blocking a light with a card eliminates the light from the setup. This is useful in a bilateral twin flash setup, where unilateral illumination is required to create shadows on the opposite side of the main flash.[11]
Diffuser
Diffuser is used in front of a nonflash studio light to soften the light on the scene being shot; such filters are used in still photography, film lighting, and stage lighting [Figure 3].[8]
Figure 3.
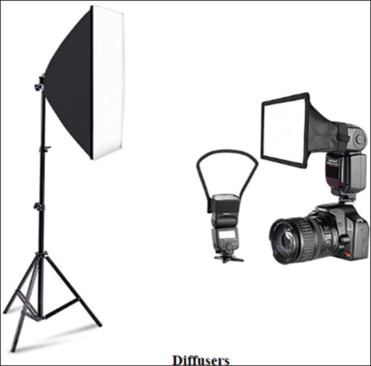
Light Diffusers
Reflectors
Reflected light is great for documenting dentine shade and characterizations and removing undesirable halations or highlights from highly reflective surfaces [Figure 4]. Few types of dental reflectors are available, mainly art card with varied reflective surfaces that may be cut to size and discarded. In the dental laboratory, custom-made reflectors help photograph casts, wax-ups.[12]
Figure 4.
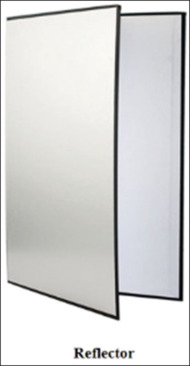
Reflector
Tripod stand
A tripod is a three-legged stand designed to support a camera. Cameras are mounted on a tripod, also referred to as “sticks,” for stability [Figure 5].
Figure 5.
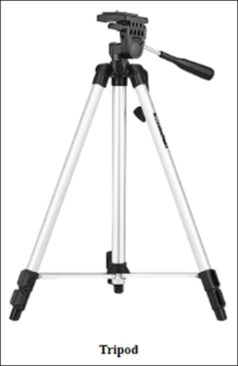
Tripod stand
In still photography, tripods allow photographers to use slower shutter speeds for long exposure images while reducing the amount of camera shake.[12]
Intraoral accessories
Accessories for dental photography, such as retractors, mirrors, and contrasters, should be autoclavable as they come into contact with the patient’s oral cavity. These tools aid in capturing improved pictures for dental purposes.[10]
Retractors
They are utilized to lift the lips away and increase the visibility. They can be made of plastic or metal. Plastic retractors are more comfortable for the patients. There are two primary types: self-retracting retractors and single-sided retractors, each available in different shapes and sizes [Figure 6];
Figure 6.
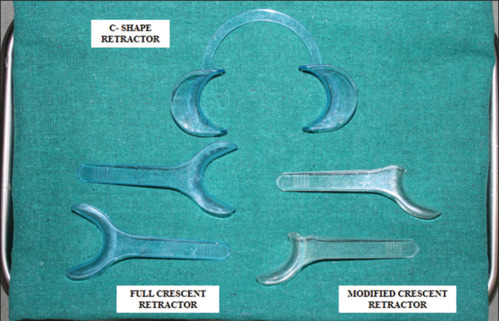
Intraoral retractors
Mirror
Mirrors are usually made of highly reflecting metal or glass. Surface coating type affects reflection percentage. Chromium coatings reflect 65% of light, rhodium 75%, titanium 75%, and ultrabright dielectric coatings reflect 95%. Commonly used and cheap ones are chromium-coated mirrors. Rhodium-coated glass mirrors, front-silvered, long-handled is ideal tool for clinical photography [Figure 7].[13]
Figure 7.
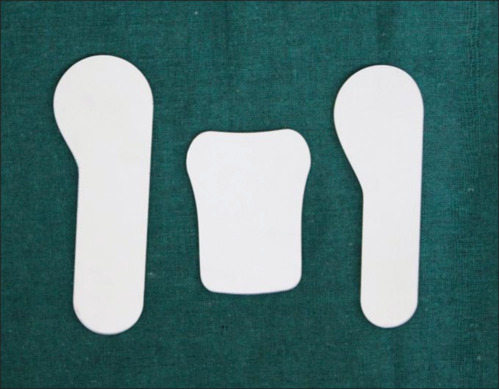
Intraoral mirror
Contrasters
Contrasters allow black-background teeth shots. Black anodized aluminum or metal plates wrapped in black silicone are used. Silicone coated contrasters are recommended as it is more durable, scratch-resistant and patient friendly [Figure 8].[13]
Figure 8.
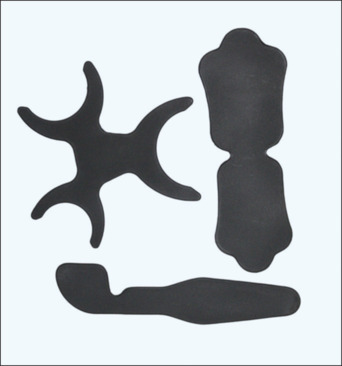
Black contraster with silicone rubber surface
Positioning of intraoral mirrors, contraster and retractors for anterior teeth view [Figure 9], lateral occlusion view [Figure 10] and for full arch occlusal view [Figure 11].
Figure 9.
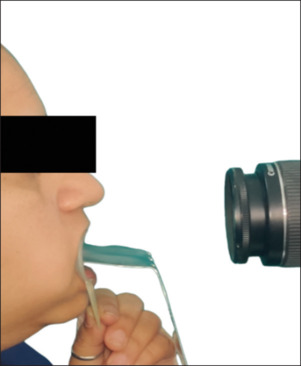
Positioning of the anterior contraster for shooting upper front teeth. The axis of the lens is perpendicular to the front teeth
Figure 10.
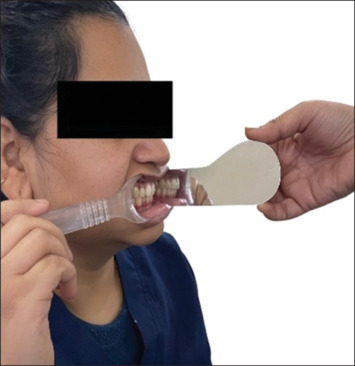
Positioning of the buccal mirror and retractor for a lateral/buccal view
Figure 11.
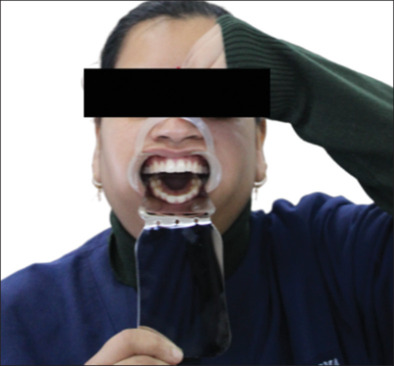
Positioning the occlusal mirror for an upper occlusal arch photo. The camera axis is at a 45° angle to the surface of the mirror
Setting of camera
Before the image capturing, dry all teeth involved, provide suction, and control mirror fog by gently blowing a light stream of air across the mirror with help of dental assistant (mirrors can be prewarmed which can prevent fogging of mirror for longer time) [Table 2].[13,14]
Table 2.
Basic setting for camera
| Camera setting mode | Intraoral | Extraoral | ||
|---|---|---|---|---|
| Shutter speed | 1/125–200 | 1/125–200 | ||
| Aperture (f/stop) | f/20–22–f/32 | f/8–10 | ||
| ISO | 100–200 | 100–200 | ||
| Magnification | 1:2 or 1:3 | 1:10 |
ISO: International Standards Organization
Shutter speed
Shutter speed refers to how long the camera’s shutter remains open when taking a photo, and it controls the amount of time that we capture light for. Faster the shutter speed more darker the image due to less exposure while slower the speed produces more blur image [Figure 12].[14]
Figure 12.
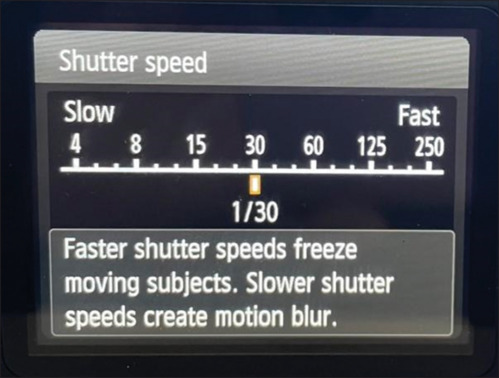
Shutter speed
Aperture
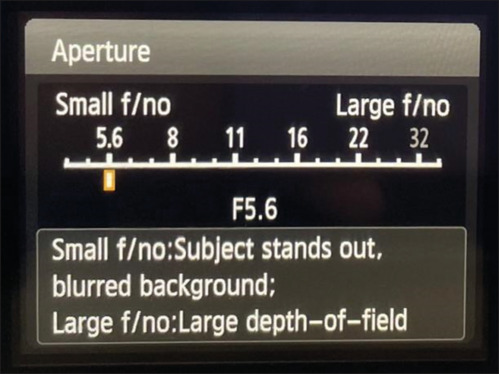
The aperture is the opening in the lens that allows light to pass from the subject to the film [Figure 13].[15]
Figure 13.
Aperture
Film International Standards Organization number
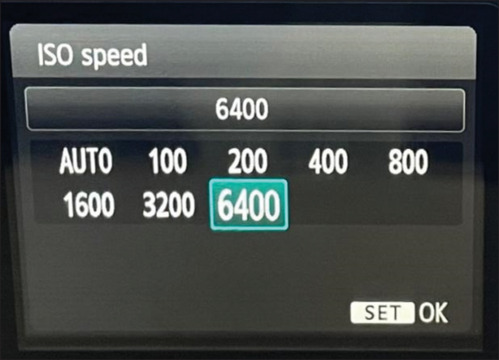
The International Standards Organization (ISO) number of a film refers to its speed, which indicates its sensitivity to light. A higher ISO rating means that the film is more sensitive to light, requiring less exposure to create an image [Figure 14].[16]
Figure 14.
International standards organization speed
Reproduction ratio/magnification ratio
It is the ratio of the size of the image projected on the sensor to the object size.[17]
Exposure
Exposure in photography pertains to the amount of light that enters the camera lens and reaches the film or sensor.[17]
Depth of Field
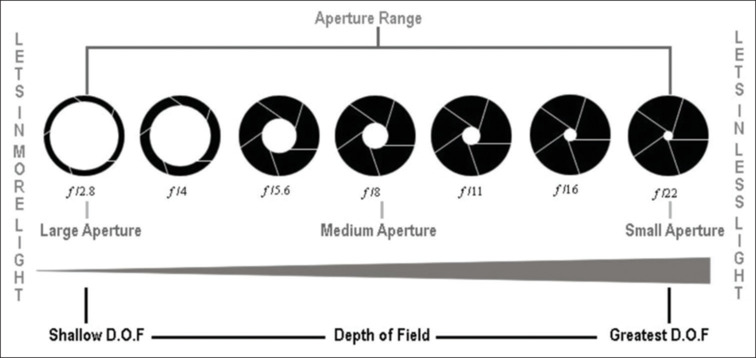
The depth of field (clarity) is the zone within a photo that appears acceptably sharp and in focus.
Aperture size and photographic distance inversely proportional to depth of field. Hence, the clarity of image increases with decrease in aperture size and image distance [Figure 15].[15]
Figure 15.
Relation of aperture with depth of field
Other parameters
Light
Light plays a crucial role in photography, its source can be natural day light or can be an electronic flash. Natural ambient light is usually inadequate to illuminate all the dark areas in most intraoral photographic situations. Therefore, a supplemental electronic flash source is necessary. This electronic flash system includes point flash, ring flash, and twin flash system [Figure 15].[11]
White balance
White balance impacts the camera color cast response. If photos were taken with an electronic flash, the white balance on the DSLR should be changed to flash mode. Setting it to incandescent or fluorescent light mode would generate an artificial appearance[11]
Sharpness
It refers to an image’s overall clarity in terms of contrast and focus. The focusing plane or area can be adjusted to modify the clarity of the image. In dental photography, for better clarity of image, certain areas are designated for different views [Table 3]:[9]
Table 3.
Represents the area to be focus while capturing the intraoral Images
| Views | Focusing area | |
|---|---|---|
| Full arch | Maxillary canine | |
| Occlusal view | Premolar | |
| Maxillary anterior | Lateral incisor |
Saturation
Saturation means the intensity or vibrancy of colors in an image. Lowering the saturation can create a calming atmosphere, while increasing it enhances the vividness of the scene. To achieve a close-to-natural color reproduction, it should be set to normal mode[12]
Contrast
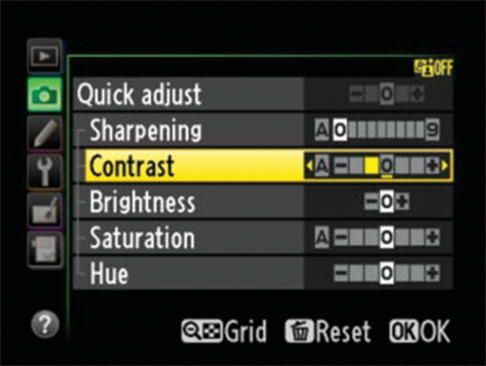
Set the contrast to negative (low), as increasing it may result in mid-tone color burn-out [Figure 16].[8]
Figure 16.
Setting of camera
Composition
The composition refers to the placement and arrangement of objects within the frame to guide the viewer’s attention toward the most captivating or important part of the image.[11]
According to the rule of thirds, dividing the frame into nine grids with four intersections and placing the subject at any of them is attractive. When appropriate, use landscape and portrait orientations to fill the frame with the topic. Amazing outcomes can be obtained by utilizing empty/negative space in an image.[12]
PHOTOGRAPHING A RADIOGRAPH
Radiographs consist of white and black areas so a viewer box is used for detailed visibility of X-rays. The conventional viewer box is composed of 20 watt two fluorescent tubes but at present advanced led X-ray illuminator are available that incorporates automatic film activation and variable brightness control.[18]
To capture the radiograph camera should be placed at 20 cm [Figure 17]. To ensure optimal results, it is recommended to set the exposure at either 1/60th or 1/4 of a second when capturing radiographic photos. In addition, placing the film on a white background of a blank PowerPoint presentation can offer sufficient illumination and the appropriate size for the images [Figure 18].[19]
Figure 17.
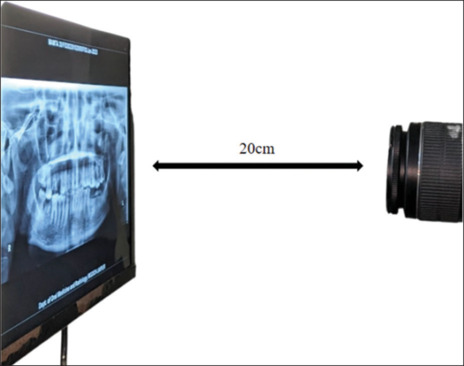
Placement of camera 20 cm at the level of radiograph or viwer box, so as to enable shooting perpendicular to radiograph
Figure 18.
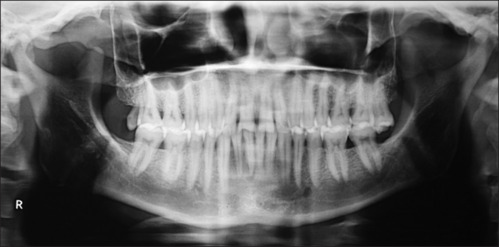
Captured image of OPG (orthopantogram) digital single lens reflex camera
TABLE-TOP PHOTOGRAPHY
Also referred to as still-life photography, consists of photographing a finished prosthesis to reproduce the texture and dimensionality of the object. Camera setting should be set at lower ISO film (100–200) with an aperture of f/16 or f/22. Plain and simple background is recommended to avoid distractions.[12]
In case of white background, the camera meter will underexpose the picture (as white background reflects more light). To compensate, switch to manual mode and simply overexpose by lowering the shutter speed by one stop.[12]
With dark background reverse happens. The camera meter overexpose the picture due to darker background. So switch to manual mode and underexpose the picture by lowering the shutter speed by one stop.[20]
WHITE AND BLACK BACKGROUND
White background
Single flash and round lens reflector is needed with the patient must be positioned in front of the soft box and camera in front of their patient from his lateral side. It utilizes close-up settings. Maintain a distance of approximately 20–30 cm between the soft box and the patient’s lips.[21]
Black background
Single flash and round lens reflector, position the patient at a 45° angle in front of the photographer and flash in front of them. Ensure that there is at least 3 m of free space behind the patient without any walls, objects, or people. Use close-up or intra-oral settings for best results.[12,20]
MICROPHOTOGRAPHY AND VIDEOGRAPHY USING A DENTAL OPERATING MICROSCOPE
Microscopic image documentation can be obtained using either a still camera (e.g., 35 mm film or CCD camera) or a video camera. Still images can also be obtained from a video stream by selecting individual frame.[22]
Digital videos camera can be mounted on an operating microscope using: beam-splitter, dual-iris diaphragm, and camera adapter. Leica is the only manufacturer currently that offers a built-in camera/video.[22]
SHADE SELECTION WITH DIGITAL CAMERA
Digital cameras can provide precise illustrations of what is required in the prosthesis and can be a perfect solution to fill the communication gap between the dental and a laboratory technician.[12]
Procedure
Perform shade selection procedure conventionally
Place the shade tab near the tooth with a gray card next to it [Figure 19]
Adjust the settings (exposure and white balance) of the camera and click a picture of the tooth, shade tab (showing the shade name), and the gray card [Figure 20]
Adjust the settings again and retake the photographs until the image’s clicked matches the color and exposure of the tooth, shade guide tab, and gray card as seen by the naked eye. The final image is then sent to the laboratory[12]
Additional black and white cards may be incorporated into the photographs which would help the laboratory technicians adjust their monitors. This is done by adjusting the settings of their monitors to match the black, white, and gray cards to adequately view the image according to the intended settings[11]
Image editing software can be then used to identify the shade tab that possess the color closest to the tooth used for shade selection.
Figure 19.
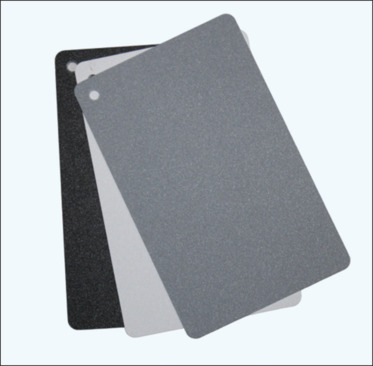
Digital white black neutral gray color calibration card
Figure 20.
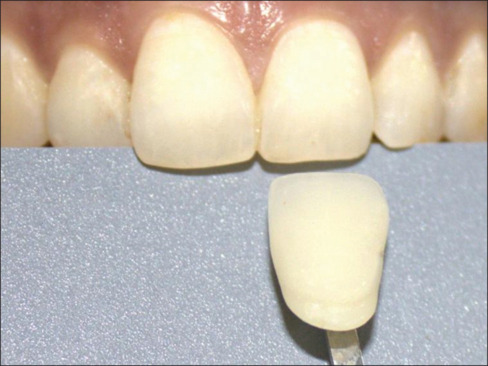
Shade selection using neutral gray card
Adobe Photoshop (Creative Cloud), Picasa, Dentrix Image, Image Fx, Visora, Elements, Thumbs PlusPaint Shop Pro (Coral).[8]
Smartphone dental photography
The smartphone is an advantageous option due to its smaller size, lighter weight, lower cost, user-friendly interface, and ability to perform multiple tasks. Capturing high-quality clinical photographs is difficult to achieve but can produce an acceptable clinical image.[21]
Mobile camera setting suggested in narrative review by Shaharul et al.[23] concluded that mobile camera should be set to manual shooting mode. Adobe Lightroom (third party app) can be used if in case manual mode is absent in smartphone. Shutter speed should be set faster than 1/100 s with a high aperture value and lower ISO as it provides better depth of field in intraoral captures.
The smartphone flashes can diminish the surface textures of enamel or ceramic prosthesis. Attachable lenses, readily accessible in the market, can be mounted in front of the camera lens to achieve the desired effect.[21]
Smartphones nowadays come with various lenses that have different focal lengths. To avoid zooming in further, one can choose the telephoto lens with the greatest focal length. Once you have selected the telephoto lens, move the phone closer to the patient until their image fills the frame.
Smile Mobile dental photography(MDP) frame is another affordable luxury in smartphone lighting. The Smile Lite MDP device offers the functionality of a ring flash, twin flashes, diffusers, and a polarizer. By combining these various lighting options, it enables the capture of unique and innovative dental photographs.[24]
POST IMAGE PROCESSING
Once the image is captured, it is physically transferred into computer-based software via a wireless network or USB. Images can be saved in different formats including raw, jpeg, tiff formats.
Correcting orientation, exposure, laterally inverting and cropping can be done in-camera, using camera-specific software, or through photo-editing software like Adobe® PhotoShop.
In clinical dentistry, it is fraudulent to engage in focal, fixed point or spot editing. This includes seemingly innocent changes such as dust spot removal, cropping, rotating, resizing or red eye elimination. Therefore, it is crucial to capture the photograph correctly during the initial shoot.[25,26]
CONCLUSION
The practice of dentistry has been transformed by technological advancements in the photographic process. Today’s clinicians must combine traditional photographic principles with modern camera systems and computer software technology to provide the best possible care for their patients. This shift toward a contemporary photographic process is changing the way clinicians diagnose, treat, and communicate with both patients and colleagues.[27]
Financial support and sponsorship
Nil.
Conflicts of interest
There are no conflicts of interest.
REFERENCES
- 1.Patel C. An overview on dental photography. Int J Dent Health Sci. 2016;3:581–9. [Google Scholar]
- 2.Wander P. A history of Dental Photography. Dental Historian. 2017;62:64–9. [Google Scholar]
- 3.Dragan M, Lidija M. Importance of digital dental photography in the practice of dentistry. Acta Fac Med Naissensis. 2010;27:75–9. [Google Scholar]
- 4.Christensen GJ. Important clinical uses for digital photography. J Am Dent Assoc. 2005;136:77–9. doi: 10.14219/jada.archive.2005.0030. [DOI] [PubMed] [Google Scholar]
- 5.Antar F, Zebouni E. Comparative review of DSLR cameras and smartphones in dental photography: Indications and limitations. Int Arab J Dent. 2018;9:107–115. [Google Scholar]
- 6.Ahmad I. Digital dental photography. Part 4: Choosing a camera. Br Dent J. 2009;206:575–81. doi: 10.1038/sj.bdj.2009.476. [DOI] [PubMed] [Google Scholar]
- 7.Nair AG, Santhanam A. Clinical photography for periorbital and facial aesthetic practice. J Cutan Aesthet Surg. 2016;9:115–21. doi: 10.4103/0974-2077.184047. [DOI] [PMC free article] [PubMed] [Google Scholar]
- 8.Vyas MB. India: Jaypee Brothers Medical Publishers; 2008. Clinical Photography in Dentistry. [Google Scholar]
- 9.Miro AJ. Choai I. Digital dental photography: An essential of cosmetic dentistry. J Cosmet Dent. 2020;36:22–31. [Google Scholar]
- 10.Chmielewski K. Great Britain: Quintessence Publishing Co., Ltd; 2018. Clinician Photography Manual; pp. 1–36. [Google Scholar]
- 11.Ahmad I. Digital dental photography. Part 5: Lighting. Br Dent J. 2009;207:13–8. doi: 10.1038/sj.bdj.2009.558. [DOI] [PubMed] [Google Scholar]
- 12.Bengel W. London: Quintessence; 2006. Mastering Digital Dental Photography. Available from: https://www.scribd.com/document/332290892/MASTERING-Digital-Dental-Photography-pdf) [Last accessed on 2023 Mar 24] [Google Scholar]
- 13.Sreevatsan R, Philip K. Digital photography in general and clinical dentistry-technical aspects and accessories. Int Dent J Stud Res. 2015;3:17–24. [Google Scholar]
- 14.Eswaran MA, Priya G, Brighton MA. Digital dental photography-a modern revolution. Indian J Forensic Med Toxicol. 2021;15:2742–50. [Google Scholar]
- 15.Hedge M, sodvadia B. Photography in dentistry: A perspective. J Otolaryngol ENT Res. 2020;12:161–165. [Google Scholar]
- 16.Clark JR. Digital photography. J Esthet Restor Dent. 2004;16:147–8. doi: 10.1111/j.1708-8240.2004.tb00025.x. [DOI] [PubMed] [Google Scholar]
- 17.Laws R. The author’s guide to controlling the photograph. J Prosthet Dent. 2001;85:213–8. doi: 10.1067/mpr.2001.115085. [DOI] [PubMed] [Google Scholar]
- 18.Vyas MB, Hantodkar NV. Photographing a radiograph: A simple alternative-short communication. J Indian Acad Oral Med Radiol. 2011;23:80. [Google Scholar]
- 19.Manjunath SG, Raju Raghavendra T, Sowmya K, Jayalaksshmi K. Photography in clinical dentistry. A review. Int J Dent Clin. 2011;3:40–3. [Google Scholar]
- 20.Fahim R, Thakur R. Digital dental photography: The guidelines for a practical approach. TMU J Dent. 2014;1:106–12. [Google Scholar]
- 21.Manayedath AC, Pujar M. Digital dental photography – The tool of necessity. J Restor Dent Endod. 2021;1:36–40. [Google Scholar]
- 22.Behle C. Photography and the operating microscope in dentistry. J Calif Dent Assoc. 2001;29:765–71. [PubMed] [Google Scholar]
- 23.Shahrul AI, Shukor N, Norman NH. Technique for orthodontic clinical photographs using a smartphone. Int J Dent. 2022;2022:1–5. doi: 10.1155/2022/2811684. [DOI] [PMC free article] [PubMed] [Google Scholar]
- 24.Hardan LS, Moussa C. Mobile dental photography: A simple technique for documentation and communication. Quintessence Int. 2020;51:510–8. doi: 10.3290/j.qi.a44365. [DOI] [PubMed] [Google Scholar]
- 25.Ahmad I. Digital dental photography. Part 9: Post-image capture processing. Br Dent J. 2009;207:203–9. doi: 10.1038/sj.bdj.2009.763. [DOI] [PubMed] [Google Scholar]
- 26.Ratcliff S. Key Biscayne, FL: The LD Pankey Dental Foundation; 2014. Digital Dental Photography: A Clinician’s Guide. [Google Scholar]
- 27.Shorey R, Moore K. Clinical digital photography: Implementation of clinical photography for everyday practice. J Calif Dent Assoc. 2009;37:179–83. [PubMed] [Google Scholar]


