

Summary
The mammalian oocyte develops within a complex of somatic cells known as a follicle, within which signals from the somatic cells regulate the oocyte, and signals from the oocyte regulate the somatic cells. Because isolation of the oocyte from the follicle disrupts these communication pathways, oocyte physiology is best studied within an intact follicle. Here we describe methods for quantitative microinjection of follicle-enclosed mouse oocytes, thus allowing the introduction of signaling molecules as well as optical probes into the oocyte within its physiological environment.
Keywords: microinjection, follicle-enclosed oocyte, mouse
1. Introduction
Intracellular microinjection allows the study of biochemical events within intact cells, but since most cells are interconnected to form complex tissues, many physiological processes could most ideally be investigated by microinjection of cells within intact tissues. This chapter describes methods for injecting mouse oocytes within the complex of surrounding somatic cells known as the follicle (Fig. 1). These methods allow the introduction of molecules into the oocyte specifically, without also applying them to the somatic cells, and without disassembling the structure that is needed for investigating physiological responses. These approaches can be used to introduce antibodies, signaling proteins, dominant negative proteins, buffers, or toxins that interfere with or mimic regulatory pathways (1–4), as well as optical probes to monitor signaling (3, 5, 6, 7). Because follicles can be cultured for multiple days, these methods also allow the time needed for protein turnover following injection of short interfering RNAs (8).
Fig. 1.

Developmental stages of mouse ovarian follicles. From ref. 10, © Society for Reproduction and Fertility (2005). Reproduced by permission.
The mouse ovarian follicle forms as a single layer of somatic cells around the oocyte; the somatic cells then proliferate to form multiple layers (Fig. 1). Follicles containing an oocyte that is surrounded by ~2–3 layers of somatic cells are referred to as “preantral”. As the follicle continues to grow, spaces form between the somatic cells, and the spaces fuse to form a single antrum. The antrum separates the ~1–3 layers of cumulus cells that directly surround the oocyte from the peripheral layers of mural granulosa cells; the cumulus mass is connected on one side to the mural cells. In response to follicle stimulating hormone (FSH), which stimulates follicle growth, receptors for luteinizing hormone (LH) are synthesized in the mural granulosa cells. Up to this point, the oocyte is arrested in meiotic prophase. Then in response to a surge of LH from the pituitary, meiosis resumes and progresses to metaphase II, and ovulation occurs. This chapter describes methods for microinjecting follicle-enclosed oocytes at both preantral and antral stages.
In our lab, we have used these methods to identify mechanisms by which meiotic arrest is maintained prior to the LH surge, and to investigate mechanisms by which LH stimulates meiotic resumption. Although cAMP in the oocyte had long been recognized as an inhibitor of meiotic progression (see refs 9, 10), it had been uncertain where and how this cAMP is generated. Microinjection of follicle-enclosed oocytes using the methods described here has contributed essential evidence that a constitutively active G-protein coupled receptor (GPR3) activates Gs in the oocyte, leading to cAMP production (1, 2, 4, 6, 7). Studies using these methods have also provided evidence that LH does not cause meiotic resumption by terminating GPR3/Gs signaling (7), or by stimulating Gi signaling (3). The recent development of optical probes for monitoring cAMP dynamics in living cells (11) should, in combination with these microinjection techniques, allow further studies of the role of cAMP in regulating meiotic progression within an intact follicle. More generally, these techniques provide a new approach that could be used to investigate many other aspects of the complex bidirectional communication between the oocyte and somatic cells (12, 13).
The following methods for injection of follicle-enclosed mouse oocytes are based on methods that were previously developed for microinjection of echinoderm oocytes (14–16). The follicle is placed between coverslips that compress it slightly, allowing the oocyte to be clearly visualized with a compound microscope (Fig. 2). The microinjection pipet is brought in horizontally, and contains mercury to allow precise control when pressure is applied through a screw-driven syringe. The pipet is front-loaded, and the volume injected is quantified by drawing up an equivalent volume of oil and then measuring the diameter of the expelled oil drop. These general methods have been described in detail in a recent chapter (16), which should be referred to for setting up the equipment, and for the basic procedures for injection. The present chapter explains how these techniques have been adapted for follicle-enclosed mouse oocytes.
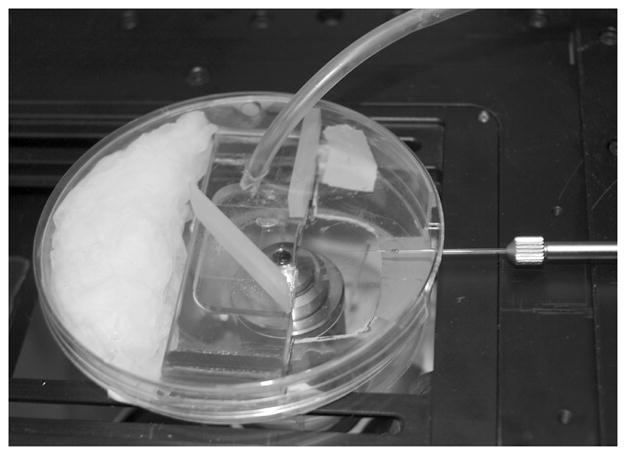
Fig. 2.

Microinjection of follicle-enclosed mouse oocytes. A. Diagram of the microinjection chamber and micropipet. B. Photograph of a plastic slide for assembling the injection chamber. C. Photograph of an antral follicle-enclosed oocyte as it appears in the injection chamber.
2. Materials
2.1. Supplies for dissection and culture of follicles
Mice. Follicles are most easily dissected from ovaries of prepubertal mice, 22–25 day old. We use BL/6 X SJL F1 mice (The Jackson Laboratory, #100012).
Equine chorionic gonadotropin (pregnant mare serum gonadotropin). From the National Hormone and Peptide Program (http://www.humc.edu/hormones/), or various commercial sources. Store single use aliquots (50 IU/ml, 500 μl) at −80°C.
MEMα (Invitrogen, #12000-022). We make this medium from powder, adding 25 mM NaHCO3, 75 μg/ml penicillin G, and 50 μg/ml streptomycin sulfate, and store at 4°C for up to 2 weeks. Add serum and other supplements on day of use.
Penicillin G (Sigma, #PEN-K). Store powder at room temperature.
Streptomycin sulfate (Sigma, #S-6501). Store powder at 4°C.
Fetal bovine serum (Invitrogen, #16000-044, or other suppliers). Store aliquots at −80°C, and then at 4°C for up to 2 weeks.
Insulin-transferrin-sodium selenite (Sigma, #I1884), dissolved according to the manufacturer’s instructions to make a 100X stock. Store aliquots at −80°C, and then at 4°C for up to 2 weeks.
Follicle stimulating hormone (ovine), from the National Hormone and Peptide Program. Store single use aliquots (10 μg/ml, 25 μl) at −80°C.
Steriflip sterile disposable vacuum filter units, 0.2 μm pore size, 50 ml volume (Millipore, #SCGP 005 25)
Miniforceps (Fine Science Tools, #11200-14)
Millicell culture plate inserts (Millipore, #PICMORG50)
Petri dishes (Falcon, #1008, 35 mm)
2.2. Equipment for microinjection
Stereoscope with an eyepiece micrometer (for dissection of follicles and assembly of injection chambers)
Vibration free table (a table with a steel plate supported by rubber spacers, or an air table)
Compound microscope with a 20X objective and focusable eyepieces with a micrometer reticle
Micromanipulator with X, Y, and Z controls
Horizontal micropipet puller
Screw-driven syringe connected to a micropipet holder by a piece of narrow tubing containing fluorocarbon oil (Sigma #F9880, Fluorinert FC-70)
Machined plastic slides for assembling the injection chamber (see Fig. 2B)
For further details, see ref. 16.
2.3. Equipment for temperature, humidity, and CO2 control
Warm air blower (Nevtek air stream incubator, #ASI400)
Electric thermometer (Physitemp Instruments, #BAT-12R, with an IT-18 temperature probe)
Fritted glass cylinder (Corning, #31770-500C, distributed by VWR Scientific Products)
Flowmeter (Gilmont, #GF-8321-2410, distributed by Barnant Company)
Translucent silicon rubber sheet (Reiss Manufacturing, Inc., 1/8″ thick)
Magnetic rubber sheet (Custom-Magnets.com)
2.4. Supplies for construction of mouth pipets for follicle transfer
Diamond knife (Fine Science Tools, #10100-00), or ceramic knife (Fine Science Tools, #10025-45)
Translucent silicon rubber sheet (Reiss Manufacturing, Inc., 1/16″ thick)
Polyethylene tubing (Clay Adams, #PE-60, internal diameter 0.76 mm)
Mouth pipet assembly (Sigma, #A5177-5EA), see Note 1.
Glass capillaries (Drummond Scientific, #9-000-1061, O.D. = 0.8 mm, I.D. = 0.6 mm)
Syringe filter (Fisher, #09-719C, 25 mm, 0.2 μm)
Glass capillaries (Drummond Scientific, #2-000-100, 100 μl calibrated pipets)
Sigmacote (Sigma, # SL2)
2.5. Supplies for construction and assembly of injection chambers
Coverslips, 22 mm square, #11/2. These should be cleaned before use (see ref. 16).
Diamond pencil. This is an ordinary diamond-tipped glass marker, not the “diamond knife” referred to in Subheading 2.4.1.
Clear flexible plastic ruler, to be used as a guide for cutting coverslips
Black Plexiglas work surface (from a machinist)
Double-sided tape (Scotch #137, previously called “double-stick” tape, office supply store)
Double-coated tape (Scotch #667, office supply store)
Small sharp scissors (Fine Science Tools, #14370-22, Moria 10.5 cm straight)
Silicone grease (Dow Corning high vacuum grease)
Silicon oil (Sigma, #DMPS-2X, dimethylpolysiloxane, 20 centistokes viscosity)
Valap (a 1:1:1 mixture of Vaseline, lanolin, and beeswax)
2.6. Supplies for fabrication of micropipets
Glass capillaries (Drummond Scientific #1-000-0500, 50 μl “microcaps”)
Mercury (Sigma-Aldrich, #215457)
10 μl syringe (Hamilton, #701N)
3. Methods
3.1. Dissection and culture of follicles
The procedures we use for follicle isolation and culture are based on those used in the lab of John Eppig (see ref. 17). 22–25 day old B6SJLF1 mice are either primed with 3–5 IU equine chorionic gonadotropin, 40–46 hrs prior to use, or are unprimed, depending on the particular experiment.
The culture medium used for follicle culture is MEMα (with NaHCO3 and antibiotics indicated above), supplemented with 5–10% fetal bovine serum. For experiments that require extended culture periods (overnight or longer), the medium is also supplemented with 50 μg/ml insulin, 5 μg/ml transferrin, and 5 ng/ml selenium (from the 100X stock referred to in Subheading 2.1.7), and 10 ng/ml ovine FSH (from the 1000X stock referred to in Subheading 2.1.8), and is filtered through a 0.2 μm filter. All media are equilibrated with 5% CO2 and 95% air.
To dissect follicles, the ovaries are removed and the bursa broken by grasping the ovary on either side using watchmaker’s forceps, one grasping the fat pad adjacent to the ovary, and the other the oviduct. The ovary pops out of the bursa as the forceps are gently pulled apart. Excess fat is trimmed from the ovaries, and the ovaries are placed into MEMα with supplements (2–3 ml in a 35 mm plastic Petri dish). Ovaries from primed animals are examined prior to follicle isolation to select only those that are well-primed (see Note 2).
Follicles are dissected from ovaries using a stereomicroscope and illuminated using transmitted light. The tools used are miniforceps and/or 30 gauge syringe needles. The combination used depends on personal preference; for example, some people prefer to use one forceps to hold the ovary while cutting the follicles using a needle, while others prefer to use two sets of forceps or two sets of needles. We first slice the ovary in half cross-wise; this yields two concave halves. A half-ovary is rotated such that the rounded part is at the top; many follicles, particularly large antral follicles, can be observed when the ovary half is in this orientation. By pushing down slightly on this top (trying to avoid popping follicles of the desired size), the ovary flattens out somewhat and some of the follicles become exposed at the periphery; these can be gently teased away from the ovary. Excess tissue remaining on the follicles can be removed gently with forceps or needles; squeezing the follicles should be avoided as much as possible, as large antral follicles are easily broken. The ovary can be cut again into several smaller pieces to expose more follicles. The number of follicles obtained per ovary depends on the individual ovary as well as the number of follicles that break during the dissection. On average, we obtain ~30 antral follicles from a primed mouse.
The best looking follicles are selected from the general pool, and 4–5 follicles are placed into the microinjection chamber. Criteria for selection are a relatively round shape without a slit through the granulosa cells or a break in the theca layer that surrounds the follicle, a visible cumulus-oocyte complex, optical clarity, and size. Follicles of equivalent appearance are set aside in a separate dish to be used for uninjected controls. Only follicles in which the nucleus is clearly discernible when the follicle is in the injection chamber are used for experiments. In our experience, almost all follicles contain such oocytes.
Following microinjection, the follicles are removed from the chamber and placed into fresh medium and incubated. The injected follicles are placed onto Millicell culture plate inserts in 35 mm Petri dishes containing 1.6 ml medium in the reservoir below the filter; we have found that this volume is ideal because it provides the follicles plenty of medium exchange from below the membrane, but not too much so that the Millicell floats, which can result in spillover onto the membrane. Follicles are placed onto the filters using a mouth-controlled pipet. Up to 10 follicles are placed on a single filter, by drawing them up in a minimal volume of medium and spotting them onto the filter. If follicles are to be cultured for several days, the medium is replaced daily by removing 1.2 ml of medium from the culture dish and replacing it with 1.2 ml of fresh medium. Follicles are incubated in a humidified incubator with 5% CO2 and 95% air, at 37°C.
3.2. Assembly of equipment for microinjection
Sources and assembly of this equipment are described in detail in ref. 16. See Note 3.
The microscope to be used for injection can be upright (Fig. 3A) or inverted (Fig. 3B). The microscopes we use have a focusable stage; this is convenient, but a fixed stage microscope can also be used. With the manipulator positioned on the right, the stage controls should be on the left (a “left-handed” stage), such that one hand can be used to operate the manipulator, and the other to operate the stage. We mount the manipulator on a magnetic base next to the microscope; a microscope with a narrow base is best, such that the manipulator is close to the microscope objective. A system with an upright microscope is easiest to set up; a Zeiss Axioskop works well (Fig. 3A).
An inverted microscope can also be used, although to bring in the horizontally held micropipet holder, it may be necessary to elevate the objective slightly such that the pipet holder does not contact the stage. We have used a Zeiss Axiovert 200, with a motorized stage (Fig. 3B); for this microscope, we needed to insert a threaded plastic spacer between the nosepiece and objective, to elevate the objective ~ 6 mm. This spacer was made by a machinist, but some microscope manufacturers sell spacers for their objectives. Because the Axiovert stage is higher than that of a small upright microscope, we also needed to mount the micromanipulator on top of two 8 cm high magnetic bases (see Fig. 3B), rather than on the single magnetic base used for the Axioskop (see Fig. 3A). The manipulator can also be mounted on the microscope body, as long as it is arranged to bring in the micropipet horizontally.
Fig. 3.

Equipment for microinjecting follicle-enclosed mouse oocytes. A. Upright microscope. B. Inverted microscope.
3.3. Assembly of equipment for temperature, humidity, and CO2 control
We have not found any deleterious effects of keeping the oocytes in a microinjection chamber at room temperature in air (vs a 5% CO2 environment) for a period of up to 30 minutes, and microinjection works equally well at room temperature or at 35°C.
For microinjection during imaging, we maintain the stage at 35°C and perfuse the slide with humidified 5% CO2 in air. Heating is provided by a warm air blower and monitored with an electric thermometer. 5% CO2 in air from a compressed gas cylinder is bubbled through a fritted glass cylinder in water, and flowed over the edge of the injection chamber through a hole in a cut-out 100 mm plastic Petri dish “incubator” that is placed around the injection chamber (Fig. 4). The injection chamber is held firmly in place by gluing on magnetic strips that match corresponding strips on the microscope stage. The flow rate is maintained at ~1 liter/min by use of a flowmeter. Baffles cut from a silicon rubber sheet are positioned on the slide to direct the gas over the open edge of the injection chamber, and wet Kimwipes inside the Petri dish maintain a moist environment (see Fig. 4). Under these conditions, the pH of the medium is maintained at a normal level, and evaporation is minimal during a 30 minute period.
Fig. 4.
Petri dish incubator for perfusing the chamber with 5% CO2/air during injection. The micropipet enters the chamber from the right, through a cut-out section of the Petri dish. Silicon rubber baffles direct the gas flow from the tube entering the dish from the upper right over the edge of the chamber.
3.4. Construction of mouth pipets for follicle transfer
Follicles can be transferred between dishes using a Pasteur pipet that has been fire-polished at the end. For transfer into and out of microinjection chambers and onto Millicell membranes, we use mouth-controlled pipets attached to Pyrex capillaries. We often silanize the pipets and capillaries, to minimize sticking of the follicles to the glass during transfer, but this is not essential (see Note 4).
In some cases the capillary is pulled with a micropipet puller, then scored using a diamond knife to a diameter that is slightly larger than the follicles. An ordinary diamond pencil is difficult to use for this purpose; we recommend an excellent, but fragile and expensive, diamond knife (see Subheading 2.4.1). A ceramic knife is an inexpensive alternative that also works quite well (see Subheading 2.4.1). When using these knives, lay the glass to be cut on a small silicon rubber “cutting board” (see Subheading 2.4.2), on the stage of a stereomicroscope with an eyepiece reticle. Score the glass, then break it by finger pressure or a tap with a forceps.
Mouth pipets can be constructed from polyethylene tubing (see Subheading 2.4.3), connected at one end to a plastic mouthpiece (see Subheading 2.4.4 and Note 1) and at the other end to a glass capillary (see Subheading 2.4.5). For a detailed description, see ref. 16.
An alternative is a preassembled mouth pipet consisting of latex tubing connected to a mouthpiece at one end, and at the other end to a silicone rubber piece into which the glass capillary is inserted (see Subheading 2.4.4 and Note 1). A syringe filter (see Subheading 2.4.6) may be attached between the latex tubing and the rubber piece, to help maintain a sterile environment; this also provides resistance so that finer control may be achieved. With this assembly, we use either the capillaries described above, or larger diameter, thicker wall capillaries (see Subheading 2.4.7) that are pulled out and cut to the desired diameter.
3.5. Construction and assembly of injection chambers
The chamber for holding the follicle during injection (Figs 2A and B) consists of a machined plastic slide, of the same width and length as a standard microscope slide (1″ × 3″), but ~6 mm in thickness, with a U-shaped cutout (Fig. 2B; see ref. 16). It is convenient to have a machinist make 10 or more of these reusable slides. Coverslips are attached to the upper and lower surfaces of the U-shaped cut-out, using silicon grease, forming a space ~2 mm in thickness that will be filled with ~400 μl of culture medium.
Prior to assembly of the chamber, double-sided tape is used to attach a smaller piece of coverslip to the full sized coverslip that will be closest to the objective (the top coverslip in the case of an upright microscope). This small piece of coverslip is positioned on the double-sided tape to form a ledge into which the follicles are placed using a mouth pipet (see below). The edge of the tape forms the back wall of the ledge, against which the follicles can be pushed during injection. For detailed diagrams of the injection chamber assembly, see ref. 16.
For preantral follicles (~140–180 μm in diameter), we use one layer of double-sided tape, resulting in a space between the coverslips that is ~100 μm in thickness; the compression of the follicle holds it firmly in place during injection, and improves visibility.
For antral follicles from unprimed mice (~300–400 μm in diameter), we use 2 layers of this tape, to form an ~200 μm thick space. For antral follicles from primed mice (~400–500 μm in diameter), 2 layers of double-sided tape can be used if the follicles are at the smaller end of the diameter range. For follicles that are at the larger end of the diameter range, we use 2 layers of double-sided tape, with one layer of “double-coated” tape sandwiched in between (see Note 5). Double-coated tape is slightly thinner than double-sided tape, so the combination results in a space of ~ 240 μm in thickness. The multilayer tape assembly is formed by stacking the 2 or 3 layers of tape, and then slicing them into small pieces with a small scissors. The scissors should be sharp in order to produce a clean edge.
If the injections are to be done at 35°C, some evaporation will inevitably occur. To minimize this problem, it is useful to position the front of the coverslip ledge ~4–5 mm back from the front of the full size coverslip. If the ledge is too far back, it is difficult to bring in the injection pipet without the pipet contacting the coverslips, but with finely tapered micropipets, a 4–5 mm distance is workable (see Note 6).
The coverslip/double stick tape chamber can also be used to hold isolated mouse oocytes for injection (see refs 6, 7, 18, and Note 7).
For use with an upright microscope, the coverslip assembly is mounted on the top surface of the plastic slide; for use with an inverted microscope, it is mounted on the bottom surface of the U-shaped cut-out (Fig. 2B). In either case, the ledge holding the follicles is positioned to face the reservoir of medium (Fig. 2A).
To assemble the chamber, the follicles are placed in the ledge before placing the coverslip assembly on the plastic support slide. For inserting preantral follicles in the ledge, the transfer pipet can be drawn out in a pipet puller and then cut with a diamond knife (see Subheading 3.4.2) to ~200 μm internal diameter. The follicles are deposited near the edge of the ledge. The pipet is used to apply suction at the far end of ledge, which helps to pull the follicles into the gap, and also to nudge the follicles into this space. For antral follicles, the internal diameter of the drawn out capillary should be ~400–500 μm. This slight taper makes it easier to apply suction and to push the follicles into the gap. It is not necessary to move the follicle completely into the gap at this stage; halfway is enough. Once the injection slide is assembled and placed on the compound microscope stage, the micropipet can be used to pull the follicle fully under the coverslip. Likewise, the micropipet can be used to remove the follicles from the ledge after injection.
The last step in assembling the chamber for microinjection is to make a loading capillary, containing the solution to be injected between columns of silicon oil (see ref. 16). Various buffers can be used for the injection solution; ionic strength does not appear to matter. For microinjection of mouse oocytes, where the pipet tips are generally smaller than for echinoderm oocytes, we use a somewhat less viscous silicon oil (20 centistokes) than previously described. The loading capillary is mounted on the injection slide using “Valap” (see Subheading 2.5.10).
3.6. Fabrication of micropipets
Micropipets are fabricated from glass capillaries (see Subheading 2.6.1, and ref. 16). The capillaries are often silanized (see Note 4), to prevent sticking of solutions to the inside wall of the micropipets; however, silanizing is not necessary when injecting solutions of small molecules. The glass is pulled in a horizontal puller to form micropipets, and an ~1 mm column of mercury is placed in the back of the pipet using a Hamilton syringe; pipets made in this way can be stored in a covered container for months (see ref. 16).
Just prior to use, each individual micropipet tip is broken slightly, such that its external diameter is ~1 μm. This is accomplished by gently tapping the micropipet tip against the face of the loading capillary (see ref. 16, and video at http://cell.uchc.edu/faculty/jaffe/documents/follinj.mov). The tip should be broken to the smallest diameter that still allows the injection solutions to be drawn up. The major cause of oocyte damage is pipet tips that are too large! If possible, try to break off the tip such that it has a slight bevel; the sharper the tip, the easier it is to insert it into the follicle and oocyte.
Bevelling of the pipet tip by touching it to a rotating surface covered with a fine abrasive paper (19, 20) is an alternative way to produce a sharp point with maximal surface area of the tip opening.
3.7 Injection procedure
The microinjection procedure described here is a modification of methods that have been developed for echinoderm oocytes (see ref. 16). Here, we provide details of the procedure as we have adapted it to be used for injecting follicle-enclosed mouse oocytes. Videos of this procedure can be viewed at http://www.jcb.org/cgi/content/full/jcb.200506194/DC1, and http://cell.uchc.edu/faculty/jaffe/documents/follinj.mov.
Because the basic setup is the same as that used for echinoderm or small frog oocytes, we recommend first practicing on these cells if they are available. If not, we suggest beginning with follicle-free mouse oocytes, or mouse oocytes within preantral follicles, as these follicles have fewer layers of surrounding cells and the oocyte is more optically clear. In addition, the survival rate for preantral follicle-enclosed oocytes is higher (~100%) than for oocytes within antral follicles (~50%). Once the basic method is mastered, then it is easier to move up to injecting oocytes within larger antral follicles.
This microinjection procedure is highly quantitative; see ref. 16 for details on calibration. The final concentration of an injected substance is based on an oocyte volume of 200 pl (~70–75 μm diameter), and the volumes injected typically range from 4 to 14 pl (2–7% of the cell volume), though volumes of up to 20 pl (10%) can be used.
Start by positioning the follicles within the injection chamber, using a micropipet. If the portion of the follicle containing the oocyte is not fully in the chamber, the follicle can be moved further in by using the injection pipet to either roll or drag it until the oocyte is completely under the coverslip. When antral follicles are used, it is often helpful to orient the follicle such that the antrum is closest to the injection pipet, with the oocyte near the tape at the back of the chamber; this helps the oocyte stay in place when the pipet pushes against it. It is also useful to position the follicle such that the oocyte nucleus is not near the site where the pipet will enter the oocyte.
After positioning the follicles, insert a new micropipet into the pipet holder, and break the tip slightly (see Subheading 3.6.2). To load the pipet, the mercury is first pushed to the tip. A column of silicon oil from the loading capillary (see ref. 16) is drawn into the pipet to separate the mercury from the injection solution. A measured amount of injection solution is drawn up next, followed by an oil cap that is used to prevent mixing of the injection solution and culture medium (see Fig. 2A). Avoid drawing up too much backing oil, and make a small oil cap. Drawing the oil cap into the pipet can be difficult, and is in large part dependent on the size of the pipet tip. Several tricks can be used to produce an oil cap if one does not easily form the first time (see Note 8).
Once the pipet has been loaded, it is moved into the chamber in front of the follicle (see Note 6). The focus should be adjusted to obtain a sharp image of the oocyte edge, and the nucleus and nucleolus should be readily visible. The plane of the injection pipet should be adjusted with the manipulator so that the tip is in focus with the edge of the oocyte.
The pipet is then pushed through the wall of the follicle. If the pipet moves out of focus as it enters the follicle, it should be moved with the manipulator until it is back in focus. Once the tip pops through the granulosa cell layers, it is inserted into the oocyte.
It is not necessary to push the pipet far into the oocyte, and the nucleus should be avoided. Once the pipet pops through the plasma membrane, the solution can be expelled. The oil cap will enter the oocyte first, followed by the injection solution, which will visibly disperse throughout the cytoplasm. Once the solution is expelled, the pipet can be removed slowly from the oocyte and follicle.
Pipets can be reused several times for non-sticky solutions.
For safety, used pipets should immediately be placed in a covered waste container.
Acknowledgments
We thank John Eppig, Marilyn O’Brien, and Karen Wigglesworth for showing us how to obtain and culture mouse follicles, and Melina Schuh for critical reading of the manuscript. This work was supported by grants from the NIH.
Footnotes
The Sigma mouth pipet assembly provides a round mouthpiece. Flat mouthpieces are more comfortable, but are not currently available. The round mouthpieces that come with the Sigma mouth pipet assembly can be flattened by warming the plastic in hot water and pinching gently with a pliers, or you can make a mouthpiece from the outer barrel of a 1 ml plastic syringe; cut off an ~3 cm piece including the tip, and flatten the wide end with a pliers.
A well-primed mouse has swollen, dark pink uteri and enlarged, dark pink ovaries that are not excessively bloody. Antral follicles from these ovaries are generally >360 μm in diameter, and the mural granulosa cells appear dark, but with large antra and easily discernible oocytes in the interior. In contrast, the uteri and ovaries from overprimed mice are larger and dark red, due to more blood vessels. Follicles from these ovaries often contain oocytes that undergo meiotic resumption spontaneously after a few hours in culture, and such ovaries often contain corpora lutea (large structures without an antrum that develop from follicles that have ovulated). In addition, these ovaries often appear to be “spongy” and the follicles fragile. Unprimed mice have uteri and ovaries that are lighter pink, and the follicles obtained from these mice are smaller.
Place the injection setup in an undisturbed environment where there is little traffic. For your well-being, provide comfortable eye pieces and chair. Good music is also recommended – in our experience, oocytes like classic rock.
Silanizing should be performed in a fume hood. We use Sigmacote (see Subheading 2.4.8), by dipping a small bundle (~20) of capillaries directly into the bottle and then inverting the capillaries several times to coat the inside of the glass. Pipets are then blotted onto Kimwipes and left for ~2 weeks in the hood to completely dry. Pasteur pipets used for transferring follicles can be silanized in the same way.
Double-coated tape is made to be removable, while double-sided tape is made to be permanent; the double-sided tape is the most common type. A chamber made with double-coated tape alone does not hold together reliably, since this type of tape is less adherent. Thus, double-coated tape is only useful for chamber construction when it is sandwiched between double-sided tape.
If the pipet contacts the coverslips and fails to move into the space between them without losing focus, remove the pipet and carefully tip the front of the chamber upwards slightly (a few hundred microns); upwards applies to an upright microscope. On an inverted microscope, the front of the chamber should be tipped slightly downwards. On our inverted microscope, the magnetic strip on the stage that matches the magnetic strip on the plastic slide (see Fig. 4) is permanently slightly elevated in the back, for this reason.
Isolated oocytes are most commonly injected using methods like those described in ref. 20, but the methods we describe here can also be used. Since the diameter of an isolated oocyte is ~70–75 μm, it is somewhat loose in a chamber formed by 1 layer of double-sided tape, and the oocyte often comes out of the chamber when the micropipet is withdrawn after injection. If it is desirable to keep the isolated oocyte in the chamber after injection, it helps to withdraw the pipet quickly, by quickly moving either the pipet or the microscope stage. Another solution is to use the serrated plastic edge of the tape dispenser to produce a serrated edge on the side of the tape that will face the front of the chamber. Tearing the tape against the plastic edge results in irregular “hooks” that can be used to hold the oocyte in place as the pipet is withdrawn.
Several tricks can be used to produce an oil cap if one does not form easily the first time: 1) tapping on the manipulator, or flicking the micropipet holder, 2) quickly moving the pipet in and out of the interface between the loading capillary oil and air, and 3) loading the injection solution until the amount is stable, then breaking the pipet tip on the capillary again. This must be done with care to avoid breaking the tip too large. It is also useful to replace the silicone gasket in the injection pipet holder (see ref. 16). Occasionally, the solution is too sticky for the pipet to cap despite trying all of the above. In these cases, it is sometimes possible to omit the oil cap. For this to work, it is important to ensure that the solution is stable such that no culture medium is drawn into the pipet when it is placed into the chamber.
References
- 1.Mehlmann LM, Jones TLZ, Jaffe LA. Meiotic arrest in the mouse follicle maintained by a Gs protein in the oocyte. Science. 2002;297:1343–1345. doi: 10.1126/science.1073978. [DOI] [PubMed] [Google Scholar]
- 2.Mehlmann LM, Saeki Y, Tanaka S, Brennan TJ, Evsikov AV, Pendola FL, Knowles BB, Eppig JJ, Jaffe LA. The Gs-linked receptor GPR3 maintains meiotic arrest in mammalian oocytes. Science. 2004;306:1947–1950. doi: 10.1126/science.1103974. [DOI] [PubMed] [Google Scholar]
- 3.Mehlmann LM, Kalinowski RR, Ross LF, Hewlett EL, Jaffe LA. Meiotic resumption in response to luteinizing hormone is independent of a Gi family G protein or calcium in the mouse oocyte. Dev Biol. 2006;299:345–355. doi: 10.1016/j.ydbio.2006.07.039. [DOI] [PMC free article] [PubMed] [Google Scholar]
- 4.Kalinowski RR, Berlot CH, Jones TLZ, Ross LF, Jaffe LA, Mehlmann LM. Maintenance of meiotic prophase arrest in vertebrate oocytes by a Gs protein-mediated pathway. Dev Biol. 2004;267:1–13. doi: 10.1016/j.ydbio.2003.11.011. [DOI] [PubMed] [Google Scholar]
- 5.Simon AM, Goodenough DA, Li E, Paul DL. Female infertility in mice lacking connexin 37. Nature. 1997;385:525–529. doi: 10.1038/385525a0. [DOI] [PubMed] [Google Scholar]
- 6.Freudzon L, Norris RP, Hand AR, Tanaka S, Saeki Y, Jones TLZ, Rasenick MM, Berlot CH, Mehlmann LM, Jaffe LA. Regulation of meiotic prophase arrest in mouse oocytes by GPR3, a constitutive activator of the Gs G protein. J Cell Biol. 2005;171:255–265. doi: 10.1083/jcb.200506194. [DOI] [PMC free article] [PubMed] [Google Scholar]
- 7.Norris RP, Freudzon L, Freudzon M, Hand AR, Mehlmann LM, Jaffe LA. A Gs-linked receptor maintains meiotic arrest in mouse oocytes, but luteinizing hormone does not cause meiotic resumption by terminating receptor-Gs signaling. Dev Biol. 2007;310:240–249. doi: 10.1016/j.ydbio.2007.07.017. [DOI] [PMC free article] [PubMed] [Google Scholar]
- 8.Mehlmann LM. Oocyte-specific expression of Gpr3 is required for the maintenance of meiotic arrest in mouse oocytes. Dev Biol. 2005;288:397–404. doi: 10.1016/j.ydbio.2005.09.030. [DOI] [PMC free article] [PubMed] [Google Scholar]
- 9.Eppig JJ, Viveiros MM, Marin-Bivens C, De La Fuente R. Regulation of mammalian oocyte maturation. In: Leung PCK, Adashi EY, editors. The Ovary. 2. Elsevier/Academic Press; San Diego, CA: 2004. pp. 113–129. [Google Scholar]
- 10.Mehlmann LM. Stops and starts in mammalian oocytes: recent advances in understanding the regulation of meiotic arrest and oocyte maturation. Reproduction. 2005;130:791–799. doi: 10.1530/rep.1.00793. [DOI] [PubMed] [Google Scholar]
- 11.Nikolaev VO, Lohse MJ. Monitoring of cAMP synthesis and degradation in living cells. Physiology. 2006;21:86–92. doi: 10.1152/physiol.00057.2005. [DOI] [PubMed] [Google Scholar]
- 12.Matzuk M, Burns KH, Viveiros MM, Eppig JJ. Intercellular communication in the mammalian ovary: oocytes carry the conversation. Science. 2002;296:2178–2180. doi: 10.1126/science.1071965. [DOI] [PubMed] [Google Scholar]
- 13.Park JY, Su YQ, Ariga M, Law E, Jin SLC, Conti M. EGF-like growth factors as mediators of LH action in the ovulatory follicle. Science. 2004;303:682–684. doi: 10.1126/science.1092463. [DOI] [PubMed] [Google Scholar]
- 14.Hiramoto Y. Microinjection of the live spermatozoa into sea urchin eggs. Exp Cell Res. 1962;27:416–426. doi: 10.1016/0014-4827(62)90006-x. [DOI] [PubMed] [Google Scholar]
- 15.Kiehart DP. Microinjection of echinoderm eggs: Apparatus and procedures. Meth Cell Biol. 1982;25:13–31. doi: 10.1016/s0091-679x(08)61418-1. [DOI] [PubMed] [Google Scholar]
- 16.Jaffe LA, Terasaki M. Quantitative microinjection of oocytes, eggs, and embryos. Meth Cell Biol. 2004;74:219–242. doi: 10.1016/s0091-679x(04)74010-8. [DOI] [PMC free article] [PubMed] [Google Scholar]
- 17.Su YQ, Denegre JM, Wigglesworth K, Pendola FL, O’Brien MJ, Eppig JJ. Oocyte-dependent activation of mitogen-activated protein kinase (ERK1/2) in cumulus cells is required for the maturation of the mouse oocyte-cumulus cell complex. Dev Biol. 2003;263:126–138. doi: 10.1016/s0012-1606(03)00437-8. [DOI] [PubMed] [Google Scholar]
- 18.Schuh M, Ellenberg J. Self-organization of MTOCs replaces centrosome function during acentrosomal spindle assembly in live mouse oocytes. Cell. 2007;130:484–498. doi: 10.1016/j.cell.2007.06.025. [DOI] [PubMed] [Google Scholar]
- 19.Kaila K, Voipio J. A simple method for dry beveling of micropipettes used in the construction of ion-selective micro-electrodes. J Physiol. 1985;369:8p. [Google Scholar]
- 20.Kline D. Quantitative microinjection of mouse oocytes and eggs. Methods Mol Biol. 2008 doi: 10.1007/978-1-59745-202-1_11. in press. [DOI] [PubMed] [Google Scholar]