

Abstract
Mini dental implants (MDI) are ultra-small diameter (l.8 mm width), biocompatible titanium alloy implant screws, conceived and designed over 20 years ago by a board-certified Manhattan dentist, Sendax Victor. Dr. R. A. Bulard added a single-piece “O-ball” design to Dr. Sendax Victor concept. These implants can be used in atrophic ridges, flabby ridges, or in other cases where there is denture instability or lack of retention due to poor availability of residual bone. In this article, a case report of 55-year-old female patient is presented, with a severely atrophic mandibular ridge that was managed by the MDI system with an overdenture.
Keywords: Immediate loading implants, mini dental implants, overdenture
INTRODUCTION
Every dentist has experienced the problem of dealing with patients with atrophic ridges. The patients always return with complaints of instability of dentures. This problem is more pronounced in the mandibular arch.[1] Due to less available tissue surface, denture adhesives have limited use in the mandibular arch. Traditional dental implants require a period of healing and tissue integration in a nonleaded capacity for optimum predictability.[2] The mini dental implant (MDI) system can be immediately loaded and provides ongoing stabilization.[3–6]
This article discusses a case report of a 55-year-old female patient with severely resorbed mandibular ridge by placement of 4 MDI with overdenture.
CASE REPORT
A 55-year-old female patient reported to the clinic with the complaint of a loose mandibular denture. The patient was unable to chew or speak properly as the denture kept coming out. The patient had a history of complete teeth loss 20 years earlier due to periodontal disease. She has been using her current set of dentures for the past 1 month and has had no previous dentures.
Clinical examination revealed that the patient has completely edentulous upper and lower arches. No bony spicules or root pieces were seen and there was severely atrophic knife-edge mandibular ridge [Figure 1]. However, the maxillary ridge was favorable for denture construction. The patient has an Angles Class III ridge relation.
Figure 1.
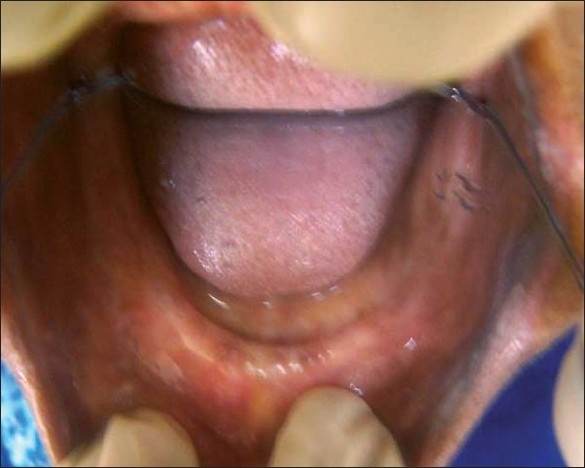
Knife-edged mandibular residual ridge
Treatment plan
After radiologic examination of the patient, it was observed that the patient had dense compact bone in the mandibular anterior region without any pathology. The blood reports of the patient also did not show any pathology to rule out surgery. Hence it was decided to place MDI on the mandibular arch and an overdenture over it.
Procedure
A new set of complete denture was fabricated for the patient [Figure 2]. The anatomy of the jaw was evaluated to determine the angulations of the implant. A Brasseler-type latch drill was used to open denser bone layers to facilitate the self-tapping and self-cutting features of the MDI system. (The speed of the drill should not exceed l600 RPMs with adequate torque and irrigation.)[7] Drills were only used to establish access angulation and pilot starting point for placement of the implant. The drilling technique typically involves no surgical incision or flaps. The drilling entry procedure was completed with a few pumping motions, resulting in light penetration past the dense cortex into softer, more trabeculated medullary bone. Sterile irrigation was utilized throughout the drilling procedure. (The desired site depth should not exceed one third to one-half the threaded length of the MDI itself.) A gentle up and down pumping motion was performed to prevent the drill tip from overheating and/or becoming bound and embedded into the patient's bone. Each sterile, double-pouched implant is suspended in a transparent vial for easy access and transmission to the implant site.
Figure 2.
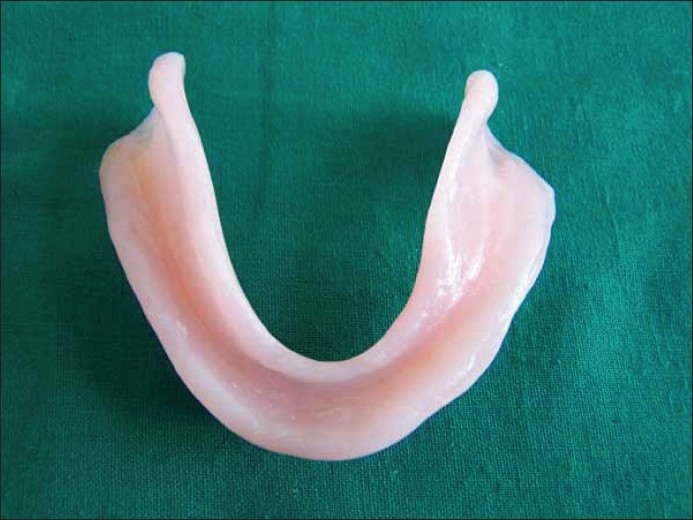
Old denture of the patient
A small thumb carrier-wrench or finger driver was used to retrieve, convey and introduce the MDI into the target site after the initial pilot drilling process has been completed. The implant was carefully screwed clockwise into the site using rotation of the thumb and index finger on the knurled handle of the wrench until it became difficult to turn. The thumb wrench was then removed from the implant abutment head. The thumb wrench was replaced with a winged thumb wrench for more mechanical advantage and leverage. The implant was again turned gradually into the patient's bone until once again it bound to a point where it became difficult to turn. Then the winged wrench was removed from the implant abutment head.
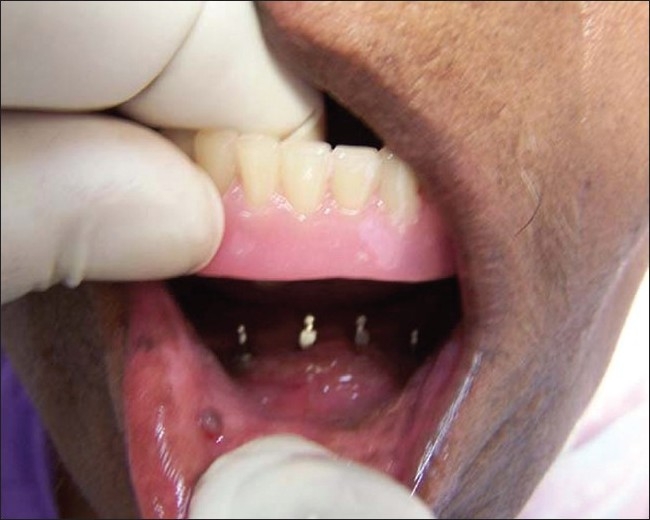
A ratchet wrench was then used to slowly insert the implant into its final position. The neck of the MDI was fully inserted into the soft tissue (attached gingiva) so that only the abutment head is protruded into the oral cavity [Figure 3]. The tissue side of the patient's prosthesis was relieved so that it could be seated passively over the top of the seated implants. A soft blockout MDI shim was then placed on each inserted mini implant's square base portion of abutment head, leaving the O-Ball top half exposed for attachment placement. Keeper caps with IMTEC (3M Imtec Corp, Ardmore, Oklahoma, US) MDI O-Rings were then snapped onto the O-ball heads [Figure 4].
Figure 3.
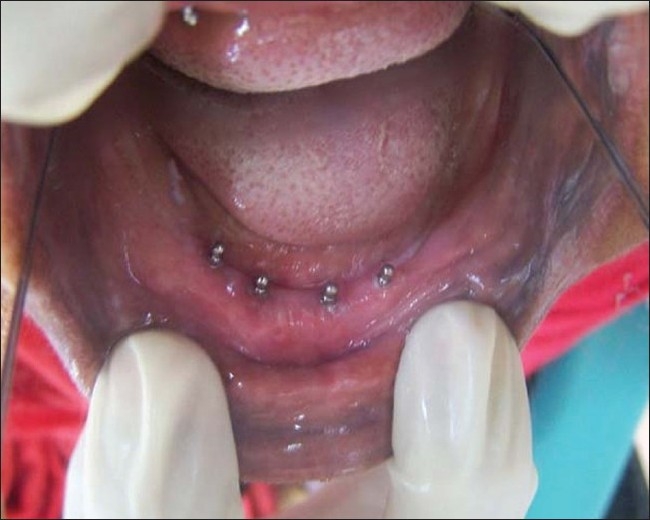
Patient's ridge with 4 mini dental implants in place
Figure 4.
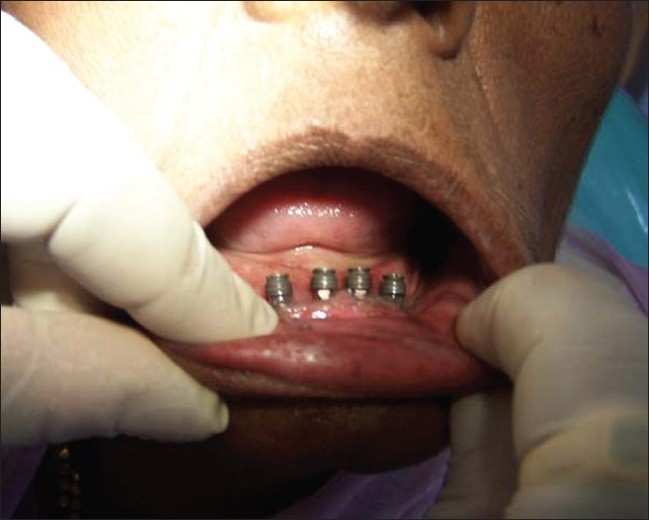
Keeper cap fitted on each mini implant
The patient's prosthesis was carefully examined to ensure a passive fit. A standard chair side self-cure acrylic mix was then prepared and placed into the denture, then seated with a functional bite into the patient's mouth over the top of the mini implants with the keeper caps attached. After an appropriate hardening time, the prosthesis was removed from the patient's mouth, the blockout shims discarded and excess acrylic material trimmed. The finished prosthesis, containing the keeper caps, was then replaced into the patient's mouth for occlusal equilibration and border adjustment [Figure 5].
Figure 5.
Insertion of the denture into the patient's mouth
DISCUSSION
In our clinical practice we regularly come across patients in whom we find it difficult to achieve optimum denture performance due to problems associated with reduced denture retention and stability. This can be due to a number of factors, such as reduced vestibular depth, flabby ridges, atrophic ridges and so on. MDI system can also be used for stabilization of a complete denture where bone quality is inadequate for standard implants.[8–10] The system can be used for Type I and Type II bones.[11] In Type I bone the standard propriety thread design can be used and in Type II bone the MDI MAX thread design is used.[12] The advantages of using the MDI system in such cases are as follows[13,14]:
Immediate loading,
Can be inserted in minimal tissues without relying on grafting techniques,
Minimally invasive procedure,
One-stage denture stabilization,
Does not require osteotomy,
Cost-effective,
Can be placed in patients with ridge to narrow for conventional implants and
A simple 5 steps technique.
CONCLUSION
MDI are an excellent and profitable addition to every dental practice. This system provides an immediate and ongoing stabilization for the patient in an economical and efficient manner. It is an extremely simple and safe procedure and can be done in cases with poor bone quality as well. It opens many treatment modalities to the dentist and the patient.
Footnotes
Source of Support: Nil.
Conflict of Interest: None declared.
REFERENCES
- 1.Nishioka RS, Garcia-Junior IR, Souza FA, Luvizuto ER. Treating the edentulous mandible: Immediately loaded implants. (72-3).Dent Toda. 2008;27:70. [PubMed] [Google Scholar]
- 2.Branemark PI. Osseointegration and its experimental background. J Prosthet Dent. 1983;50:399–400. doi: 10.1016/s0022-3913(83)80101-2. [DOI] [PubMed] [Google Scholar]
- 3.Sendax VI. Mini implants as adjunt for transitional prostheses. Dental Implantol Update. 1996;7(2):12–5. [PubMed] [Google Scholar]
- 4.Misch K, Neiva R. Small-diameter implants for optimal stabilization of implant-supported overdentures. Pract Proced Aesthet Dent. 2007;19:428–31. [PubMed] [Google Scholar]
- 5.Assad AS, Hassan SA, Shawky YM, Badawy MM. Clinical and radiographic evaluation of implant-retained mandibular overdentures with immediate loading. Implant Dent. 2007;16:212–23. doi: 10.1097/ID.0b013e318065a95f. [DOI] [PubMed] [Google Scholar]
- 6.Nazarian A. Mini dental implants: Immediate gratification for patient and provider. Dent Today. 2005;24:110–112. [PubMed] [Google Scholar]
- 7.Gibney JW. Minimally invasive implant surgery. J Oral Implantol. 2001;27:73–6. doi: 10.1563/1548-1336(2001)027<0073:MIIS>2.3.CO;2. [DOI] [PubMed] [Google Scholar]
- 8.Christensen G. The Mini Implant for General Practitioners, Simplified Implant Surgery Techniques. Dent Town Mag. 2001;132:231–3. [Google Scholar]
- 9.Bulard R. Mini implants a solution for loose dentures. J Okla Dent Asso. 2002;93:42–6. [PubMed] [Google Scholar]
- 10.Balkan BE, Steflik BE, Naval F. MDI implant insertion with auto advancing technique for ongoing applications. J Oral Implantol. 2001;27:32–8. doi: 10.1563/1548-1336(2001)027<0032:MIIWTA>2.3.CO;2. [DOI] [PubMed] [Google Scholar]
- 11.Sussman HI, Goodridge OF. Use of SIG device to accurately place permanent miniature dental implants to retain mandibular overdenture.A case report. N Y State Dent J. 2006;72:34–8. [PubMed] [Google Scholar]
- 12.Jefferies SR, Boston DW, Damrow MP, Galbraith CT. Comparison of detachment forces of two implant overdenture attachment types: Effect of detachment speed. Am J Dent. 2008;21:244–50. [PubMed] [Google Scholar]
- 13.Sadowsky SJ. Mandibular implant-retained overdentures: A literature review. J Prosthet Dent. 2001;86:468–73. doi: 10.1067/mpr.2001.119921. [DOI] [PubMed] [Google Scholar]
- 14.Dene L. Implant supported overdenture for the atrophic mandible. N Y State Dent J. 2010;76:26–9. [PubMed] [Google Scholar]