

Abstract
Microstomia has been defined as an abnormally small oral orifice associated with various etiopathologic factors. Management of these patients poses extreme difficulties in every procedure during prosthesis fabrication. Restricted mouth opening of the patient makes the insertion and the removal of the tray extremely difficult. So sectioning of the existing stock tray is necessary, so that the trays can be inserted and removed in sections. The main problem encountered during this procedure is the reorientation of the tray back in position. This article presents an innovative technique for the easy handling of the sectioned stock impression trays.
Keywords: Sectional trays, Sectional impressions, Microstomia, Magnets
Introduction
Microstomia has been defined as an abnormally small oral orifice [1]. It can occur either due to trauma or burns of electrical, thermal and chemical origin. The condition can also result from genetic disorders, Plummer-vinson syndrome, scleroderma and surgical treatments of oro-facial tumors and reconstruction of lip defects [2–4].
Prosthetic rehabilitation in microstomia patients presents difficulties starting from primary impression. This is mainly due to the decreased oral opening and tongue rigidity. A maximum possible mouth opening does not accommodate the smallest impression tray [5].
Insertion of the impression tray is extremely difficult and various modifications of the trays have been tried in the past. These include flexible trays and sectional trays which could be assembled extra orally [2–7]. Flexible trays were inaccurate while reassembling of sectional trays were difficult.
This article describes a technique of making sectional trays for maxillary impressions. This can be adapted for the mandibular trays also. The magnets were attached to the sectioned handles with a designed reorientation mechanism.
Technique for the Modification of the Stock Tray
Width of the ridge was measured using a caliper and a suitable stock tray was selected.
The intended area for sectioning of the stock tray was marked on the tissue side of the tray (Fig. 1).
Dental stone was poured into the impression tray and a cast was made [5]. This cast acted as an index for the sectioned stock tray. (Fig. 1).
The tray was sectioned into two along the line marked, using a diamond disk.
The sections of the tray were then reoriented on the cast and stabilized with sticky wax (Fig. 2).
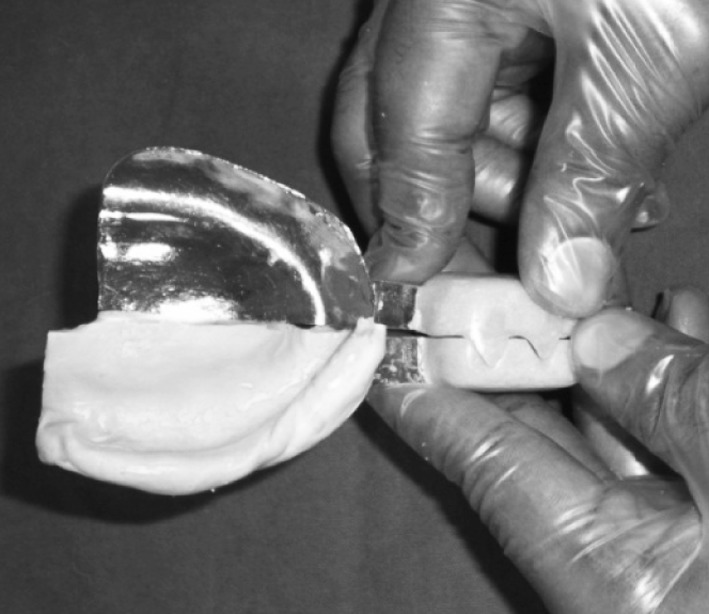
A block of acrylic resin measuring 2 × 1.5 × 2 cm was made on the handle of one section of the impression tray. A metal keeper corresponding to the size of the magnet to be placed was incorporated into the block facing the sectional portion of the tray.
Once the acrylic resin was completely cured, two triangular grooves of approximately 1 cm in depth were made on the side of the acrylic block. This helped in reorientation of the trays during and after impression making (Fig. 3).
A rectangular magnet 1.5 × 1 × 1.5 cm was placed over the metal keeper incorporated in the acrylic block. Petroleum jelly was applied over the grooves and surface of the acrylic block.
Keeping both the sections of the tray together in the index, an autopolymerizing acrylic resin block was prepared on the handle of the second section of the tray enclosing the magnet. Care was taken to extend the resin to the orientation grooves already prepared on the first section. The magnet and the keeper contained within both the blocks stabilized and reoriented both the sections of the tray during the making of the impression and subsequently the cast (Fig. 4, diagrammatic representation).
Once the acrylic resin was cured, the sectioned stock tray was taken out from the cast and the two halves were separated (Fig. 5).
Fig. 1.
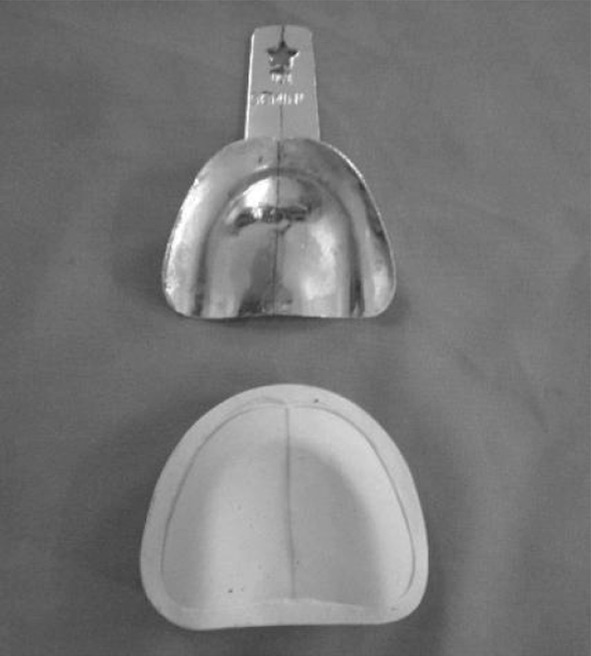
Outline for the sectioning of the tray
Fig. 2.
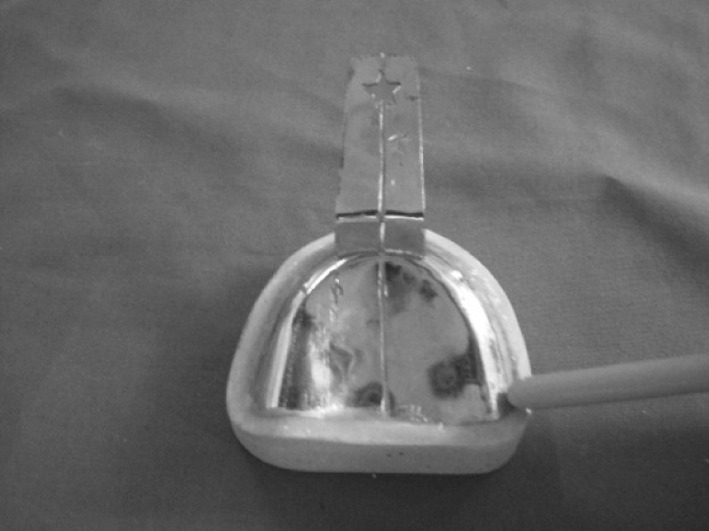
Sectioned tray reoriented on the cast
Fig. 3.
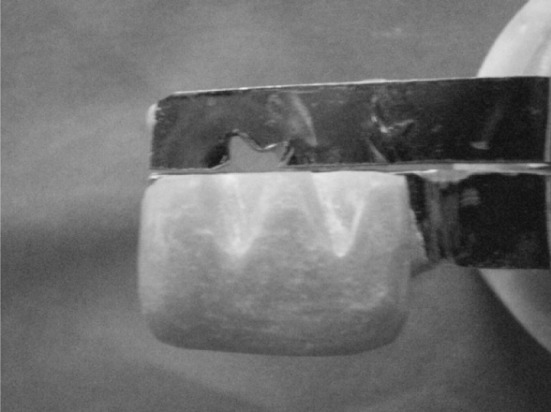
Grooves for orientation of the impression
Fig. 4.

Schematic representation of the design
Fig. 5.
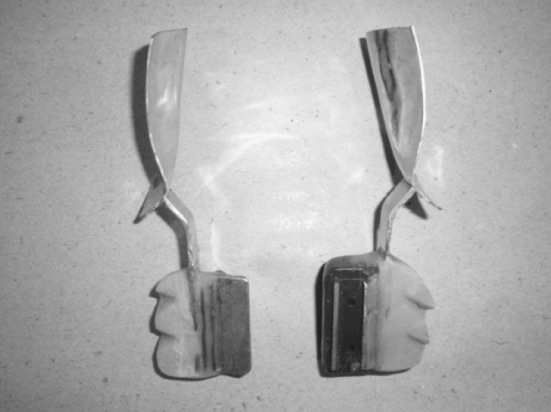
Design showing the magnet assembly and reorientation grooves
Impression Making
Impression was made in two steps. The impression of one half of the arch was made first followed by the impression of the other half. Elastomeric impression material was used.
Tray adhesive was applied on both sections of the tray and was allowed to dry for 5 min.
Then, the first segment of the modified impression tray was loaded with elastomeric impression material (polyvinylsiloxane-putty consistency) and the impression of the corresponding side of the arch was made. Then for greater accuracy, a wash impression was made with light body material.
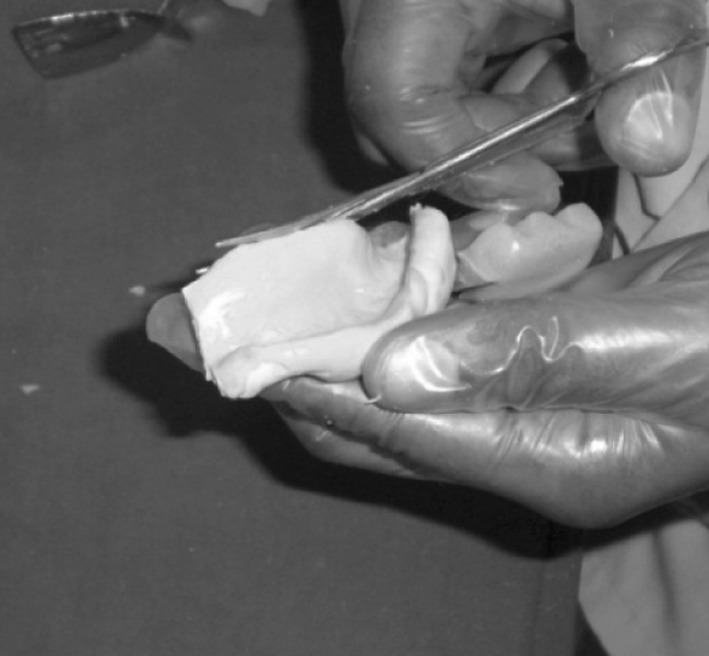
The material extending medially beyond the tray was cut off and petroleum jelly was applied to the cut surface (Fig. 6).
Next, the second segment of the tray was checked for proper orientation and minor modifications were incorporated (Fig. 7).
Impression of the second half of the mouth was made without disturbing the first half. The magnet incorporated helped in holding the two segments of the tray and the grooves in the proper orientation. The impression was taken out in segments and was reoriented outside (Figs. 8, 9).
The impression was poured in dental stone to obtain the cast (Figs. 10, 11).
Fig. 6.
Trimming of the excess portion of impression
Fig. 7.
Checking the proper reorientation of the segments
Fig. 8.

Segments of impression
Fig. 9.

Reassembled impression
Fig. 10.

Pouring the cast
Fig. 11.
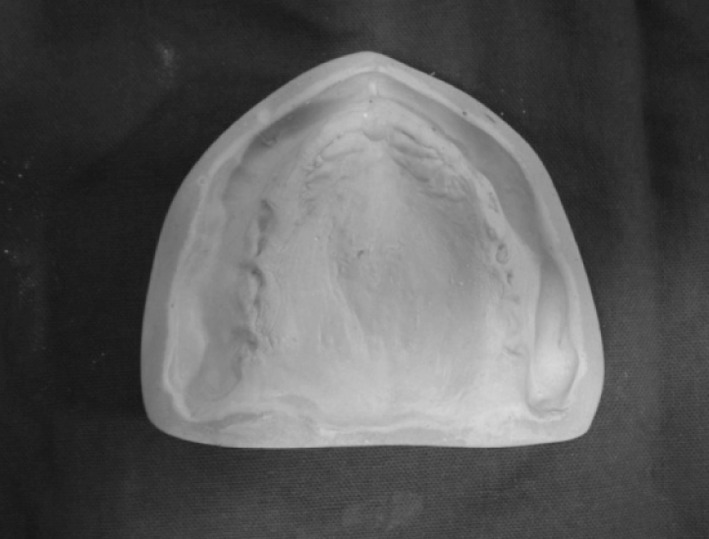
Primary cast
Discussion
The decreased perimeter of the oral cavity possesses a unique problem during the clinical steps of fabrication of prosthesis. On many occasions the ridge dimension remains normal. Hence it becomes relatively difficult to insert a conventional stock tray into the mouth. Literature is abundant with various methods of management of such patients. The impression techniques include the use of flexible trays and sectioned trays with different modes of reassembling the segments extraorally after the impression is made [2–7]. The accuracy of the impression obtained from the flexible impression trays is questionable, and reassembly of the impressions made with the sectioned impression trays is complicated.
The technique discussed in this article is relatively simple, where a magnet is used for reassembling the sections of the impression. A reorientation mechanism is also incorporated in the acrylic, with which the two halves of the impression could be aligned intraorally as well as extraorally. The magnet, keeper and the grooves provided an efficient mechanism of reorienting sectioned impression trays.
Summary
Various techniques have been explained in the past to obtain an impression for a patient with microstomia. A technique using magnets commonly available in the market is described. The magnet and the metal are incorporated in the sectioned stock tray juxtaposed for their orientation intraorally and extraorally. Accuracy of the orientation is further enhanced with the help of the groove indices cut on the acrylic. This simple and inexpensive method can be used effectively in microstomia patients.
Acknowledgments
The authors sincerely thank Dr (Prof.) Munirathnam Naidu, Dr Shibu Job for their support in completing this article.
Conflicts of interest
None.
References
- 1.The Academy of Prosthodontics Glossary of prosthodontic terms-8. J Prosthet Dent. 2005;94:1–52. doi: 10.1016/S0022-3913(05)00332-X. [DOI] [PubMed] [Google Scholar]
- 2.Geckili C, Altung C, Bilgin T. Impression procedures and construction of sectional dentures for a patient with microstomia: a clinical report. J Prosthet Dent. 2006;96:387–390. doi: 10.1016/j.prosdent.2006.10.008. [DOI] [PubMed] [Google Scholar]
- 3.Wahle JJ, Gardner K, Fiebiger The mandibular swing lock complete denture for patients with microstomia. J Prosthet Dent. 1992;68:523–527. doi: 10.1016/0022-3913(92)90423-8. [DOI] [PubMed] [Google Scholar]
- 4.Bnetti R, Zupi A, Toffanin A. Prosthetic rehabilitation of a patient with microstomia: a clinical report. J Prosthet Dent. 2004;92:322–327. doi: 10.1016/j.prosdent.2004.06.003. [DOI] [PubMed] [Google Scholar]
- 5.Cura C, Cotert HS, User A. Fabrication of sectional impression tray and sectional complete denture for a patient with microstomia and trismus: a clinical report. J Prosthet Dent. 2003;89:540–543. doi: 10.1016/S0022-3913(03)00179-3. [DOI] [PubMed] [Google Scholar]
- 6.Al Hadi LA, Abbas H. Treatment of an edentulous patient with surgically induced microstomia: a clinical report. J Prosthet Dent. 2002;87:423–426. doi: 10.1067/mpr.2002.123230. [DOI] [PubMed] [Google Scholar]
- 7.Luebke RJ. Sectional impression tray for patients with constricted oral opening. J Prosthet Dent. 1984;52:135–137. doi: 10.1016/0022-3913(84)90196-3. [DOI] [PubMed] [Google Scholar]