SUMMARY
Objective.
Over the last several years, the Finite Element Analysis (FEM) has been widely recognized as a reference method in different fields of study, to simulate the distribution of mechanical stress, in order to evaluate the relative distribution of loads of different nature. The aim of this study is to investigate through the FEM analysis the stress distribution in fixed prostheses that have a core in Zirconia and a ceramic veneer supported by implants.
Materials and methods.
In this work we investigated the mechanical flexural strength of a ceramic material (Noritake®) and a of zirconium framework (Zircodent®) and the effects of the manufacturing processes of the material commonly performed during the production of fixed prostheses with CAD/CAM technology. Specifically three point bending mechanical tests were performed (three-point-bending) (1–3), using a machine from Test Equipment Instron 5566®, on two structures in zirconium framework-ceramic (structures supported by two implant abutments with pontic elements 1 and 2). A further in-depth analysis on the mechanical behavior in flexure of the specimens was conducted carrying out FEM studies in order to compare analog and digital data.
Results.
The analysis of the data obtained showed that the stresses are distributed in a different way according to the intrinsic elasticity of the structure. The analysis of FPD with four elements, the stresses are mainly concentrated on the surface of the load, while, in the FPD of three elements, much more rigid, the stresses are concentrated near the inner margins of the abutments. The concentration of many stresses in this point could be correlated to chipping (4) that is found in the outer edges of the structure, as a direct result of the ceramic brittleness which opposes the resilience of the structure subjected to bending.
Conclusions.
The analysis of the UY linear displacement confirms previous data, showing, in a numerical way, that the presence of the ceramic is related to the lowering of the structure. So, the reference values are those of the linear lowering obtained in the Mechanical Test and in our FEM analysis.
zirconium framework with four elements 4,227 10−2mm.
zirconium framework with ceramic structure with four elements 2,266 10−2 mm.
That suggests that the presence of ceramics halves the flexion capabilities of the prosthetic materials.
Keywords: FEM, zirconium-ceramic, chipping, stress, fixed-partial-dentures, CAD-CAM, mechanical evaluation
Introduction
Over the last years, the study of mechanical properties of prosthetic structures allowed to predict and optimize their clinical performances. Several prosthetic structures have been studied with various techniques, such as analysis of delicate finish, strain gauges, holography, two-dimensional and three-dimensional photoelasticity, finite element analysis (FEM), interferometric investigation and other numerical methods. Most of the analysis of the mechanical stresses of dental structures was performed using the photoelastic technique. The photoelastic study allows to quantify the physical stress of 3D structures and to determine the tension gradient (5).
In 1970, in order to replace the photo elasticity tests, a stress numerical analysis, developed in 1956 in the aviation industry, was introduced in the field of dental research: the finite element method (FEM). Initially, this technique has been widely used only in aerospace engineering, but slowly, thanks to its great flexibility in modeling complex geometries and provide immediate results, it has spread to other areas of research (6). This method involves a series of calculation methods, useful to evaluate stress and the consequent mechanical deformation of a solid. The FEM allows to bypass many problems of analog analysis and to calculate measures of physical stress (7, 8).
There are three methods to solve any engineering problem: the analytical method, the numerical method and the experimental method (8).
The FEM uses a complex system of points (nodes) and of elements composing a grid called network. This tangle is programmed to be able to enter data about the structural properties of the materials that we want to analyze (Young’s modulus, Poisson’s ratio, and yield stress), so as to be able to simulate how the structure will react to certain loading conditions. In practice, we analyze a limited number of points (finished) and then interpolate the results for the entire domain (of surface or volume). Any object has an infinite degree of freedom (DOF), however, the FEM analysis reduces the degrees of freedom with the aid of a constraint (nodes and elements) and all calculations are traced to a limited number of nodes (9). Using these functions and the actual geometry of the element, we can determine the equilibrium equations between the external forces acting on the elements and the relative displacements.
In practice, FEM usually consists of three main phases:
Pre-processing: including CAD (computer aided design) of the data, meshing, and outline definition.
Working or solution: this is the phase in which the software makes calculation. The software performs formulations such as: calculation of the matrix, inversion, multiplication, and finally the solution.
Post-processing: this step includes the visualization of the results, the checks, the conclusions, and any consideration of what could have been done to improve the design.
Materials and methods
Two fixed partial dentures have been created, respectively with three (19) and four elements, supported by two standard abutments. The framework has been milled by a white disk of zirconium (Zircodent®), and subsequently the ceramic phase has been started (Noritake Czr a ceramic zirconium dedicated).
Specimens preparation
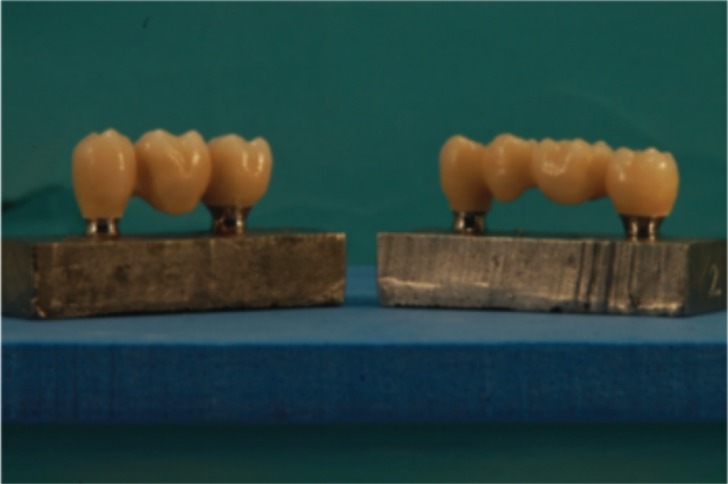
The initial phase of the costruction of the structures consisted of the implementation of two steel bases upon which two Straumann® abutments were placed in order to simulate two missing teeth, one of three elements (Fig. 1) and the other of four elements (Fig. 2).
Figure 1.
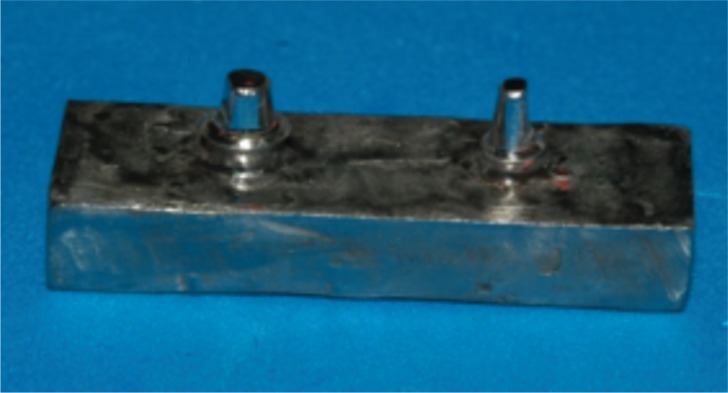
Steel frame (three elements bridge).
Figure 2.
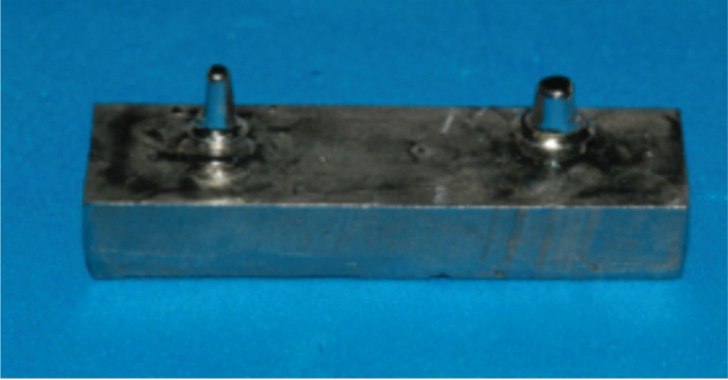
Steel frame (four elements bridge).
The choice of steel, as material for the realization of the base is not random state, but dictated by physical and chemical reasons: in fact the steel has a Young’s modulus (E) = (Nm−2) = 2.1011 superior to the bone. Bone along the axis of traction (E) = 1.8 1010, bone along the axis of compression (E) = 0.9 1010 (10) and has a large chemical affinity with the steel of the abutments. At this point, the structures were scanned, using software Dental Wings, obtaining, as desired, an initial 3D processing of the prosthetic abutments.
After having obtained the CAD project, we have provided for data transfer to realize the implementation of CAM. In this study we employed white discs of Zirconia (Zircodent®), non-sintered, which require a further sintering process, during which the size of the prosthetic structures decrease by about 20%. After sintering, the specimens are subjected to manual finishing to evaluate the marginal fitting and finally sand-blasted with AlO2 to 50μm, 2.5 Bar at a distance of 3–5 cm (11–14). After this process, the specimens are exposed to ceramic coating, characterized by a first layer of dentin and a final polish. The specimens are now subjected to three cycles of cooking then polished with fine grit diamond mills (Fig. 3).
Figure 3.
Specimens.
Three-point bending test
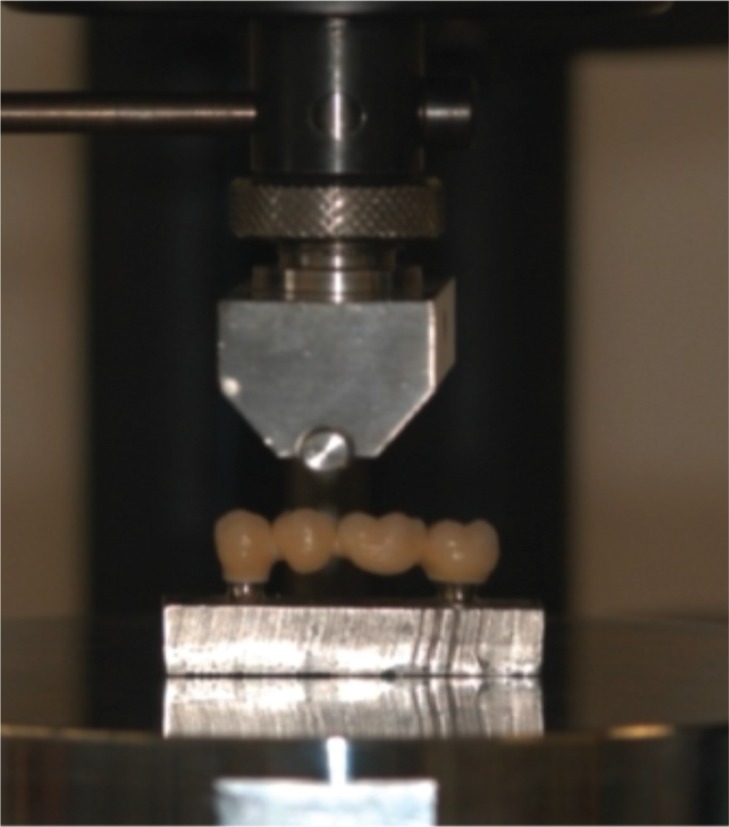
Specimens thus made are subjected to a three point bending test (Figs. 4, 5). We used an Instron 5566 machine. The two bridges were analyzed according to three-point-bending method. In the case of prosthetic structure composed of two pontics, the central load was applied at the exact center: in other words, in the central connector, and the lower constraints made up by the implant structures. However, in the case of the bridge with a single pontic, the load was applied in the middle of the molar, and constraints, also this time represented by the implant structures. For the size of the occlusal surfaces and for the o thrust roller geometry (15) of the machine we have to consider reasonable the existence of a load surface, rather than a point. The cyclic load applied to the structures ranges from a minimum of 0N to a maximum of 820N. Applying these values to the equation that 1N = 0.102 kg, we can say that our samples have undergone a load varying from 0 to 84Kg. This load is not random, but responds to the parameters of a molar during the chewing cycle (75–89Kg) (16). The cyclical nature of the load tends to simulate an act of mastication, where there is an increasing application of a load.
Figure 4.
Three-point bending test. Four elements Bridge.
Figure 5.
Three point bending test, three elements bridge. Mesh representation of high-quality.
Specimens FEM analysis
Using FEM method, we analyzed our structures. The operational procedures that led to the creation of the structures are in sequential order:
The technician delivers STL files (Stereo Lithography interface format or Standard Triangulation Language) (17).
The files are analysed and converted to a 3D model.
The substructures are analysed using the program Solid Works.
The engineer creates the superstructure.
The complete structures of superstructures are analysed through the program Solid Works.
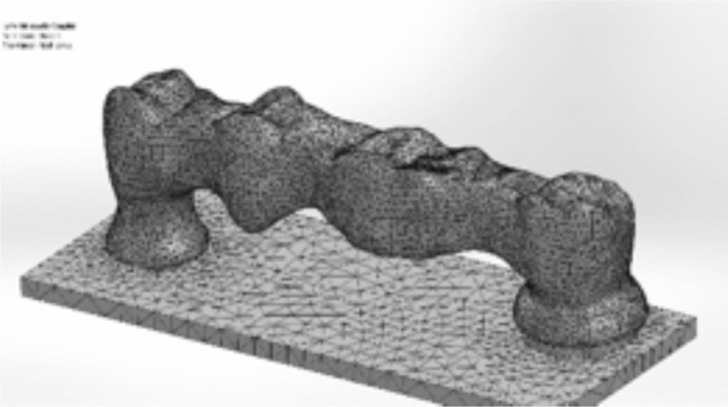
Mesh explanations (18)
When you create the mesh of a part or a set with solid elements, the software generates one of the following types of items, according to the settings in effect for the study:
Mesh draft quality: the automatic mesher generates linear tetrahedral solid elements.
Mesh high quality: the automatic mesher generates parabolic tetrahedral solid elements.
Linear elements are also referred to as first-degree or low-order. The parabolic elements are also referred to second-degree or high order.
A linear tetrahedral element is defined by four corner nodes connected through six linear edges. A parabolic tetrahedral element is defined by four corner nodes, six intermediate nodes and six parabolic edges. In principle, for the same mesh density (number of elements), the parabolic elements produce better results than linear ones, for the following reasons: 1) they better represent curved outlines and 2) they generate better mathematical approximations. However, the parabolic elements absorb more resources than linear ones.
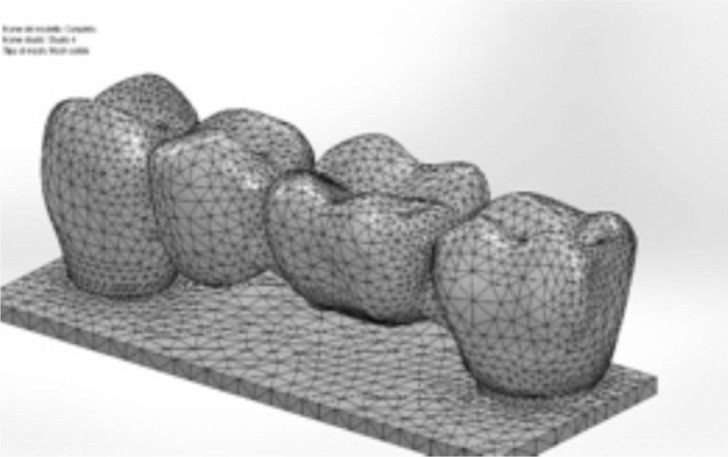
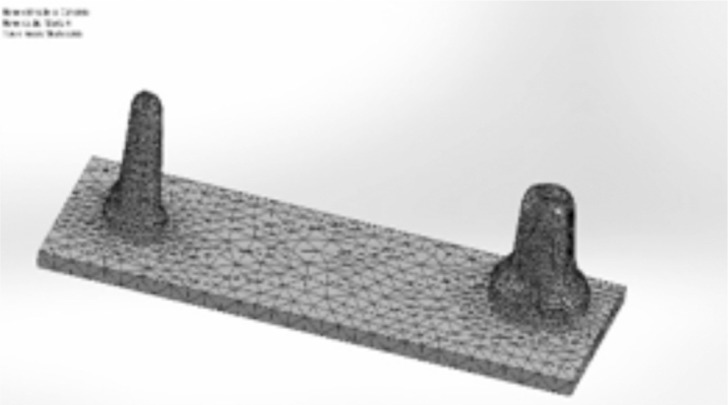
Mesh representation of high-quality:
Figure 6.
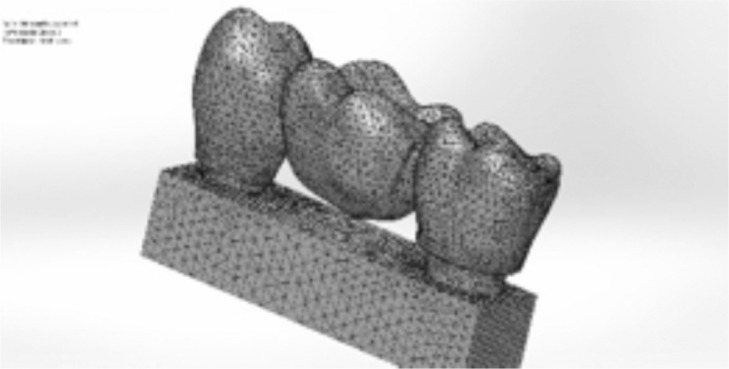
Mesh three elements bridge.
Figure 8.
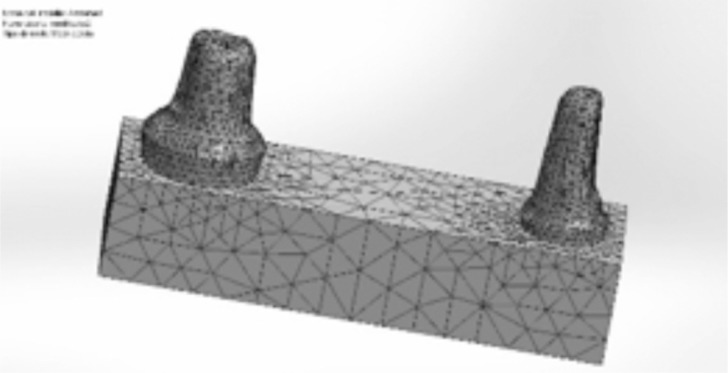
Mesh steel frame (three elements bridge).
Figure 9.
Mesh four elements bridge.
Figure 11.
Mesh steel frame (four elements bridge).
Results and discussion
For stress load evaluation of the structures tested, we maintain that FEM could be a good method for the following reasons: the structures that we have analyzed have a geometry faithfully reproducible, their composition is available readily thanks to the instructions of the manufacturers of different materials and our specimens, they do not interface in a very complex and variable system such as the oral cavity. In our analysis (Figs. 12, 13, 14, 15) we did not have to relate to variables such as fluids, periodontal ligaments, or gum tissues. We can say that our system is a rigid system and therefore it guarantees a perfect adaptation of this method. Regarding the analysis of prosthetic structures we can say with certainty, thus confirming the data found in the literature, that there is a wide difference in the bending of the two materials.
Figure 12.
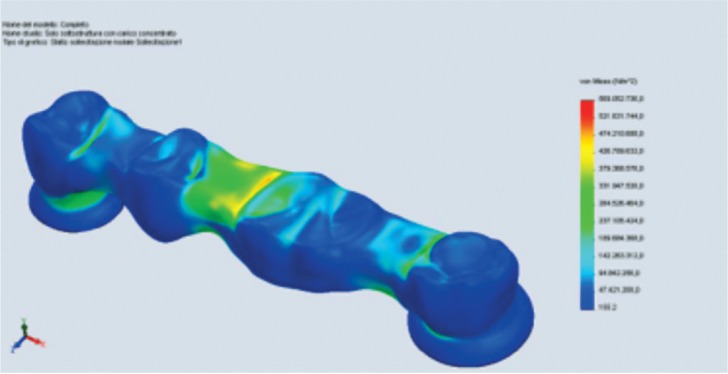
FEM analysis four elements framework.
Figure 13.

FEM analysis zirconium-ceramic bridge.
Figure 14.
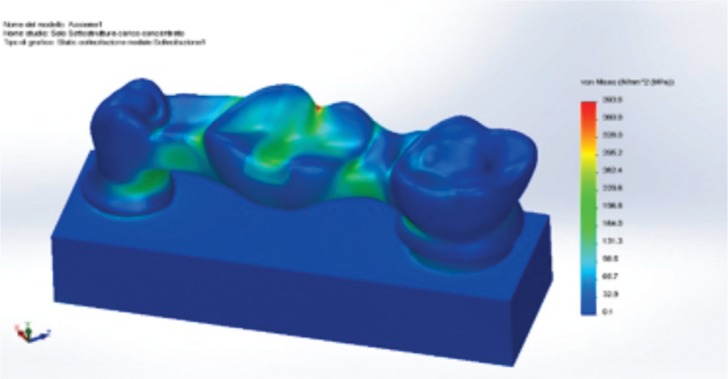
FEM analysis three elements framework.
Figure 15.
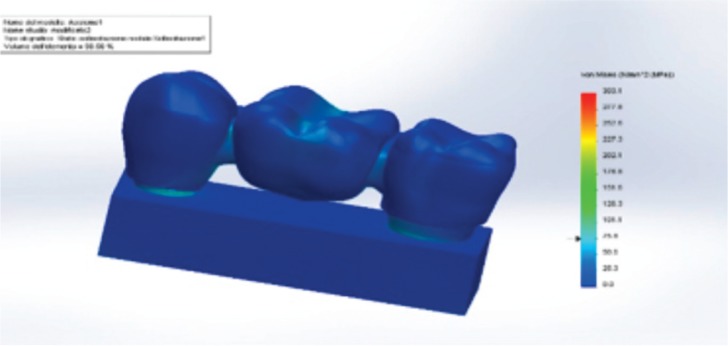
FEM analysis zirconium-ceramic bridge.
The zirconia substructures have an higher bending strength to ceramics and comprehensive analysis of structure and substructure, the final value is to be referred to ceramics which gives greater rigidity to the prosthetic structure.
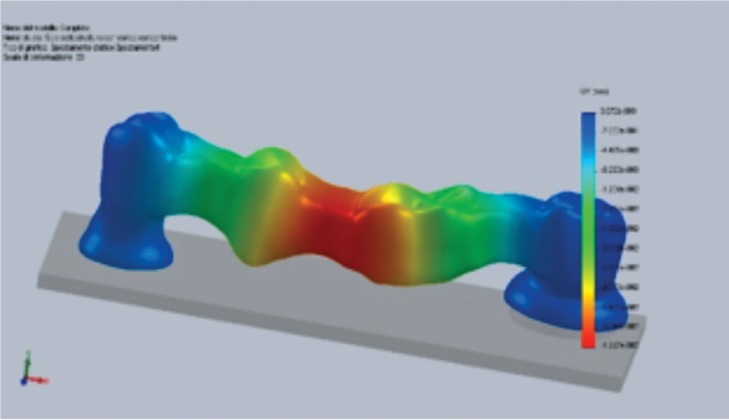
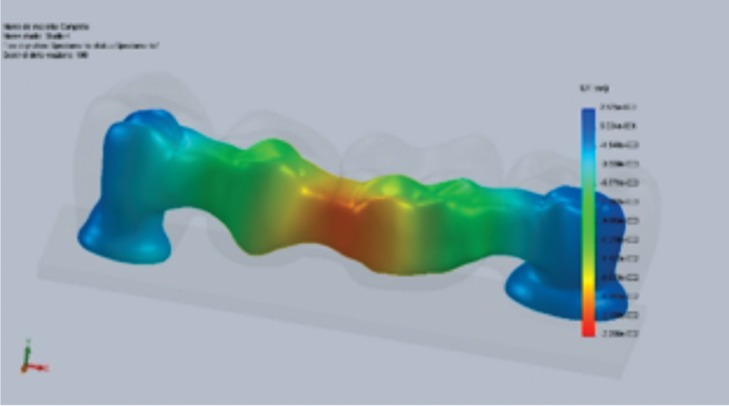
Analyzing the prosthetic structures with the FEM method (Table 1), we see how stresses are distributed in a different way according to the elasticity of the same structure. In the analysis of FPD composed of 4 elements the stresses are mainly concentrated on the surface of the load, instead of three elements in the bridge, much more rigid, stresses are concentrated near the edge of the mesial abutment (20). The concentration of considerable stress at these locations can be correlated to the chipping, which is usually found in distal margins of the structure, as a direct result of the fragility of ceramics which opposes the slightest, elastic recoil of the structure subjected to bending. The analysis of the UY linear displacement confirms previous data, showing, this time numerically, how the presence of ceramic influences in the vertical linear lowering of the structure itself. In this regard we can consider as reference the values of Young’s modulus obtained during mechanic Test Equipment.
zirconia framework with four items 4,227 10−2mm (Fig. 16)
structure and superstructure with zirconia ceramic with four items 2,266 10−2mm. That suggests that the presence of ceramics reduces by half the capacity in flexion of the prosthetic (Fig. 17).
Table 1.
FEM analysis results.
| Bridge 3 elements | Bridge 4 elements | Abutment bridge 3 elements | Abutment bridge 4 elements | |
|---|---|---|---|---|
| ∑max (N/mm2) | 456,9 zirconium 284 zirconium-ceramic |
663 zirconium 428 zirconium-ceramic |
284 | 428 |
| Von Mises (N/mm2) | 393 zirconium 303 zirconium-ceramic |
569 zirconium 330 zirconium-ceramic |
303 | 330 |
| Linear displacement UY (mm) | 1,28310−2 zirconium 9,515 10−3 zirconium-ceramic |
4,227 10−2 zirconium 2,266 10−2 zirconium-ceramic |
In the following table there are no bibliographic data, because the table was derived from our analysis of the FEM entirely. The only values that we used were the Young’s modulus (E) of 210 GPa for zirconia and 70GPa for veneer. These values are in agreement with the literature and with the manufacturers requirements.
Figure 16.
Linear displacement UY without ceramic.
Figure 17.
Linear displacement UY with ceramic.
Conclusions
FEM predictions report values of 330MPa and fracture incurs at 720N approximately, certainly these values are not encouraging from the mechanical point of view, although even in this case, our structure has been tested in an extreme situation (system rigid with constant load upon the two intermediate pontic elements). Situation that could be complicated, if not impossible, to regain in a clinical setting.
So we can say that the dedicated ceramic to zirconia (Noritake) is able to guarantee an uniform and lasting bond with each sub-milled.
The realization of prosthesis with the zirconia are able to offer an high aesthetic satisfaction and a good clinical performance potentially but the limits that have been described in the context of a good design must be considered.
Figure 7.
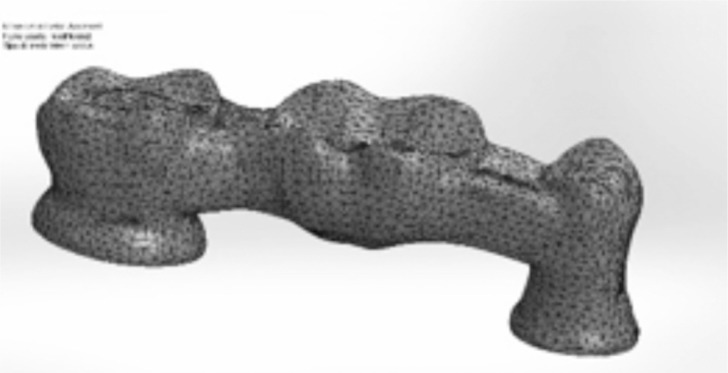
Mesh three elements framework.
Figure 10.
Mesh four elements framework.
References
- 1.Zuccarello B. Mechanical engineering with conventional materials
- 2. UNI EN ISO 178:2011: Plastics-Deformation of flexural properties.
- 3. ASTM D790 - 10 standard test method for flexural properties of unreinforced and reinforced plastics and electrical insulating materials.
- 4.Survival ad complication of zirconia based fixed dental prostheses. JPD. 2012;107:170–177. doi: 10.1016/S0022-3913(12)60051-1. [DOI] [PubMed] [Google Scholar]
- 5.Craig RG, Powers JM. Conservativo materiali dentali. 11° ed. St. Louis, Missouri: Mosby, Inc; 2002. pp. 110–1. [Google Scholar]
- 6.Thresher RW, Saito GE. The stress analysis of human teeth. J Biomech. 1973;6:443–9. doi: 10.1016/0021-9290(73)90003-1. [DOI] [PubMed] [Google Scholar]
- 7.Wood I, Jawad Z, Paisley C, Brunton P. Non carious cervical tooth surface loss: A literature review. J Dent. 2008;36:759–66. doi: 10.1016/j.jdent.2008.06.004. [DOI] [PubMed] [Google Scholar]
- 8.Sannino G, Barlattani A. Mechanical evaluation of an implant-abutment self-locking taper connection: finite element analysis and experimental tests. Int J Oral Maxillofac Implants. 2013 Jan-Feb;28(1):e17–26. doi: 10.11607/jomi.2058. [DOI] [PubMed] [Google Scholar]
- 9.Geramy A, Sharafoddin F. Abfraction: 3D analysis by means of the finite element method. Quintessence Int. 2003;34:526–33. [PubMed] [Google Scholar]
- 10.Borsa F, Scanicchio D. Medical and biological applications. Edizione Unicopli; FISICA; p. 63. [Google Scholar]
- 11.Swain MV, Hannink RHJ. Metastability of the martensitic transformation in a 12 mol% ceria-zirconia alloy: grinding studies. J AmCeramSoc. 1989;72:1358–1364. [Google Scholar]
- 12.Kosmac T, Oblak C, Jevnikar P, Funduk N, Marion L. The effect of surface grinding and sandblasting on flex-ural strength and reliability of Y-TZP zirconia ceramic. Dental Materials. 1999;15:426–433. doi: 10.1016/s0109-5641(99)00070-6. [DOI] [PubMed] [Google Scholar]
- 13.Xu HKK, Jahanmir S, Ives LK. Effect of grinding on strength of tetragonal zirconia and zirconia-toughened alumina. Machining Science and Technology. 1997;1:49–66. [Google Scholar]
- 14.Papanagiotou HP, Morgano SM, Giordano RA, Pober R. In vitro evaluation of low-temperature aging effects and finishing procedures on the flexural strength and structural stability of Y-TZP dental ceramics. J Prosthet Dent. 2006;96:154–164. doi: 10.1016/j.prosdent.2006.08.004. [DOI] [PubMed] [Google Scholar]
- 15. Uni En Iso 6872:2008 Ceramic material.
- 16.Graf H. Research on form and function. Ann Arbor University of Michigan; 1975. Occlusal forces during function in occlusion; p. 90. [Google Scholar]
- 17. http://it.wikipedia.org/wiki/STL_(formato_di_file)
- 18. Handbook Solid Works 2012: solid mesh.
- 19.Sannino G, Marra G, Feo L, Vairo G, Barlattani A. 3d Finite Element Non Linear Analysis On The Stress State At Bone-Implant Interface In Dental Osteointe-grated Implants. ORAL & Implantology. 2010;3:26–37. vol.III. [PMC free article] [PubMed] [Google Scholar]
- 20.Sannino G, Barlattani A. Mechanical evaluation of an implant-abutment self-locking taper connection: finite element analysis and experimental tests. Int J Oral Maxillofac Implants. 2013 Jan-Feb;28(1):e17–26. doi: 10.11607/jomi.2058. [DOI] [PubMed] [Google Scholar]


