Abstract
The purpose of this study was to compare the effect of seven different alloy surface treatments on the bond strength of the porcelain-metal interface. Three layers of opaque porcelain and a measured thickness of dentin porcelain were applied to nickel–chromium alloy, A tensile bond strength test was used. The alloy surface treatment that exhibited the highest bond strength was sandblast + surface grinding + sandblast + de-gas, whereas the alloy surface treatment that exhibited the lowest bond strength was sandblast + surface grinding + sandblast + steam cleaning + de-gas. There was a significant difference between the two methods (P < 0.05). It was concluded that de-gassing the alloy prior to porcelain application increased the bond strength and excess surface grinding of the alloy reduced bond strength; steam cleaning the alloy surface prior to de-gassing and porcelain application also significantly reduced the bond strength.
Keywords: Surface treatment, Bond strength, Sand blasting, Metal ceramic interface
Introduction
Metal ceramic crowns and fixed partial dentures are extensively used in fixed prosthodontics since they combine the high strength properties of metal with cosmetic appearance of ceramic. The success of metal ceramic restorations depends on the success of the bond between the ceramic and metal substructure. Despite the increased efforts to improve the bond strength between the metal and the ceramic substrate, on occasion fracture of ceramic veneers still occur under certain clinical conditions. A large proportion of these failures are as a result of ceramic facings separating from the metal substrate.
Several methods of preparing metal surface prior to porcelain application to increase the bond strength have been reported in literature. Shell and Nielsen [1] found that greater the roughness of metal surface, greater is the bond strength. Similar findings were reported by Lavine and Custer [2]. As the surface roughness of the metal was increased promoting better adhesion, a reduction in contact angle between porcelain and metal was observed. Surface roughness can be achieved by sandblasting with a fine abrasive. Alumina oxide abrasive is popularly used with 50 μm particle size. McLean and Sced [3] stated that sand blasting increased mechanical interlocking of porcelain and metal by increasing the surface area available for porcelain attachment. Grinding the metal surface increases the roughness aiding in retention of ceramic to metal by micromechanical interlocking.
Also various methods have been recommended for cleaning the metal surface prior to porcelain application; electrolytic degreasing with caustic soda, steam cleaning [4], organic solvents in an ultrasonic cleaner, rinsing under running water, boiling in hydrochloric acid followed by distilled water have also been recommended.
Graham et al. [5] concluded that degassing the alloy prior to porcelain application increased the bond strength. McLean and Sced [3] found that by not degassing prior to porcelain application, hydrogen absorbed during casting of metal produced porosity in porcelain.
Base metal alloys with nickel and chromium readily form an oxide layer with the thickness of oxide layer depending on preparation of metal and length of firing. Thick oxide layers weaken bond strength, therefore removal of oxide layer by means of sand blasting after degassing is recommended. Some clinicians recommend double oxidation: the first oxidation is designed to remove surface contamination and gas inclusions and the second provides oxide surface.
Thus various alloy surface treatments have been recommended to increase the bond strength. The purpose of this study is to compare the effect of seven different alloy surface treatments on bond strength of nonprecious alloy–ceramic interface and to determine which surface alloy treatment would provide the optimum bond strength.
Aims and Objectives
Aim
The aim of this study was to compare the effect of seven different alloy surface treatments on bond strength of nonprecious alloy–ceramic interface.
Objectives
To evaluate the bond strength of nonprecious alloy–ceramic interface when it is subjected to seven different surface treatments of metal.
To determine which alloy surface treatment would provide the optimum bond strength.
Materials and Methods
For the study a stainless steel mold was fabricated which consisted of two parts; lower base with a vertical cylindrical perforation (13 mm high, 8 mm in diameter) and upper removable portion of semicircular form which had a central perforation (3 mm high, 10.4 mm in diameter) that fit perfectly in the upper face of lower (Fig. 1). Fabrication of wax cylinders fabrication, porcelain build-up and shear strength testing were accomplished using a stainless steel mold.
Fig. 1.
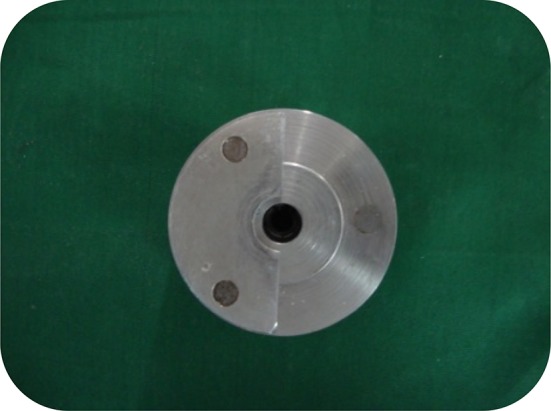
Two portions of the stainless steel mold fitted together
Thirty-five standard wax cylinders (13 mm high, 8 mm diameter) were prepared using inlay wax (Bego,Germany) and stainless steel mold (Fig. 2). These wax cylinders were then sprued and de-bubblezing agent (Aurofilm-Bego, Germany) was applied. Investing was done using phosphate-bonded investment (Bego, Germany) (Fig. 3). After 30 min of bench setting the rings were placed into room temperature burnout furnace (Unident, India) and heated gradually to 900 °C. The casting ring was kept for 30 min to allow complete wax elimination. Casting was accomplished using Ni–Cr alloy (Ni-65.2 %, Cr-22.5 %, Mo-9.5 %, Nb–Si–Fe–Mn) (Bego, Germany) in an induction casting machine (Bego, Germany).
Fig. 2.
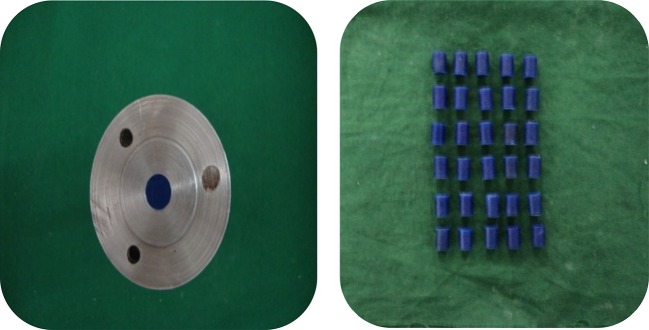
Wax patterns of test alloy samples
Fig. 3.
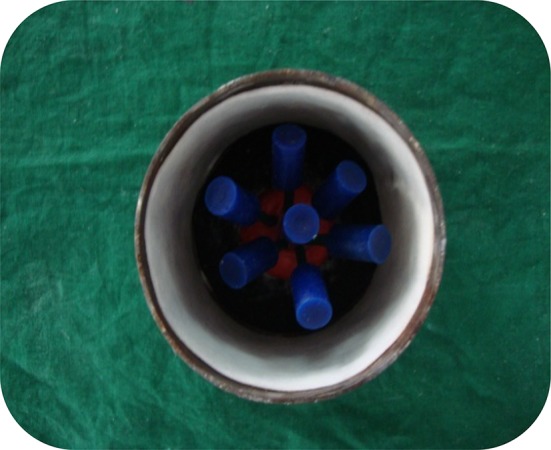
Sprued wax patterns assembled in the casting ring
After casting, each ring was bench-cooled and the casted alloy samples were divested (Fig. 4); any residual investment and the oxide layer on the surface of the castings was removed using 50-μm aluminum oxide abrasive at six bars of pressure in sandblasting unit (Bego, Germany). The sprues were removed using carborundum disks in alloy grinder (Ray foster) and the area where the sprues were attached was ground smooth using high speed micromotor handpiece (Marathon).
Fig. 4.
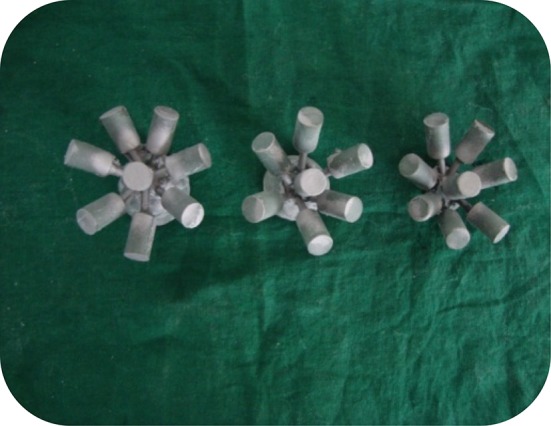
Test alloy samples after casting
A total of 35 test pieces were made following the guidelines described (five for each of the surface treatments to be carried out). The test pieces surfaces were all abraded with aluminum oxide and ground using identical grinding stones; both procedures were employed when preparing any metal–ceramic frameworks. After this the 35 alloy samples were divided into seven groups (five alloy samples for each of the surface treatment to be carried out).
Surface Treatments Carried Out on Alloy Test Samples
- Group I
Sandblast + surface grinding (Control group)
- Group II
Control group + sandblast
- Group III
Control group + sandblast + de-gas
- Group IV
Control group + sandblast + de-gas + sandblast
- Group V
Control group + sandblast +de-gas + surface grinding + sandblast
- Group VI
Control group + sandblast + de-gas + surface grinding + sandblast + de-gas
- Group VII
Control group + sandblast + steamclean + de-gas
Subsequent to surface treatment procedure porcelain was applied on all 35 test samples. Porcelain build-up followed two sequences, i.e., one for the opaque and the other for body porcelain (Ceramco3, Dentsply, USA). The cylindrical specimens were positioned in the lower half of the mold, with approximately half of its height above that. As the upper part of the mold, with circular form, presents a hole with an 10.4 mm diameter and 3.0 mm height, it provided a porcelain layer with similar dimensions for all specimens, that is, 1.2 × 3.00 mm, with an area of 0.2827 cm² (Fig. 5).
Fig. 5.
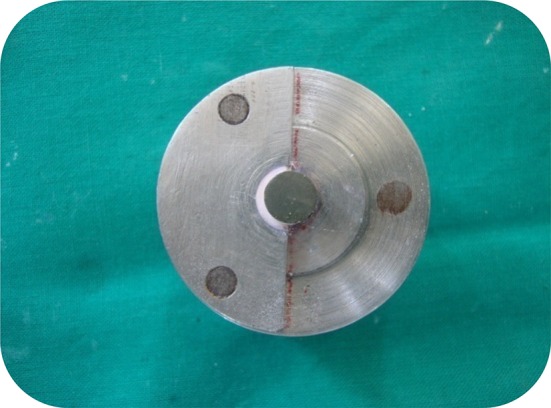
Body porcelain application
After the applied porcelain area was measured, the lower part of the mold was taken along the test sample to an universal testing machine (Fig. 6). The test configuration was then loaded in shear strength, with generation of forces perpendicular to the ceramic metal interface at a crosshead speed of 1 mm/min until failure occurred and failure loads were recorded in Newtons. Compressive force was applied to the upper portion of the specimens and stress was produced in the opaque/metal interface.
Fig. 6.
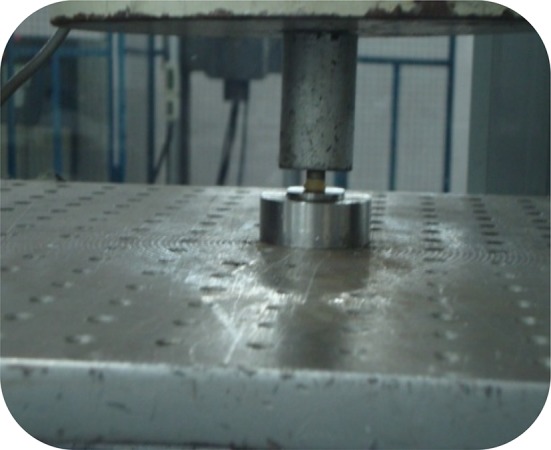
Shear bond testing
The load at fracture was given in Newtons to allow conversion of results into Mpa using the following formula:
 |
Results
Mean Shear bond strength values of group I–group VII test samples are given in Table 1. The mean values obtained were subjected to student’s t test and significance was evaluated. A one-way statistical analysis of variance (ANOVA) was performed to evaluate the load required to fracture the alloy–ceramic interface.
Table 1.
Surface treatments carried out on alloy test samples and mean loads at fracture
| Group No. | Surface treatment | Mean (Mpa) |
|---|---|---|
| I | Sandblast + surface grinding | 23.6 |
| II | Sandblast + surface grinding + sandblast | 30.7 |
| III | Sandblast + surface grinding + sandblast + de-gas | 37.9 |
| IV | Sandblast + surface grinding + sandblast +de-gas + sandblast | 36.0 |
| V | Sandblast + surface grinding + sandblast + de-gas + surface grinding + sandblast | 27.5 |
| VI | Sandblast + surface grinding + sandblast + de-gas + surface grinding + sandblast + de-gas | 28.4 |
| VII | Sandblast + surface grinding + sandblast + steam clean + de-gas | 20.77 |
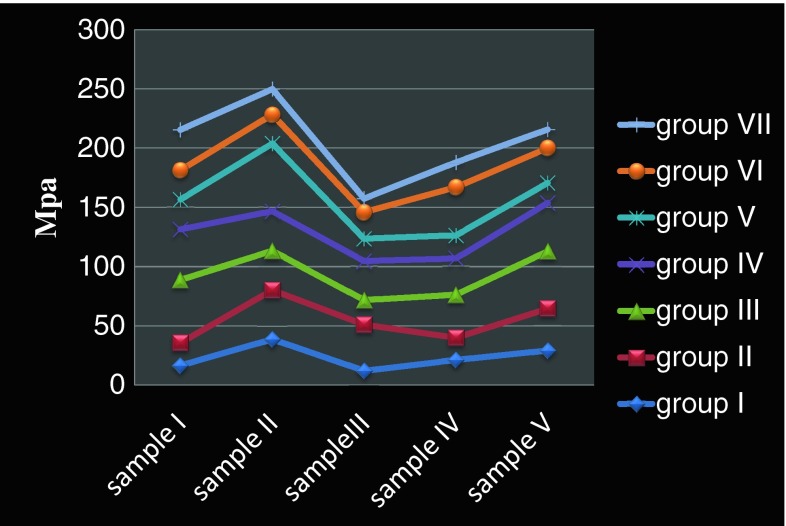
The results (Graph 1) indicated that the alloy surface treatment that exhibited the highest bond strength was sandblast + surface grinding + sandblast + de-gas (group III) was followed by sandblast + surface grinding + sandblast + de-gas + sandblast (group IV) whereas the alloy surface treatment that exhibited the lowest bond strength was sandblast + surface grinding + sandblast + steam cleaning + de-gas (group VII). There was a significant difference between the two methods group III and group VII (P = 0.035).
Graph 1.
Mean Shear bond strength values of group I to group VII test samples
Discussion
The results indicated that a nonprecious alloy that is prepared with the following surface treatment combinations has an important function in producing a good bond between the alloy surface and ceramic: sandblast + surface grinding + sandblast de-gas (Group III-37.9 Mpa), or sandblast + surface grinding + sandblast + de-gas + sandblast (Group IV-36.0 Mpa).
The addition of de-gas stage in the preparation of the alloy surface resulted in an increase in bond strength compared to surface that were not de-gased before porcelain application. The de-gas stage was included from group III onwards, and the subsequent results demonstrated the importance of surface oxide in adherence development. The de-gas stage allows the oxidizable elements present in the alloy to be drawn to the alloy surface. This results in oxide formation at the alloy surface. When the ceramic is fired, it is taken above its glass transition temperature, allowing the ceramic to flow and fuse with the oxides on the metal surface and producing an increase in bond strength between the metal and the ceramic [6].
Groups V (27.5 Mpa) and VI (28.4 Mpa) also involved introducing a de-gas stage into the metal surface preparation, with subsequent surface grinding and sandblasting. However, the bond strength obtained for these groups were lower than those for groups III and IV. This can only be explained by the additional surface grinding and sandblasting carried out for groups V and VI. Groups VI had slightly higher bond strength than groups V but had a further de-gas cycle before porcelain application; the lower bond strength of group VI compared to group III and IV can be explained by the fact that once the original oxide layer is removed it cannot be recreated as effectively by subsequent de-gas cycles and does not produce as effective a bonding layer. Steam cleaning the metal surface prior to porcelain application is a recognized procedure that is widely carried out [4].
In this study it was seen that steam cleaning the metal after sandblasting and prior to de-gassing dramatically reduced the bond strength between metal and ceramic (Group VII-20.77 Mpa). Group VII was the same as group III, which gave the highest bond strength, except for the steam cleaning; yet statistical analysis (Student’s t test) showed that there were significant difference between the two groups (P = 0.035). The fracture surface of the test pieces from group VII showed a large volume of porosity which led to a premature fracture occurring within the porcelain The large volume of porosity in the ceramic may have been the result of contamination of the metal surface by the steam jet, and the presence of trapped air; this kind of fracture was also reported by Naylor.
Surface roughening of the metal by sandblasting and surface grinding produces microscopic criss–cross scratches on the metal surface, and during steam cleaning air bubbles and contaminants may have lodged in these surface irregularities. During firing of the ceramic the trapped air and contaminants are driven off and become trapped in the porcelain near the metal–ceramic interface, resulting in a reduction in porcelain strength [7]. It is essential that steam cleaners be checked regularly to ensure purity of steam, as impurities in the steam can lead to poor bond strength.
Grinding the surface of the metal increases roughness, aiding the retention of ceramic to the metal by micromechanical interlocking. Naylor and Van Noort [7] indicated grinding in many directions can trap debris and air in surface irregularities, which may decompose on firing and result in the formation of gas bubbles at the interface between the metal and ceramic; these bubbles cause a reduction in bond strength. Therefore it is recommended to finish the metal in one direction only as it leaves the metal smooth and debris free. Sand blasting the alloy surfaces with aluminum oxide leaves a matte surface for improved porcelain bonding. The test piece surfaces were all abraded with aluminum oxide and ground using identical grinding stones; both procedures are employed when preparing any metal–ceramic frameworks.
Group VII exhibited a fracture within the porcelain, and a large volume of porosity in the porcelain near the metal–ceramic interface. In Group III (the same surface treatment as group VII but without the steam cleaning) a clean fracture surface was evident at the metal-ceramic interface. Group I and II showed very similar fracture with some porcelain still adhering to the metal. Group IV, V, and VI also showed a combination of fractures at the metal–ceramic interface and within the porcelain itself.
Conclusion
Metal–ceramic restorations are extensively used in restorative dentistry. There has been a remarkable increase in their use in recent years, from 1980 to 1996. Controlled clinical trials have shown that failures of these restorations are in the region of 3 % over 10 years and are likely to be much higher in general dental practice. A large proportion of these failures are a result of the ceramic facings separating from the metal substructure. Various surface treatment of alloy substructure have been recommended to increase the bond strength between metal and porcelain before porcelain application.
The study ascertained that surface grinding and sandblasting of the alloy result in providing more retentive surface for inter locking of porcelain thus strengthen the metal ceramic bond interface. De-gassing, the formation of oxide layer by heat treatment in the porcelain furnace is recommended to improve bonding between metal and ceramic.
The following conclusions were drawn from the present study:
De-gassing the alloy prior to porcelain application increased the bond strength of the metal ceramic interface.
Excessive surface grinding of the alloy surface reduced the bond strength of the metal ceramic interface.
Steam cleaning the alloy surface prior to de-gassing and porcelain application also significantly reduced the bond strength.
References
- 1.Shell JS, Nielsen JP. Study of the bond between gold alloys and porcelain. J Dent Res. 1962;41:1424–1437. doi: 10.1177/00220345620410062101. [DOI] [PubMed] [Google Scholar]
- 2.Lavine MH, Custer F. Variables affecting the strength of bond between porcelain and gold. J Dent Res. 1966;45:32–36. doi: 10.1177/00220345660450012501. [DOI] [PubMed] [Google Scholar]
- 3.Sced IR, Mclean JW. The strength of metal/ceramic bonds with base metals containg chromium. Br Dent J. 1972;132:232–234. doi: 10.1038/sj.bdj.4802830. [DOI] [PubMed] [Google Scholar]
- 4.Stein RS, Kuwata MA. Dentist and a dental technologist analyze current ceramo–metal procedures. DCNA. 1977;21:729–749. [PubMed] [Google Scholar]
- 5.Graham JD, Anthony J, Wildgoose DG, Shareef MY, Cannavina G. The effect of surface treatments on the bond strength of a nonprecious alloy ceramic interface. Int J Prosthodont. 1999;12:330–334. [PubMed] [Google Scholar]
- 6.Carpenter MA, Goodkind RJ. Effect of varying surface texture on bond strength of one semiprecious and one nonprecious ceramo-alloy. J Prosthet Dent. 1979;42:86–95. doi: 10.1016/0022-3913(79)90334-2. [DOI] [PubMed] [Google Scholar]
- 7.Van Noort R. Introduction to dental materials. London: Mosby; 1994. pp. 215–217. [Google Scholar]


