The forearm volar slab splint is a non-circumferential shell of plaster used to temporarily immobilize fractures and soft tissue injuries of the forearm and wrist. It is used to obtain pain relief until a circumferential cast is applied or until definitive surgical treatment is obtained. When a circumferential plaster is applied, ischemia or compartment syndrome can develop over an injured area if substantial swelling is present due to pressure exerted by the cast.1 In these cases, a volar slab might be preferred, as it does not encircle the forearm, potentially decreasing those risks.2,3 Forearm volar slabs prevent forearm rotation and wrist motion. They can be very useful for family doctors working in emergency departments, for in-field temporary management, or for any case when safe transportation for definitive treatment is required.
Indications
Examples of injuries that can be managed with this kind of immobilization include the following:
soft tissue injuries to the hand and wrist,
acute carpal bone fractures (excluding scaphoid or trapezium),
childhood buckle fractures of the distal radius, and
middle or distal forearm fractures for temporary stabilization for transportation.
A volar slab is not appropriate to immobilize proximal ulnar or radial fractures, or simultaneous ulnar and radial fractures (“both bones” fractures).4
Steps for immobilization
Educate the patient and obtain informed consent
Explain the procedure to the patient and obtain informed consent (verbal or written).
Review with the patient the reasons for using this kind of immobilization, the risks, the benefits, possible complications, care of the splint, and further treatment to follow (eg, definitive treatment).
Prepare and apply the volar slab splint
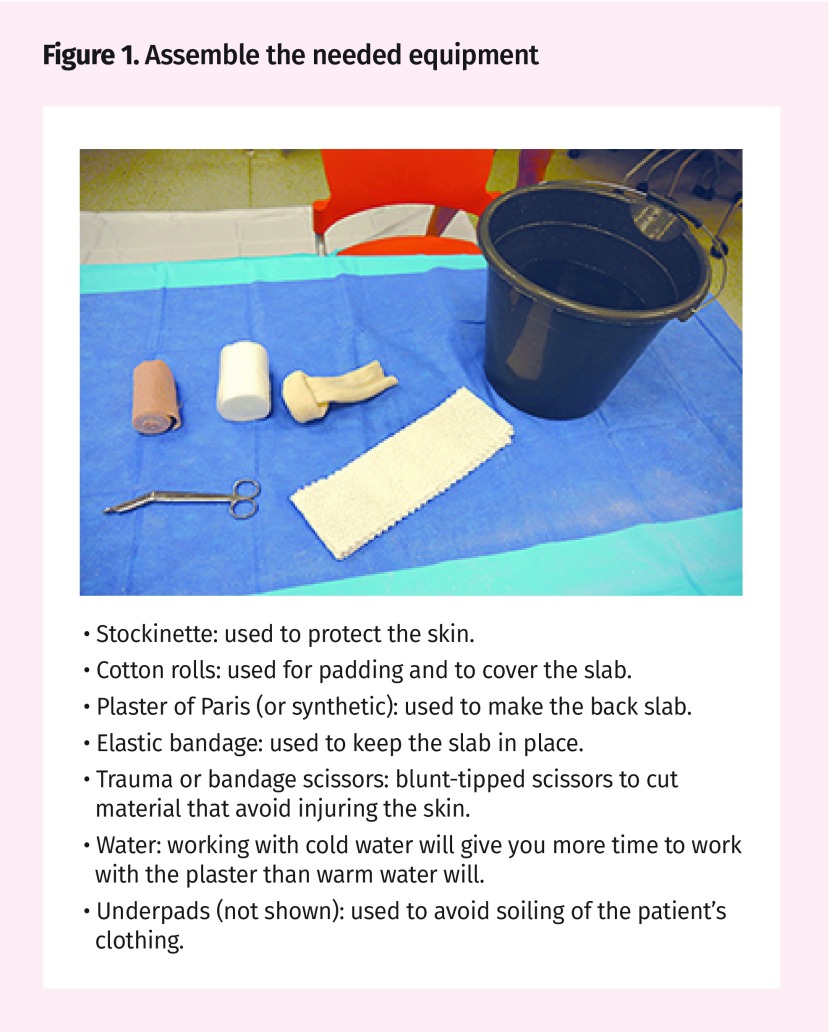
Figure 1.
- Stockinette: used to protect the skin.
- Cotton rolls: used for padding and to cover the slab.
- Plaster of Paris (or synthetic): used to make the back slab.
- Elastic bandage: used to keep the slab in place.
- Trauma or bandage scissors: blunt-tipped scissors to cut material that avoid injuring the skin.
- Water: working with cold water will give you more time to work with the plaster than warm water will.
- Underpads (not shown): used to avoid soiling of the patient’s clothing.
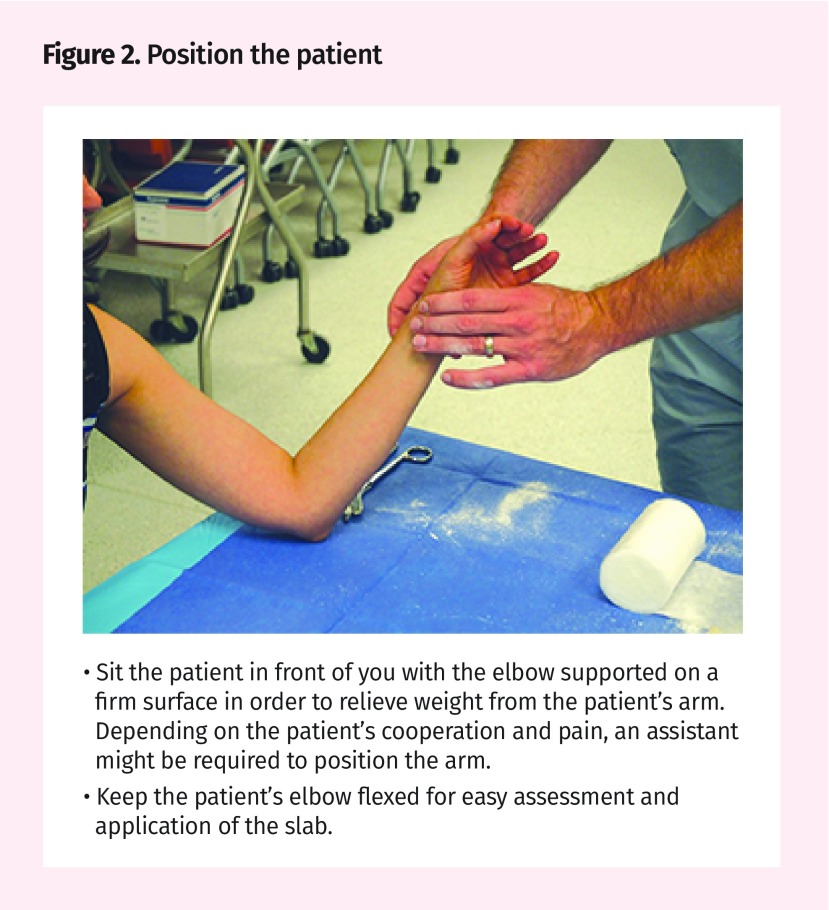
Figure 2.
- Sit the patient in front of you with the elbow supported on a firm surface in order to relieve weight from the patient’s arm. Depending on the patient’s cooperation and pain, an assistant might be required to position the arm.
- Keep the patient’s elbow flexed for easy assessment and application of the slab.
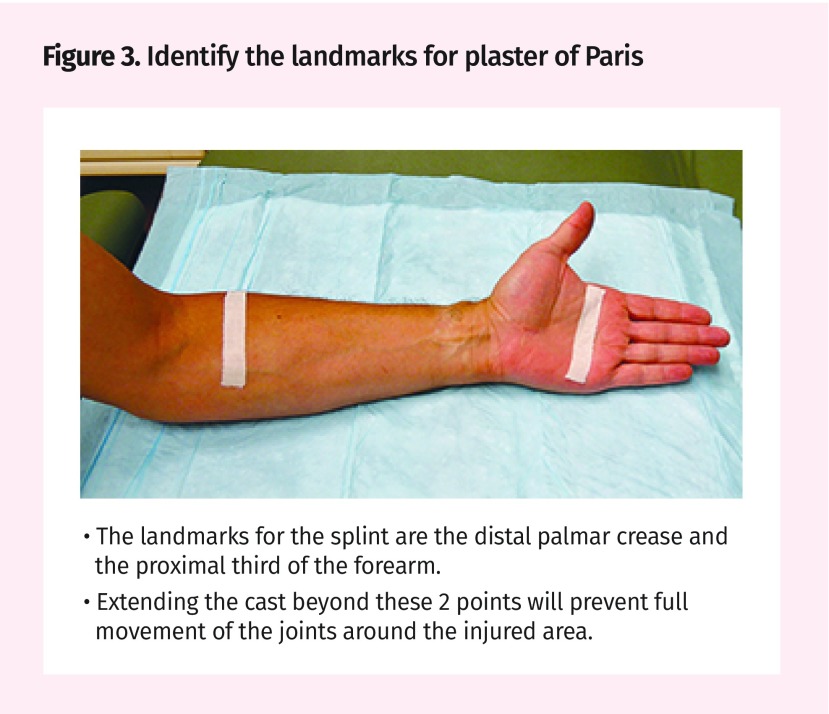
Figure 3.
- The landmarks for the splint are the distal palmar crease and the proximal third of the forearm.
- Extending the cast beyond these 2 points will prevent full movement of the joints around the injured area.
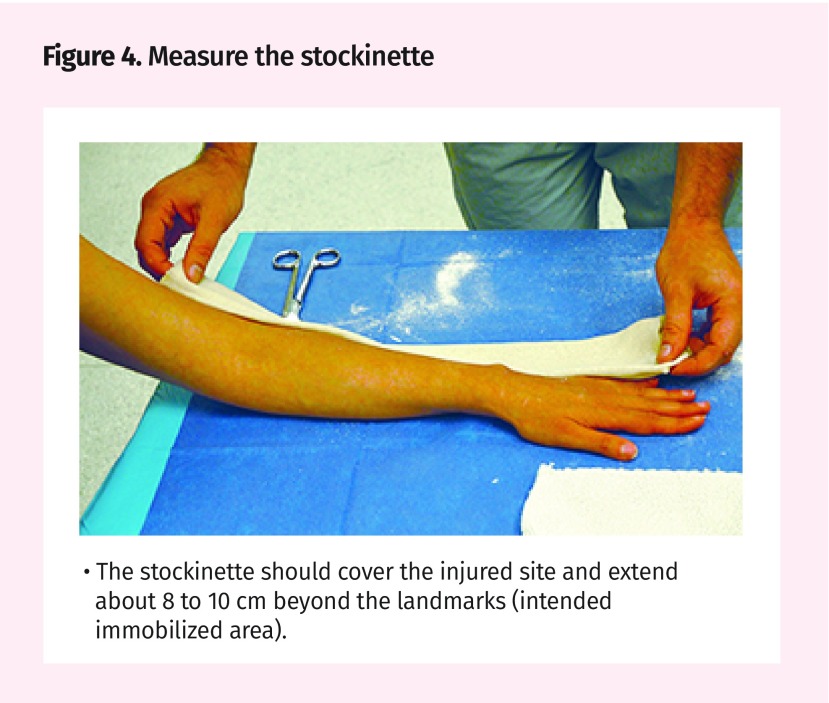
Figure 4.
- The stockinette should cover the injured site and extend about 8 to 10 cm beyond the landmarks (intended immobilized area).
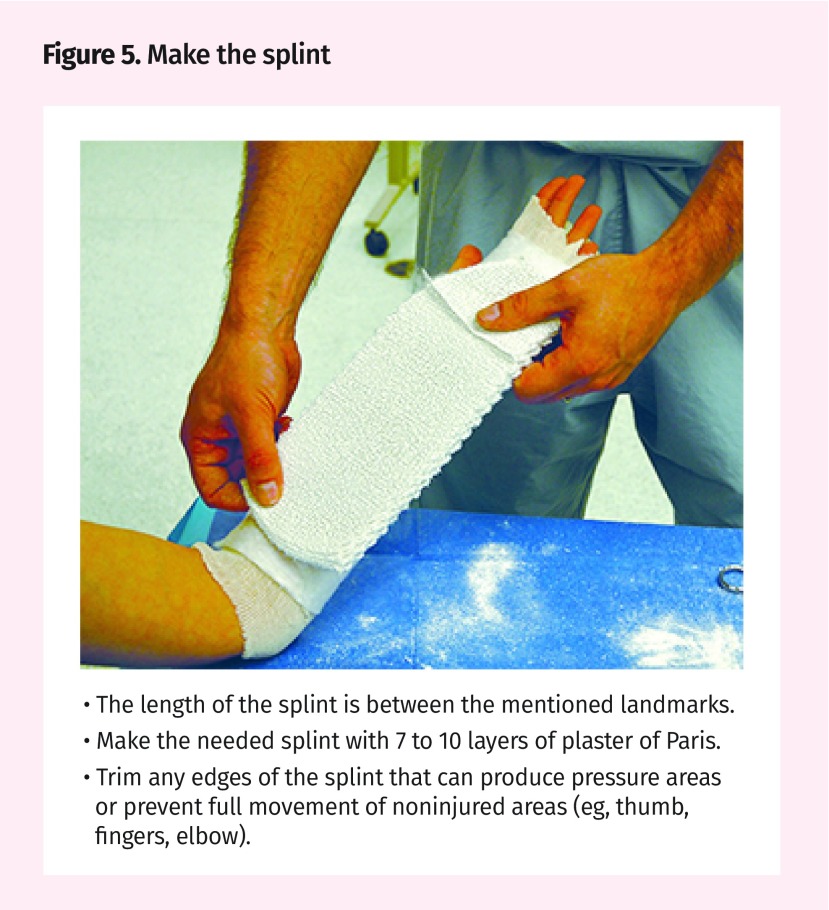
Figure 5.
- The length of the splint is between the mentioned landmarks.
- Make the needed splint with 7 to 10 layers of plaster of Paris.
- Trim any edges of the splint that can produce pressure areas or prevent full movement of noninjured areas (eg, thumb, fingers, elbow).
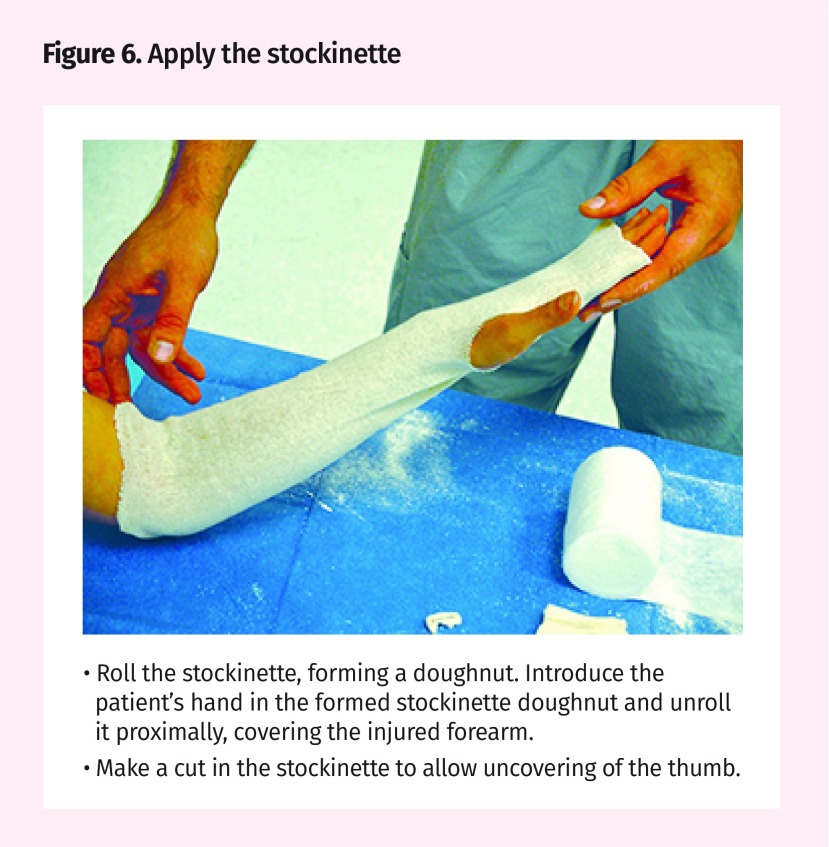
Figure 6.
- Roll the stockinette, forming a doughnut. Introduce the patient’s hand in the formed stockinette doughnut and unroll it proximally, covering the injured forearm.
- Make a cut in the stockinette to allow uncovering of the thumb.
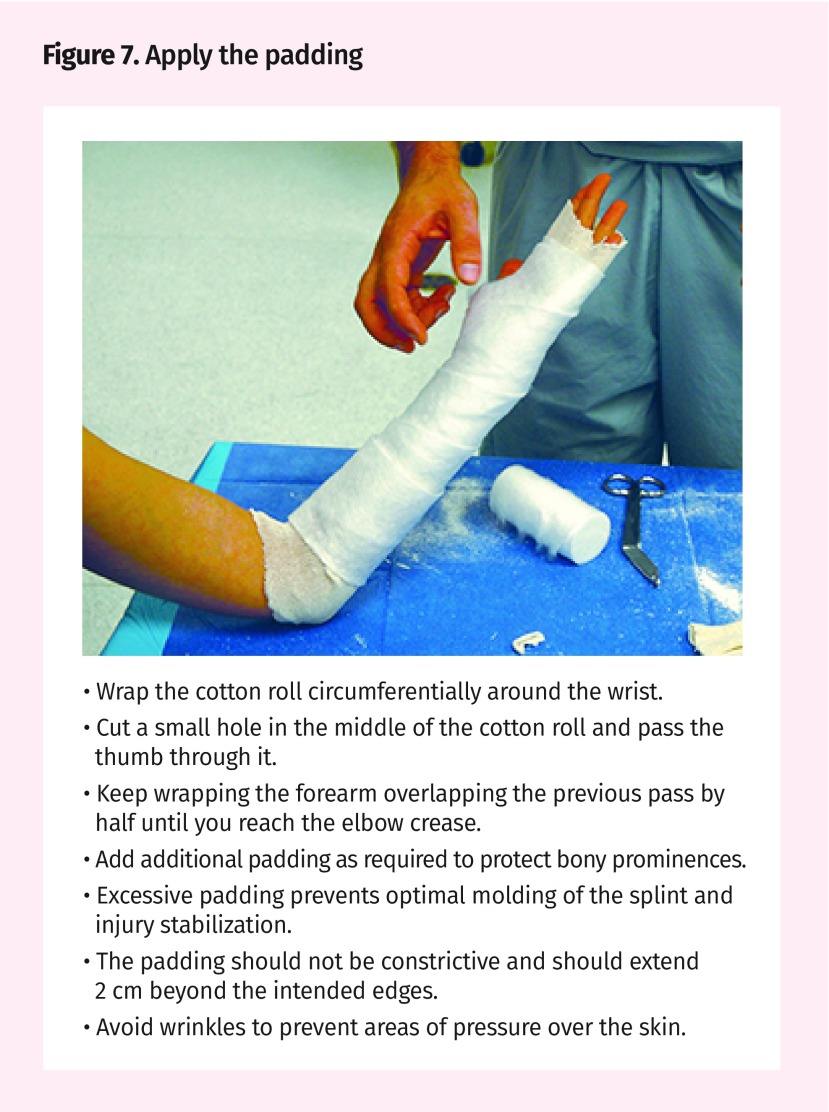
Figure 7.
- Wrap the cotton roll circumferentially around the wrist.
- Cut a small hole in the middle of the cotton roll and pass the thumb through it.
- Keep wrapping the forearm overlapping the previous pass by half until you reach the elbow crease.
- Add additional padding as required to protect bony prominences.
- Excessive padding prevents optimal molding of the splint and injury stabilization.
- The padding should not be constrictive and should extend 2 cm beyond the intended edges.
- Avoid wrinkles to prevent areas of pressure over the skin.
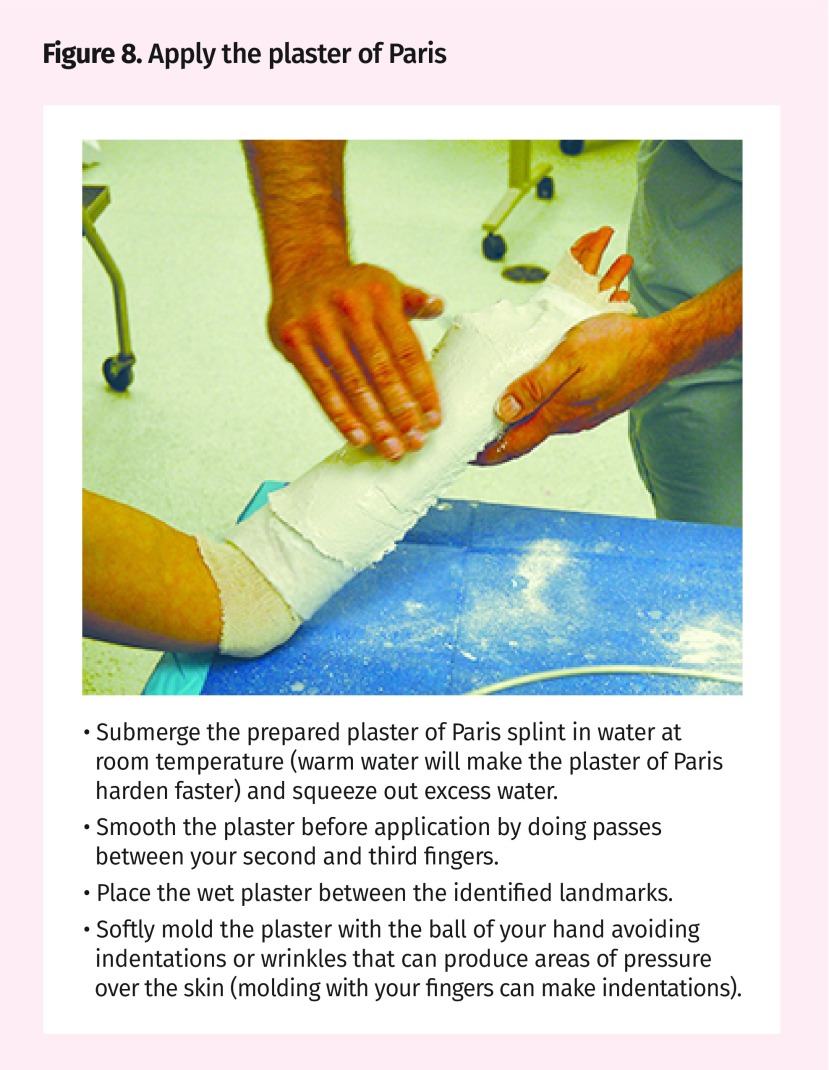
Figure 8.
- Submerge the prepared plaster of Paris splint in water at room temperature (warm water will make the plaster of Paris harden faster) and squeeze out excess water.
- Smooth the plaster before application by doing passes between your second and third fingers.
- Place the wet plaster between the identified landmarks.
- Softly mold the plaster with the ball of your hand avoiding indentations or wrinkles that can produce areas of pressure over the skin (molding with your fingers can make indentations).
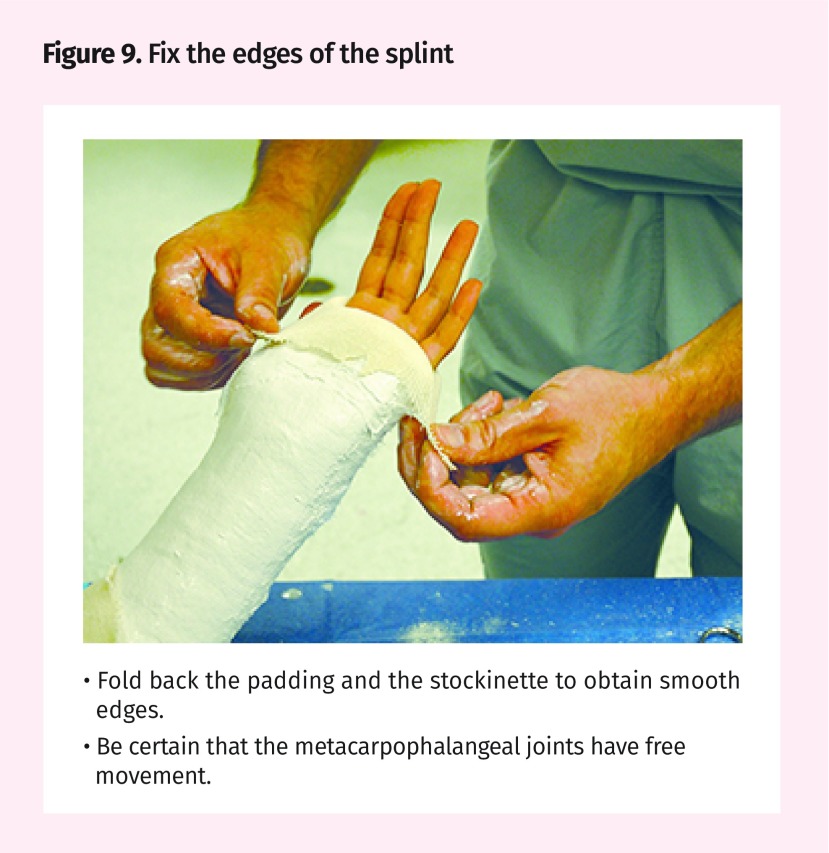
Figure 9.
- Fold back the padding and the stockinette to obtain smooth edges.
- Be certain that the metacarpophalangeal joints have free movement.
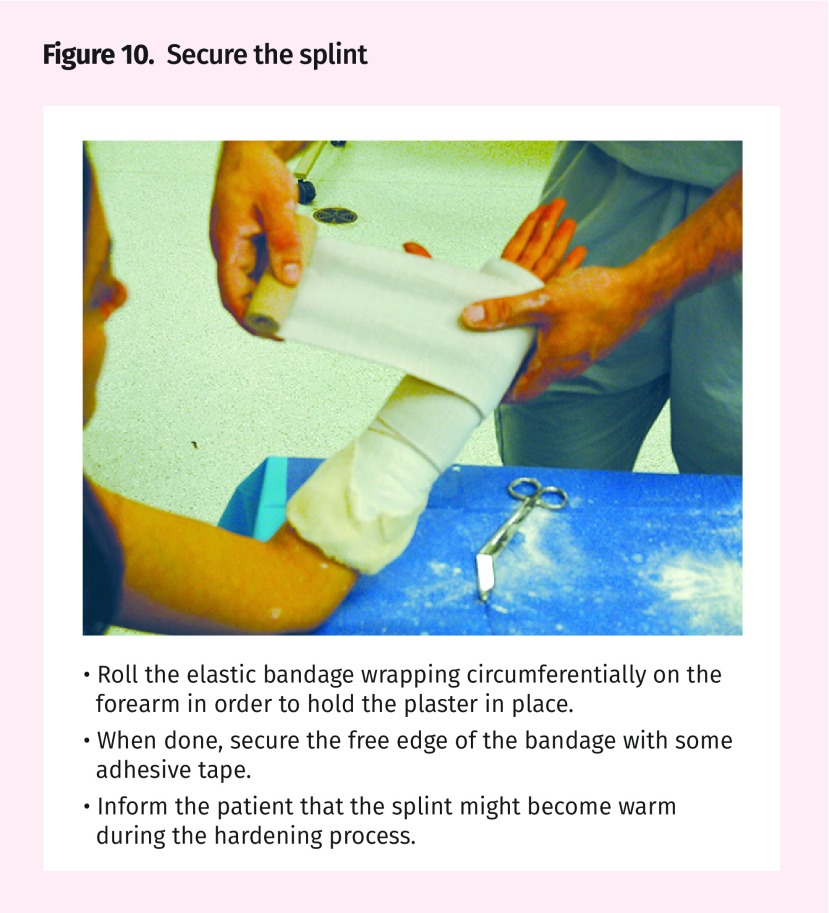
Figure 10.
- Roll the elastic bandage wrapping circumferentially on the forearm in order to hold the plaster in place.
- When done, secure the free edge of the bandage with some adhesive tape.
- Inform the patient that the splint might become warm during the hardening process.
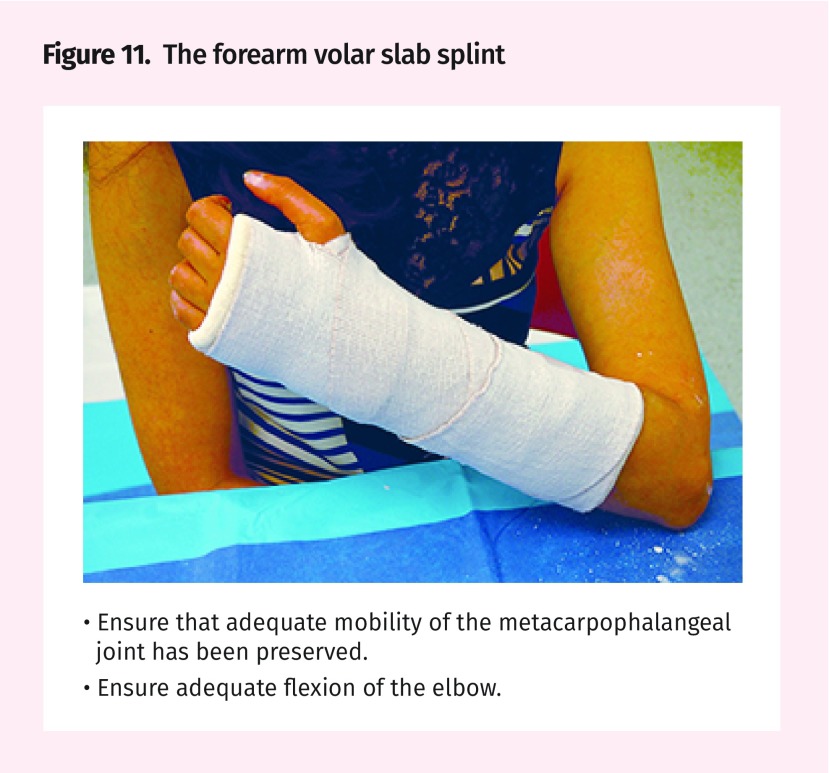
Figure 11.
- Ensure that adequate mobility of the metacarpophalangeal joint has been preserved.
- Ensure adequate flexion of the elbow.
Notable points
The following are some important considerations:
If considerable fracture angulation and displacement is present, a closed reduction using adequate anesthesia should be performed.
Be certain to both examine and perform x-ray scans of the joint above and below ulna shaft fractures.
It is important when assessing patients with ulnar fractures to exclude an associated dislocation of the head of the radius (Monteggia fracture).
Potential complications
Alteration to circulation or to local nerves can be induced if the splint is applied too tightly. Skin ulcers can also be produced if bony prominences are not protected by adequate padding. For this reason, once the volar slab is applied, check for distal swelling and adequate perfusion and active movements, and repeat a neuromuscular examination. Depending on the specific case, the volar slab can be changed to a definite circumferential plaster when swelling has subsided.
Footnotes
For further reading
General principles. In: Simon RR, Sherman SC, Koenigsknecht SJ. Emergency orthopedics: the extremities. 5th ed. New York, NY: McGraw-Hill; 2007. p. 1-29
Competing interests
None declared
This article is eligible for Mainpro+ certified Self-Learning credits. To earn credits, go to www.cfp.ca and click on the Mainpro+ link.
La traduction en français de cet article se trouve à www.cfp.ca dans la table des matières du numéro d’août 2018 à la page e337.
References
- 1.Cohen M, Jupiter J. Fractures of the distal radius. In: Browner B, Jupiter J, Levine A, Trafton P, Krettek C, editors. Skeletal trauma. 4th ed. Philadelphia, PA: Saunders Elsevier; 2008. [Google Scholar]
- 2.Means KJ, Graham T. Disorders of the forearm axis. In: Wolfe S, Hotchkiss R, Pederson W, Kozin S, editors. Green’s operative hand surgery. 6th ed. Philadelphia, PA: Churchill Livingstone Elsevier; 2010. pp. 837–68. [Google Scholar]
- 3.Plint AC, Perry JJ, Correll R, Gaboury I, Lawton L. A randomized, controlled trial of removable splinting versus casting for wrist buckle fractures in children. Pediatrics. 2006;117(3):691–7. doi: 10.1542/peds.2005-0801. [DOI] [PubMed] [Google Scholar]
- 4.Benjamin HJ, Hang BT. Common acute upper extremity injuries in sports. Clin Pediatr Emerg Med. 2007;8(1):15–30. [Google Scholar]


